|

On
your layer palette window, click on the globe layer to make it the
active one. Make sure it is now the one highlighted in blue. Click
on the magic wand (RGBvalue...tolerance 0 ...feather 0...sample
merged unchecked )and then click in an area outside the globe. When
the marching ants appear, then go to the menu bar to "Selections"
and then click on "Invert". Check the two images below. I have tried
to darken the marching ants to make them easier to see.
 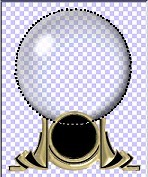
My next step is to modify where the ants are
marching around the globe and I want that area smaller. Go to the
menu bar to "Selections". Go down to "modify" then drag across to
"Contract". A small window will pop up and in the space fill in the
number 1.

This
next step is one I do for safety sake to make sure I always have
this same selection. Go to the menu "Selections", then down to "Save
to an alpha channel". In many graphics you might save more
selections to alpha channels and you will need to give them names.
In this globe, we are only worried about one, so when the two little
windows pop up, don't worry about naming them and just click on "OK"
in both areas to bring you back to the globe image.
Leave
the marching ants visible. Do not deselect. Even though we made our
globe selection on one layer it can still be used now that we are
moving to a different layer. Go to your layer palette and click on
the "image" layer to make it the active one. Make sure it is now the
one highlighted in blue. This is all ready for our image now, so put
it to one side of the work area and open up my mountain
picture.
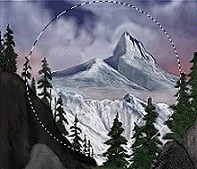
Go to the selection tool and set it for
"circle".

Then
on your mountain picture draw out a circular shape on the part of
the image you would like to be in your globe. DO NOT worry about
size because I will show you how to fit it with no problems. You
will see the area I selected for this demonstration below. Then you
can either go to "Edit - copy" or hold the control key down and
press the letter C.
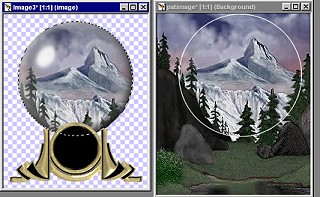
Now is the time to go back and click on your globe
image to make it the active window. Go to the Edit menu, drag down
to "paste" then across to "paste into a selection".

Your
mountain image has now been pasted into the circular area inside the
marching ants and fits under your globe with no problems. You can
now close and remove the mountain image. Feel free to use it again
if you wish in your other work.
We are now ready to add extra layers for the snow.
I always do three. (However, sometimes when I animate I find I can
get away nicely with only using two images.) Open your layer palette
and you will notice the active one is still the bottom image layer.
Go to the menu "Layers" and create a new raster layer and call it
snow 1. Immediately go back and create another layer and call it
snow 2. Create one last layer and call it snow 3. The image below
shows the three steps you just took.

BACK
TO PAGE
ONE PAGE
THREE
MAIN
TUTORIAL LIST
This
tutorial was posted at the site of "P. Ann's Place" Oct.20,2001 and
written by P. Sherman. All I ask is that you do not claim it as your
own.
| |