|
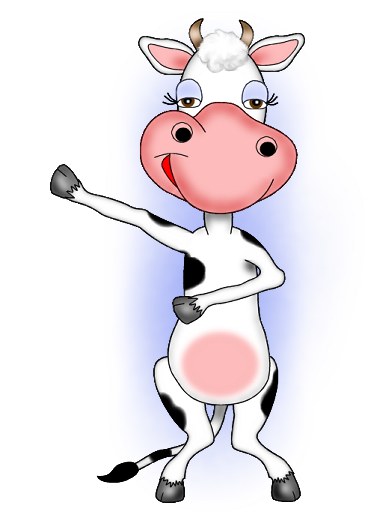
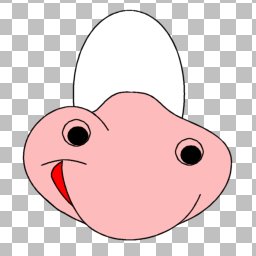
Your Basic Cow |
 |
|
©By Mary aka CowLady...March 1,
2003 |
.
This tutorial and all images were made just
for fun and meant to be shared. What you create from my tutorial
belongs to you to do with as you wish.
I feel that it is
necessary in order to maintain my nick as CowLady that I must have
at least one tutorial based on that theme. We will start with a
basic COW and a couple of suggestions on how to embellish her.
Hopefully you will have fun.
Click
Here
to see examples.
Feel free to email me mbergen33@cableone.net |
This tutorial was done with PSP7  but could be done with other
versions.
but could be done with other
versions. |
|
|
|
YOU WILL NEED |
|
 Paint Shop Pro Paint Shop Pro
Download a trial version here 
EyeCandy4000 by AlienSkin (Optional)
 ColorChart...Right click and
save to your HD. ColorChart...Right click and
save to your HD.
Basic
knowledge of vectors and layers |
|
Remember to Save OftenSTEPS - These are the steps I used. OftenSTEPS - These are the steps I used. |
| 1. |
Let's Begin |
|
New Image 500 X 700
File/Save As: cow1.psp |
| 2. |
The Head |
|
Foreground: Black #000000
Background: White #FFFFFF
Preset:
Ellipse
Antialias:Checked
Create as Vector: Checked
Line
Width: 1
Due to the nature and length
of this tutorial I want to remind you that it is important that you
name EACH layer as you work. With that said, let's get going. *BG*
Starting near the top of your canvas (leave
room for horns) draw an elongated oval. Rename this layer
"head".
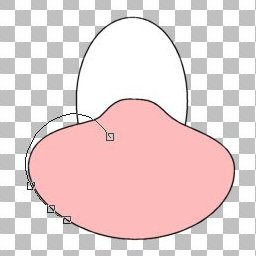
New Vector Layer
Change the Background Color to Pink #FDBBBC and add another
oval. Position and node edit till similar to the pink portion in the
graphic below. Name this layer "muzzle".
New Vector Layer
Draw
Tool
Style: Freehand
Antialias:Checked
Create as Vector:
Checked
Line Width: 1
Close Path: Unchecked
Using the
same pink color draw a bulge on the left side of the face as is
shown by the line of the node edit in the graphic above. Name this
layer "muzzle2" Note: when I refer to right and left sides it is
easier to define these as your left or your right not that of the
figure facing you.
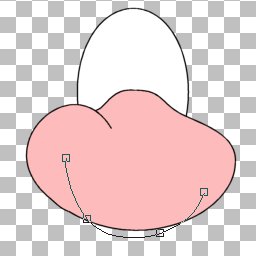
New Vector
Layer
Draw another addition to the muzzle
as depicted in the figure below and name it "muzzle3".
The Mouth...
New Vector Layer
Change the Background Color to Red #C60506 and draw a
freehand lopsided little oval and name it "mouth". When you get it
similar to the one below then move the mouth layer to a position
below the muzzle3 layer.
New Vector
Layer
Foreground: Black #000000
Background Color: Null
Draw a curved line at the edge of the mouth to define the
cheek area. Name it "detail1". Note: We are keeping all things
separate for shading purposes later on.
The Nostrils...
New Vector
Layer
Background Color: Pink #FDBBBC
Preset: Ellipse
Hold down
the shift key and draw out a small circle. Now change the Background
Color to Black and make the Foreground Color Null. Again holding
down the shift key draw a small black circle inside of the pink one
you just drew. Make if off center, similar to the one in the figure
above. When you get it the way you want it to look. Click on the
"Object Selector" and draw a box around these two circles. Right
click and choose "copy". Right click again and choose "paste new
vector selection". Position the second nostril and name the layer
"nostrils".
The Eyes...
New Vector Layer
Foreground: Black #000000
Background: White #FFFFFF
Preset:
Ellipse
Antialias:Checked
Create as Vector: Checked
Line
Width: 1
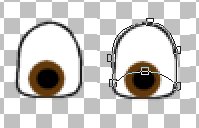
Draw a small white ellipse.
Position it on the left side of the head so that it protrudes
slightly over the edge. Flatten the bottom by pulling up the lower
node and extending the ends of the arrow till you get a shape
similar to the first object in the graphic below.
Change the Foreground Color to Null and the Background Color
to dark brown #63380B. While holding down the shift key draw a small
circle within the white area and move it to the bottom. Change the
Background Color to black #000000 and draw yet another circle inside
of the brown one for the pupil. With the Object Selector draw a
rectangle around these three parts of the eye. Right Click...select
Copy...Right click again and choose Paste new vector selection.
Position this eye on the right side of the head. Rename this layer
"eyes"
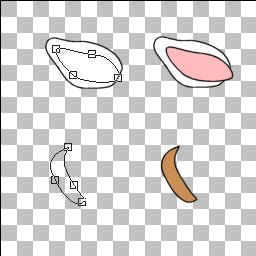
The Eyelids...
New Vector Layer
Foreground:
Black #000000
Background: White #FFFFFF
Draw a small oval over the top of the
left eye. Node edit this layer till it looks like the second object
in the graphic below. Name this layer "left eyelid"
With the eyelid selected go to Edit/Copy. Again in the Edit
menu select Paste/As a new layer. With this eyelid selected click on
Image/Mirror. Position this over the second eye and rename this
layer "right eyelid".
The Lashes...
New Vector Layer
Foreground: Black #000000
Background: Null
Draw Tool
Style: Freehand
Antialias:Checked
Create as Vector:
Checked
Line Width: 1
Close Path: Unchecked
Draw 3
small curved lines at the outer edges of each eye. Rename this layer
"lashes".
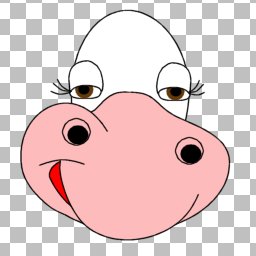
Here is what you should have
so far. Remember to save your work often.
The Ears...
Foreground: Black
#000000
Background: White #FFFFFF
Preset: Ellipse
Antialias:Checked
Create as Vector:
Checked
Line Width: 1
In the Layer Palette place your cursor on Layer1
New Vector Layer
Draw a
small oval and position it on the left side of the head...just a bit
above the eye. Node edit the ear until it is similar to the white
portion of the ear in the figure below.
Change the Background Color to Pink #FDBBBC and draw a
slightly smaller oval inside of the white one, using node edit to
make the shapes nearly the same. Rename this layer "left ear". Use
the Object Selector to draw a rectangle around the two ear pieces go
to Edit/Copy...then Edit/Paste/As new layer. While still selected
Image/Mirror and position on the right side of the head. Rename this
layer "right ear".
The Horns...
New Vector
Layer
Only one more item and the head will
be complete. The body is easier.
Change the
Background color to the Tan #CA8F57
At the
top of the head draw a small narrow ellipse. Node edit to match the
figure above. Name the layer "left horn".
Edit/Copy
Edit/Paste/As new
layer.
Image/Mirror
Position and rename this layer "right horn".
|
| 3. |
The Body |
|
New Vector Layer.
Foreground: Black #000000
Background: White #FFFFFF
Preset:
Ellipse
Antialias:Checked
Create as Vector: Checked
Line
Width: 1
Draw out a large ellipse. Node
edit it to be similar to the one depicted below. Give her an
hour-glass figure with the 45 minutes in the bottom. Leave a little
space between the body and the head for the neck. Rename the layer
"body".
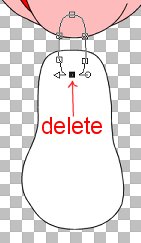
The Neck...
New Vector Layer.
Draw a rather long thin ellipse for the neck. The top of the
oval should be under the head and the bottom should be on top of the
body. Node Edit by adding two nodes, one on each side and deleting
the bottom node as shown in the figure below. Adjust if needed.
Rename the layer "neck".
Are you remembering to SAVE your work?
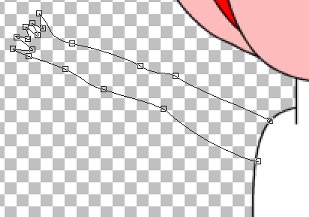
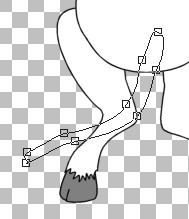
Left Arm...
New Vector
Layer.
Draw out a long thin ellipse. Place
it similar to the one shown below. Node Edit...Zoom in to make the
jagged edge at the wrist. At the points where the arm meets the body
add two nodes and delete the very end node as shown in the
illustration.
Rename this layer "left
arm".
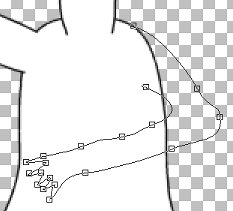
Right Arm...
New Vector Layer.
Using the same procedure as the left arm...draw the right
arm, but bring it across in front of the body as shown below. Again
add 2 nodes, one on each side of the node at the shoulder and delete
the end one.
Zoom in to node edit the
wrist. Rename this layer "right arm".
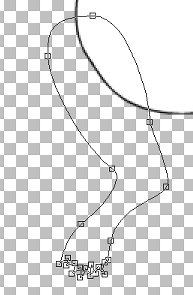
Left Leg...
New Vector
Layer.
Draw out a slightly fatter ellipse
than we used for the arms. Node edit and position as seen below.
Again zoom way in to node edit the jaggies at the ankle.
Rename this layer "left leg".
Edit/Copy
Edit/Paste/As new
layer.
Image/Mirror
Position and rename this layer "right leg".
The Hooves...
New
Vector Layer
Foreground: Black
#000000
Background: Gray #808080
Draw Tool
Style:
Freehand
Antialias:Checked
Create as Vector: Checked
Line
Width: 1
Close Path: Unchecked
The hooves are made in two parts. We'll use the
same basic hoof in all four positions. Rotation, mirror and maybe a
little adjustment is all that is necessary.
We'll start with the left hand/hoof. Using the enlarged
image below as a visual guide draw both parts of the hoof. In the
layer palette, position this layer so it lies just under the left
arm layer. Rename it "left front hoof". With the Object Selector
draw a rectangle around the two parts and reposition if necessary.
While still selected go to Edit/Copy...Edit/Paste/As new layer.
Position this layer so that it is just under the right arm layer.
Use the handle to rotate it into position. Rename it "right front
hoof"

Once again select
Edit/Paste/As new layer. Move this new layer to a position below the
left leg. Rotate...adjust. Rename this layer "left foot". Repeat the
same procedure one last time for the right side, but mirror the
image. Rename the layer "right foot".
The Tail...
New Vector Layer.
Foreground: Black #000000
Background: White #FFFFFF
Preset:
Ellipse
Antialias:Checked
Create as Vector: Checked
Line
Width: 1
In the layer palette again
place the cursor on Layer 1.
Draw a long
very thin ellipse and place it between the two legs.
Shape the tail to look like it is touching or
almost touching the floor. See illustration below.
Rename the layer "tail".
New Vector Layer
Change the Foreground
Color to Null and the Background Color to Black #000000. Draw a
small oval at the end of the tail and edit it to look sort of like
the end of a paint brush.
Rename it "tail
tip".
There you have it...the basic
cows body parts. I know you get tired of hearing it, but once
again...SAVE your work. Here is how she should look now. On to the
shading on page two.
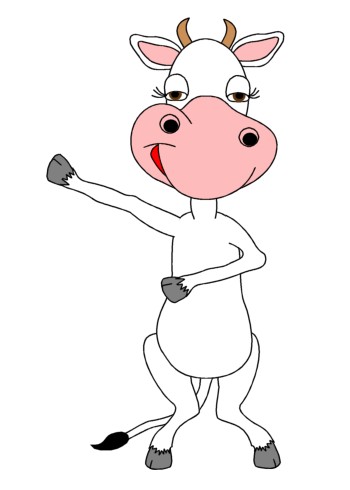
Continued on Page
2. |
|