|


If you are one of the brave souls
who want to try a transparent background, there are just a few
adjustments you have to make from what you did here.
(1) Skip the
background layer and floodfilling with the grey.
(2) Avoid the
drop shadows at all costs.
(3) When your three duplicates are all
ready for saving...instead of choosing "merge all", you must choose
"merge visible".
(4) In Animation Shop, make sure you choose
background in Screen Two as "transparent".
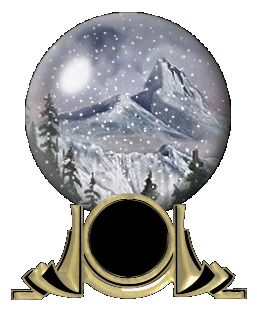
That should make
you a globe with a transparent background. Check out the sample I
have done below for you to see. Now you will see, as far as I am
concerned, why I always add backgrounds now.
One last tip I will offer is that as well as using
a smaller size on the snow tube (remember we chose 60 instead of
100), I also change the opacity sometimes. Depending on the image
you choose, I sometimes find the full strength snow is a little
overpowering. What I will do then is lower the opacity slider on the
snow layers to fade it out a little. Sometimes I reduce opacity to
70 and I even go as low as 50 for a really soft snow
effect.
I hope this tutorial has given you some insight into
making a globe (my way) or "an urge" to make a few more (your way).
I know everyone has their own way of doing things they develop over
time so I hope you have enjoyed your tour through my little world of
globemaking.
I hope you will check out the rest of the
globes and bases I offer for your own fun. They can be found in the
snowglobe section under "Bases" or click HERE
. There are over a 100 there now. Hopefully one of them will
inspire you to try again. Good luck and best wishes in your globe
making endeavours. If you have any questions, or are having
problems, feel free to email me by clicking here.
BACK
TO PAGE
SEVEN BACK
TO PAGE ONE
MAIN
TUTORIAL LIST
This
tutorial was posted at the site of "P. Ann's Place" Oct.20,2001 and
written by P. Sherman. All I ask is that you do not claim it as your
own.
| |