|
Soul
Frame
(PSP all
versions)
A tutorial by
Mar © 2006

What you need:
Corel PSP. Download a 30 day trial
here.
The materials: Download
here.
Sinedots II from
Dragonfly.
Download
here.
Unzip in
your PSP Plugins folder.
Unzip the filter in your plugin folder of PSP.
Close and
restart PSP otherwise your filter won't work.
Open all images
from the ZIP in PSP.
Save
often.
Let's get
started. Good
luck.....
Open one of the flower
images from the ZIP (total of 5).
I made the tutorial with the
red flowers but every color will do.
All you have to do is adjust
the gradient colors to match your image.
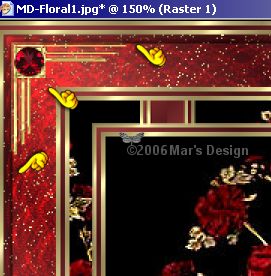
Foreground to #963939.
Background to #430e12.
Foreground to gradient.
Look for
the "Fore-background" gradient.
Texture unchecked (bleu
hand).
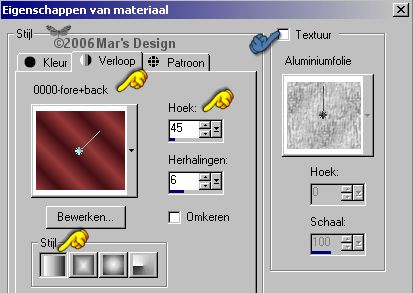
Now put your background to pattern
and find the MD-Goldfill.jpg.
Texture unchecked (bleu
hand).
.jpg)
Image > Add borders >
Symmetric > 3 Pixels > White.
With your magic wand  select (feather 0 - tolerance 15) the white
border.
select (feather 0 - tolerance 15) the white
border.
Fill your selection with your right
mouse button (the gold).
Image > Add borders > 3
Pixels > White.
With your magic wand select the white
border.
Fill your selection with the gradient.
Image > Add borders > 3
Pixels > White.
With your magic wand select the white
border.
Fill your selection with your right mouse button (the
gold).
Image > Add borders > 15
Pixels > White.
With your magic wand select the white
border.
Fill your selection with the gradient.
Effects > Reflection-effects
> Kaleidoscope.
Use the preset Stripes. If you don't have that
preset,
you can make it yourself. Just look at the screenshot
below
When you are done, save it as preset Stripes (=bleu
hand).
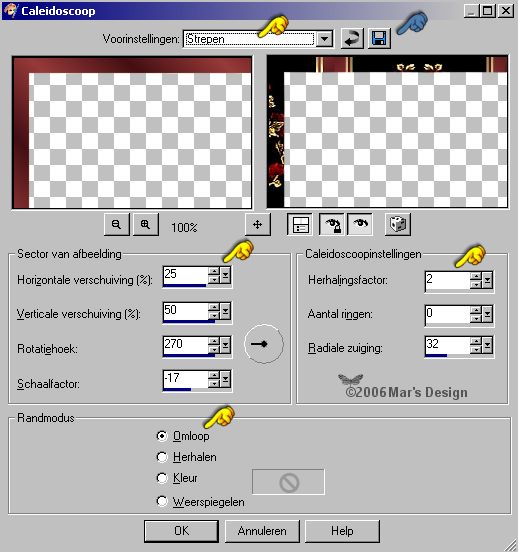
Image > Add borders > 3
Pixels > White.
With your magic wand select the white
border.
Fill your selection with your right mouse button (the
gold).
Image > Add borders > 3
Pixels > White.
With your magic wand select the white
border.
Fill your selection with the gradient.
Image > Add borders > 3
Pixels > White.
With your magic wand select the white
border.
Fill your selection with your right mouse button (the
gold).
Image > Add borders > 35
Pixels > White.
With your magic wand select the white
border.
Fill your selection with the gradient.
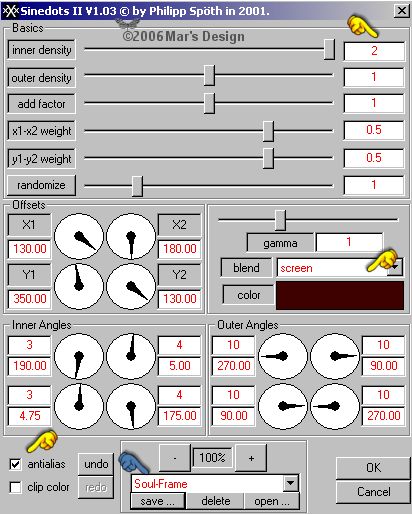
Effects > Plugins > DragonFly
> Sinedots II.
Put all settings like on the screenshot. Don't
skip any. Color #400000.
If you use another color for your
frame, adjust that in the filter too.
So
you have to change all settings in red and anti-alias has to be
checked.
If you are done with the settings you can save it for
future use. (See bleu hand).
Layers > New raster
layer.
Fill the layer with your right mouse button (the
gold).
Put the opacity of this layer to 4
and the mode to Dissolve.

Layers > Merge > Merge all
flatten.
Image > Add borders > 3
Pixels > White.
This time you can't use your magic
wand to select because there
are some light spots from the
dissolve layer. So we do it like this:
Selections > Select
all.
Selections > Modify > Contract with 3
pixels.
Selections > Invert.
Fill your selection with your right
mouse button (the gold).
Image > Add borders > 3
Pixels > White.
With your magic wand select the white
border.
Fill your selection with the gradient.
Image > Add borders > 3
Pixels > White.
With your magic wand select the white
border.
Fill your selection with your right mouse button (the
gold).
Selections > Select
all.
Selections > Modify > Contract with 15
pixels.
Effects > 3D-effects > Drop
shadow > Black.
Repeat the drop shadow but this
time Vert. and Horiz. at - 2.
Selections > None.
Open the MD-Soul-Corner.psp and
copy.
Edit > Paste >
Paste as a new layer.
Move  to the
left upper corner touching the shadow. to the
left upper corner touching the shadow.
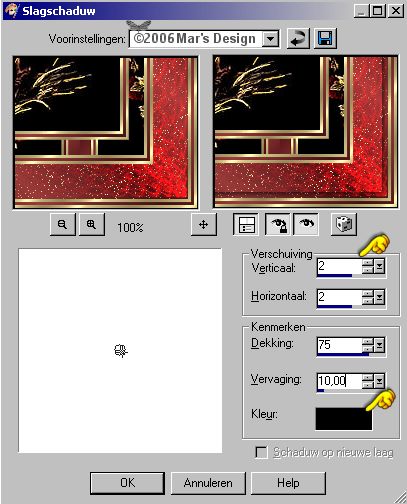
Repeat the drop shadow at 2 but
change
the settings like on the
screenshot below.

Layers > Duplicate.
Image
> Mirror.
Lock your background for now.
Layers >
Merge > Merge visible layers.
Layers >
Duplicate.
Image > Flip.
Unlock your background.
Layers > Merge > Merge all
flatten.
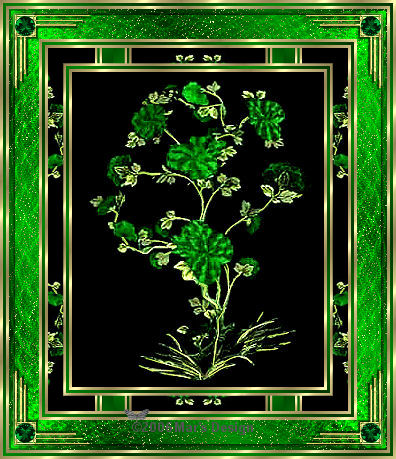
This frame can be done in silver as
well.
All elements for the silver frame are in the ZIP
too.
Your Soul Frame is done.
I hope
you like this tutorial.
Thank you for trying them out.

This tutorial is written and
designed by Mar and therefore her property.
This tutorial may not be
downloaded for any purpose other
than to follow the tutorial. If
you're a Moderator of a group,
please e-mail me
before adding this tutorial to any lessons,
etc.
When you do have my permission..... only a text link is
allowed.
My tutorials are never ever to
be sent over any mailing list or to leave my
site.

Since
02-17-2006:
|