|

This tutorial
is dedicated to a wonderful man who was a real
gentleman, he was a member
of my group for
many years and sadly passed away on the 8th June
2006
rest in peace
my friend...
WHAT YOU
WILL NEED
PSP 9
Graphic
Plus
Bordermania
Almathera
Puddle Filter
Supplies
1. Open up a
new image 700 x 400
2. Flood
fill with #000C1B and apply Graphic Plus Cross
Shadow using the default settings
3. Copy and
paste the scene tube as a new layer - position
this to the right side and lower the opacity to
26
4. Duplicate
your scene layer - Image - Mirror - move left
until the moon is just hidden
5. On your
layer palette, drag your duplicate scene layer
below the original layer
6. Making sure your highlight is on the top
layer, copy and paste the rose tube onto your
working image - move the rose to the far left
side and apply the following drop shadow
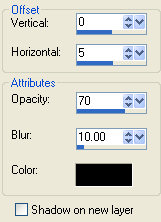
7.
Copy and paste the boat tube as a new layer on
your working image - see my finished image for
position
8. Apply the
same drop shadow as in step 6
9. Layers -
merge visible
10. Image -
Canvas Size - resize to the same settings as
below
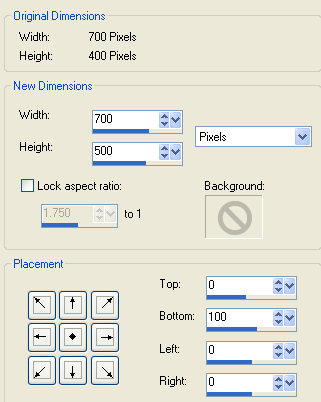
11. Select
the new area with your wand and flood fill with
#000C1B
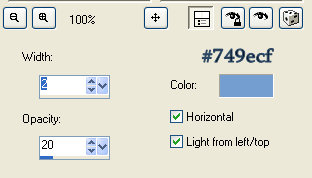
12. Keep
selected - Effects - Texture effects - Blinds
using the following settings
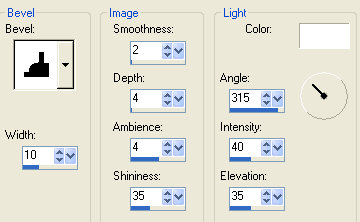
13. Still
selected apply the following Inner Bevel
14. Select
none
15. Add a
new layer - X off your foreground colour and
change your background colour to #a2ccfa, using
your favourite font type in your name or Happy
Birthday, Congratulations etc then apply a drop
shadow - merge layers visible
16. Add a
5px border - select and fill with the silver
pattern - apply Bordermania Frame 2 changing the
top two settings to 5 - if you want to you can
add some corners then merge your layers
17. Using
the Freehand Selection Tool set to Point to
Point start outlining your water but make sure
you keep a little away from the silver border on
the far right side, not a great deal just a
bit

18. Once you
have the ants marching around, duplicate this
layer twice
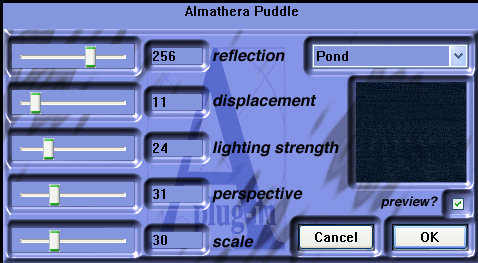
19. X off
the bottom two layers and working on your top
layer apply Almathera Puddle using the same
settings as below
20. Now
working on your middle layer (make sure you X
off the others) apply the filter again only this
time change the scale to 32
21. Working
on the bottom layer now, apply the same filter
and change the scale to 34 - selections - select
none
22. X off
the middle and bottom layers, make sure your
highlight is on your top layer - File - Save As
- save this as Image1.psp
23. Do the
same to your other layers so you end up with
Image 1, 2 and 3psp
24. Now open
up Animation Shop - click on the animation
wizzard - check same size as first image - next
- transparent - next - check upper left corner
of frame - with canvas colour - next - yes
repeat and enter 30 in the frame rate box - next
- add image - find your 3 psp files and add them
- next - finish - you can view your animation
before saving - if your happy with it - save as
and give your image a name....
That's it,
your all done !
Hope you
enjoyed this one !
*s*

Copyright ©
Designs by
Sandee
|