|
Rosette
Frame
(PSP 7,
8, 9 & 10)
A tutorial by Mar ©
2005.

What you need:
PSP. Download a 30 day trial
here.
Attention...... these are very large
files.
The Rosettes (Gold): Download
here.
The Rosettes (Silver): Download
here.
The Rosettes (Wood): Download
here.
The Rosettes (White plaster): Download
here.
I used beautiful
tubes by © Jecajo.
Save
often.
Let's go. Good
luck.....
What can you do with a doorknob or
a ceiling ornament.
Well some are very lovely and can be used as
a frame!
I don't think there are © copyrights to doorknobs or
ceiling ornaments.
If I'm wrong, mail me! If the doorknobs or
ornaments I have
used are yours, I will give you all
the credit you deserve.
1. Open the rosette you like to
use.
There are 10 layers with different rosettes in each
file.
Open all layers to look at the rosettes.
Choose the one
you like to use and activate that layer (=blue).
I used the
second silver doorknob in my first example.
Copy the
rosette.
Edit > Paste >
Paste as new image.
Close the original file.
2. Selection tool to circle (feather
0).


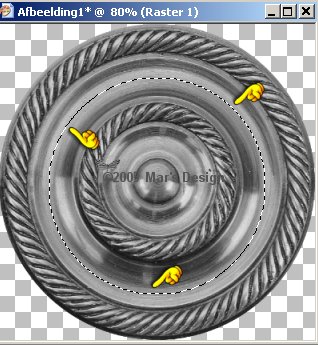
3. Click in the middle part of your
rosette, and draw a selection circle that
will fit your image
nicely and leave you a lovely border.
If your selection is not in the
middle, use  and right and right
mouse button to move your
selection.
Hit delete.
4. You have 2 choices.
I will
describe them both.
For both methods you start at the top of this
tutorial.
After you hit delete, choose one of the two methods
below.
Method
1:
Frame a picture.
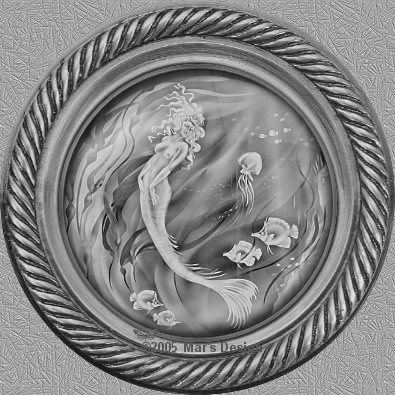
5-1. You will have a very nice effect by
framing an image.
Choose an image and convert to grayscale or use
a colored one.
I liked mine to be black and
white:
Image > Grayscale.
Image > Increase color depth > 16 Million
colors.
6-1. A negative image is also very
nice.
Adjust > Color Balance > Negative
image.
7-1. If your image is ready to
frame:
Edit > Paste > Paste into selection.
8-1. New raster layer.
Effects > 3D-effects > Cut
Out.
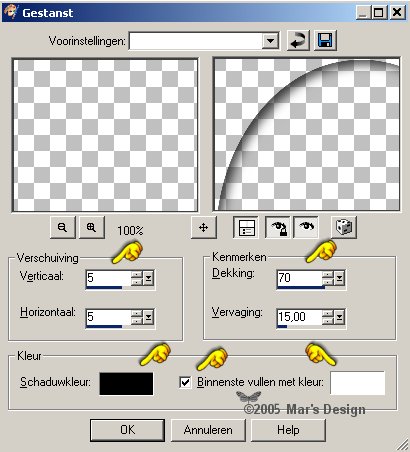
9-1. New raster layer.
Repeat the cut-out with
Vert. and Horiz. to - 5.
Activate your bottom (rosette)
layer (=blue).
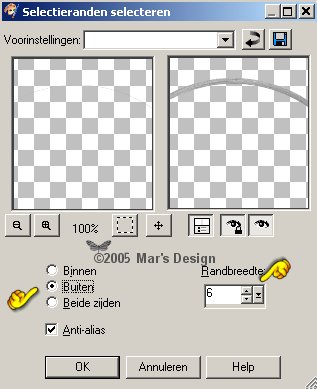
10-1. Selections > Modify >
Select selection borders > 6 Pixels > Outside.
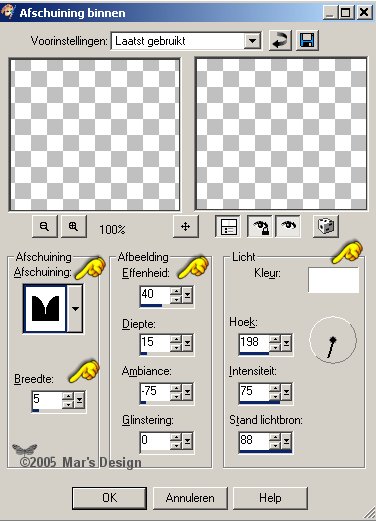
11-1. Effects > 3D-effects > Inner
bevel > Color White
12-1. Effects > 3D-effects
> Drop shadow > Black.
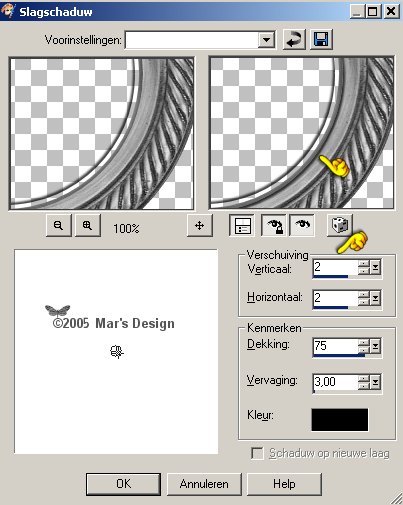
13-1. Repeat the drop shadow but
Horiz. and Vert. to - 2.
Selections > None.
Merge your
layers.
Method 1 is done.
****************************
Method 2:
With a tube.
5-2. I used some lovely
tubes by © Jecajo.
6-2. Fill selection with a color or
pattern.
7-2. Effects > 3D-effects > Inner
bevel > White.
8-2. Selections > Modify >
Select selection borders > 6 Pixels > Outside.
9-2. Repeat the inner bevel.
10-2. Effects > 3D-effects
> Drop shadow > Black,
same settings as in Method
1.
Repeat but Horiz. and Vert. to - 2.
Selections > None.
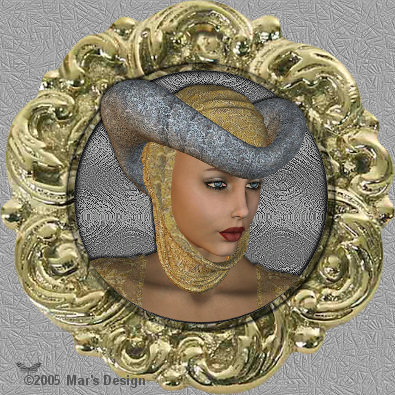
11-2. Open the tube you like to use
and copy.
Edit > Paste > Paste as a new
layer.
12-2. Again draw a round circle with your
selection tool.
Make it fit until you have the part you like
to delete.
You can select some parts you like to keep with lasso
tool.
I loved to keep the hat.
Hold shift while selecting or
set your mode to (PSP 8 and 9) 'Add'.
.jpg)
13-2. Selections > Invert.
Hit delete again.
Selections > None.
14-2. With  you can always move your tube a little.
15-2. Add a drop shadow if you like to.
Merge your layers.
So we frame with doorknobs.
Who
had ever thought of this lol.
Tube
by ©
Jecajo.
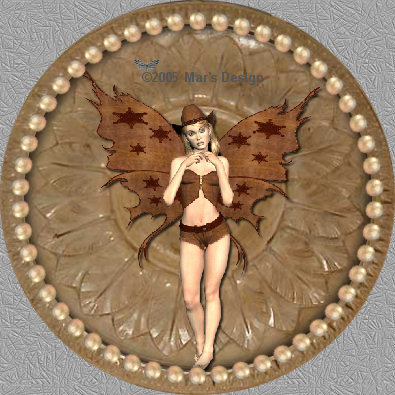
The pearl circle border is made
with Mura's Copy's.
Colorize or use the way it is. Download
here.
Tube
by ©
Jecajo.
Your Rosette Frame is done.
I hope you liked it.
Thanks for doing my
tutorials.

Tube
by ©
Jecajo.

This tutorial is written and
designed by Mar and therefore her property.
This tutorial may not be
downloaded for any purpose other
than to follow the tutorial. If
you're a Moderator of a group,
please e-mail me
before adding this tutorial to any lessons,
etc.
When you do have my permission..... only a text link is
allowed.
My tutorials are never ever to
be sent over any mailing list or to leave my
site.
Translation into English
with help of my best friends, Trudie.
Thanks sweetie! Couldn't do
it without you.

Since
04-23-2005:
|