|
What you will need
Tutorial
done using PSP9
Blade
Pro
Filters
Unlimited 2
An
image
Supplies
1. Open up a new image 550 x
550px transparent
2. Open up the gold hearts.psp layer - copy
and paste as a new layer onto your working image
3. Add a new
layer - using the selection tool set on rectangle - starting point
x74 y77 then drag the selection
down and out
until your just on the tips of the hearts
Look down
the bottom right corner of your psp program and you'll see the
numbers change as you move your selection
tool, your
start point is when you see the numbers above.
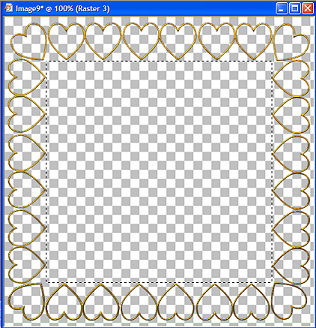
4. Fill this section with white - keep
selected - selections - modify - contract 20 and hit the delete
key
5. Using the magic wand select the white
border and apply Blade Pro - Shiny Gold preset - select
none
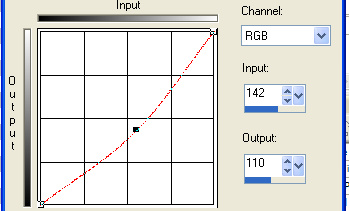
6. We want
to make this frame a bit darker so go Adjust - Brightness and
Contrast - Curves - click on the square
you see in
the middle of the red lines and drag this down until you have the
settings below - click ok then apply the
same
settings again
7. X off
your background layer and merge visible your hearts and frame
layers
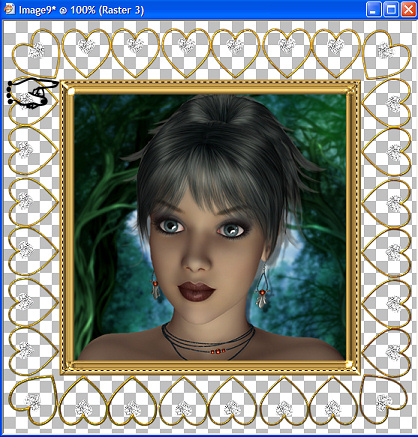
8. Open up
the image you want to frame - copy and paste as a new layer - drag
this layer below your frame
I find it's
not always a good idea to copy and paste your images into a
selection because they sometimes become
distorted -
if need be resize your image by 75% (make sure you don't have all
layers checked when you resize)
now if you
still have some image showing outside your gold border just use your
selection tool - make sure you don't go
inside the
gold frame then while selected go - selections - invert and hit the
delete key to get rid of the over lapping bits.
9. Making
sure your working on the top layer - Open up the diamonds.psp layer
provided - copy and paste as a new layer
10. X off
the background layer and merge visible
11. Remove
the x off the background layer as we want to work on this now, pick
a colour from your image and flood fill
the
background layer with this colour - apply a texture if you want, I
just used the crosshatch that I think comes with
psp
11. Again
using the rectangle selection tool and making sure your highlight is
still on your background layer-
start just a
little bit from the edge of the solid gold part of the frame
and work your way around see below for example
(I x my
background off for a clearer preview, you need yours
unchecked)
12. Once
selected - Selections - invert and hit the delete
key
13. Select
none - Selections - select all - selections - float - layers merge
visible and apply Filters Unlimited 2 - Buttons &
Frames
Glass Frame
2 using the following settings
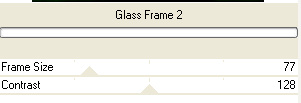
Select none
and your all done, hope you enjoyed this one !


|

