All that is needed
for this tute is Paint Shop Pro, a nice Sunset Gradient and bit of an
imagination! *L*
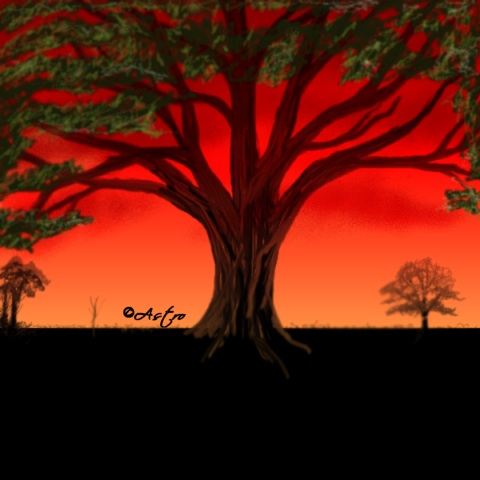
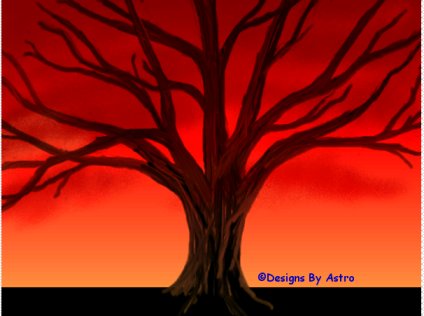
I used the Gradient called "Autumn" in the above painting for
this tutorial but other sunset gradients
will work or you can create your
own.
The above image came from my
own mind, I did not use any reference material to "paint" it.
This
tutorial
only serves as a guideline to show you how to paint your own images. Open your
mind up
when
you paint, think of places you've seen that wowed you in the past and let your
minds eye
put
it on canvas! It doesn't matter if it's exact, we all see things differently,
that's the beautiful of
painting. It would be a boring world if we all saw things
the same, now wouldn't it?
I enjoy looking at trees,
they have such strength and character! Each crook and bend in a tree
tells
a story
of what the tree went through as it was growing. Next time you're out for a
walk or a drive
look at the trees around you. Note the bend in the limbs and
think about how the environment and
wild life around it has shaped the
tree into the majestic plant it is. Most of us only see the beauty
in
trees that
have eye catching foliage in the fall or beautiful blooms in the spring but
take a minute
to look beyond those things to the trunk, limbs and bark of the
tree. I think you'll be surprised how
beautiful each tree really is. Okay,
enough babbling *L*, let's get on with the tute!
1.) Open a 600X600
transparent canvas.
2.) Set your foreground
color to black, background should be off during this tute.
Add a new Raster layer
naming it black if you wish.
Use your Selection Tool set on
Rectangle, Antialias unchecked, to select the bottom 3rd of your
canvas. Flood fill that
section with black.
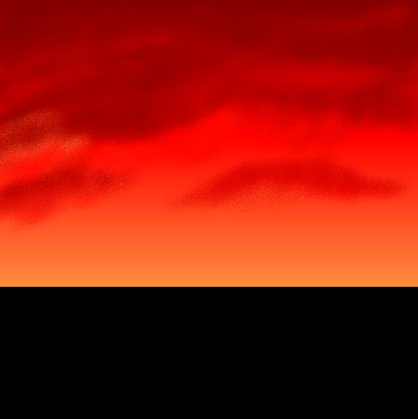
3.) Make Layer1 your active
layer.
Set
your foreground to the Autumn Gradient or the one of your choice. Flood fill
Layer 1 with the
Gradient.
4.) We will be working with
Layer 1 first. Click on your Retouch Tool and set to these
settings.....
5.) Notice how the top of
your gradient has lines in it? I want you to start pushing at the top
where
the
darker part of the gradient is. Click and hold the push tool down, make
circular motions as you
go around the area to make dark clouds. Pulling down the darker
area but leaving lighter areas to
define your clouds. Below is a
screenshot of what mine looks like.....
This screenshot is resize at
70% and optimized at 15% so yours will look somewhat different.
6.)
Change your Retouch Tool to Soften with these settings.....

Go around
your clouds softening them a little.
7.) Switch back and forth
between the Push Tool and the Soften Tool until you're happy with
the
look of
your clouds.
8.) Now make your Black
Layer your active layer. Set your Push Tool to these
settings.....
9. Use your Push Tool to
push the black area up to make your tree. Your tree can take on
any
look you
want it to have. It can have lots of branches or just a few large ones. It's
up to you and
what your imagination sees. By pushing upwards you get strong
black lines, but by pulling down
a little here and there you'll get
highlights of the sky tones reflecting in your branches and
trunk.
As you
play you'll see how your tree will start to take on some character and how
this technique
works.
If you make a mistake or place too many branches, you don't have
to undo, just blend the area
around with the push tool until it
vanishes back into your sunset. Cool huh? *L*
This is what my tree looks
like so far....
10.) Now you can leave it
like this if you'd like, but I want to show you how easy it is to
make
foliage
for your tree.
Save a copy if you'd like before continuing.
11.) Set your foreground
color to #171E08 Click on your Airbrush and set to these
settings....
12.) In a circular motion
spray some areas of foliage on your tree limbs. Make tight
scribble
areas as you spray. Don't panic and hit undo like you'll be
tempted to do *LOL* It'll all come
together when you add some highlights
in the next step!
13.) Now change your
foreground color to #607723 and spray some highlights on the
foliage
you
just made. Just touches here and there to make it stand out!
14.) Once you're happy with
the foliage then change to the Soften Tool set to these
settings....
Now use this brush to go around the
foliage area to soften the look some.
15.) Set your Retouch Tool
back to Push with the same settings we used to make our large
tree
except
charge the size to 2.
16.) Go to the black area
that makes your horizon, push up a little black to make some trees in
the
distance.
Use the same techniques we used for making the larger tree to make the
trees/shrubs/grass.
Change between size 1 and 2 to make some blades of grass across
your horizon. For the foliage
on the smaller trees, I just used the
push tool to push the black around in a circular motion to
indicate
foliage! Once I had the horizon area like I wanted I switched to
the soften tool with the same settings
as above and made a couple passes to
soften the areas of my grass and trees.
STOP... If you'd like to give your image the
moon effect below then save a copy
of it UNmerged!!
That's all there is to it,
merge the layers, resize and add a nice frame or whatever you'd like to
do.
I resized
mine by 70% to use as the header for this tute and optimized at 10% to reduce
the file size.
I hope this tute has
shown you how easy it can be to paint in Paint Shop Pro and will
inspire
you
to create more paintings like this!
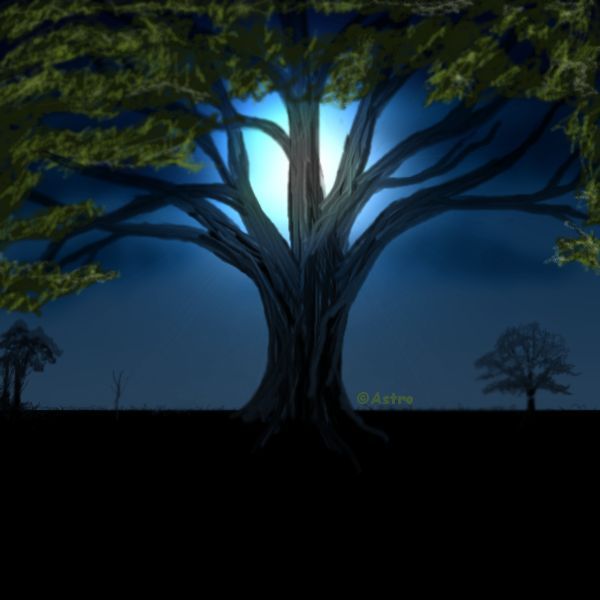
Use your unmerged copy for this
effect!
Okay, so slap me! This tute was suppose to be
finished but once I finished my image I continued to
play with my results and showed the moon effect
below to Emily (Auntie Em) and she said I had to
add the steps I took to get this look! *L*......... so
here it is.......
Make your gradient layer your active layer. Go
to Colors, Colorize and set to these settings.....
Ggo to Colors, Adjust, Brightness/Contrast, with
these setting....
Go to Effects, Illumination Effects, Lights,
with these settings....

Go back to Illumination Effects but this time,
use Sunlight set to these settings....

See what you think? If it's too dark and you
want it lighter you can go to Colors, Adjust,
Brightness/Contast and adjust the brightness to make it
lighter. This is my end results...
Pretty Stunning with just a few changes!! Save
however you'd like!
I do hope you've had fun with
this tute and that I've convinced you that using the Push Tool is easy
and
can be fun!!
Until next time, God
Bless.
Connie