|
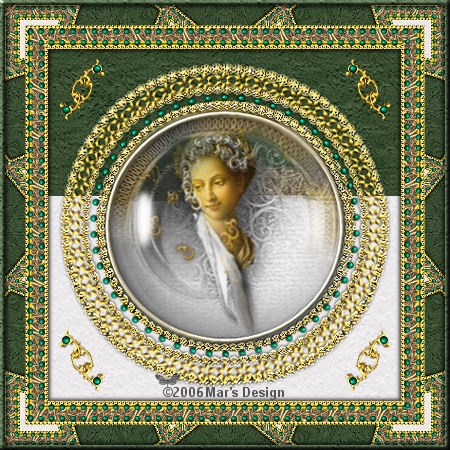
Courtesan
Frame
(PSP all
versions - no filters)
A tutorial by Mar ©
2006
What you need:
Corel PSP. Download a 30 day trial
here.
The materials: Download
here.
Open all images from the ZIP in PSP.
Save
often.
Let's get
started. Good
luck.....
This tutorial is done
in PSP 9.
1. Open a new image 400 X 400 >
Transparent.
2. Open the
MD-courtisane-pattern1.jpg from the ZIP.
Put your foreground
to pattern and find the opened pattern.
Texture unchecked
(blue hand).
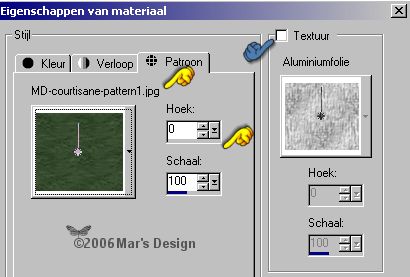
3. Fill the image with the green
pattern
4. Open the MD-courtisane.psp and
copy.
Go back to your frame.
Edit > Paste >
Paste as a new layer.
5. With your rectangle selection tool
 select the part you see on select the part you see on
the screenshot. Start with
the white that shows through the glass
half down the ladies face
and pull it all the way down to the bottom.
If all went well you
must have this:

6. Now in your Layer Palette select
the bottom layer (= blue).
7. Layer > New raster
layer.
8. Open the MD-courtisane-pattern2.jpg
from the ZIP.
Foreground to the white pattern
and look for the white pattern.
Texture unchecked (blue
hand).
9. Fill your selection with the white
pattern.
10. Selections > None.
11. Open the MD-courtisane-overlay.psp
and copy.
12. Edit > Paste >
Paste as a new layer.
13. Effects > 3D-effects > Drop
shadow > Black.
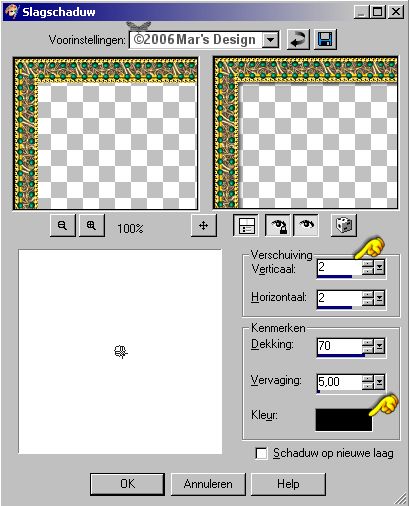
14. Repeat the drop shadow but this
time Vert. and Horiz. at - 2.
15. Layers > Merge > Merge all
flatten.
16. Image > Add borders > 20
Pixels > Symmetric > Yellow.
17. With your magic wand  select (feather 0 - tolerance 15) the yellow border.
From this point you can make two
border. I will show how for each one.
I'll start with the
first one:
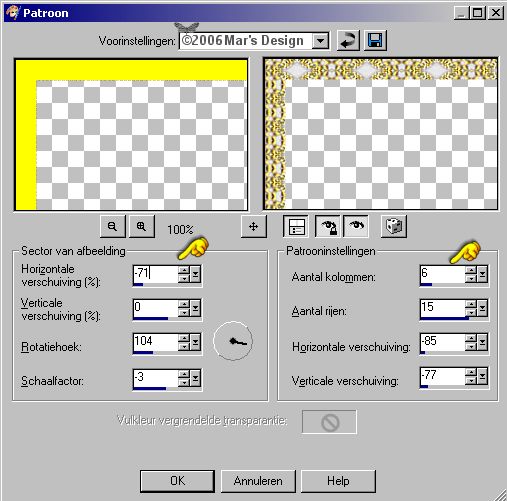
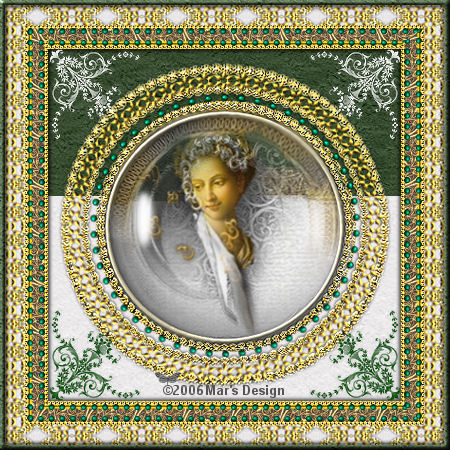
18-A. Effects > Reflection-effects
> Pattern.
See the example at the bottom of this
tutorial.
Or take the second option:
18-B. Fill the yellow with the green or white pattern.
Every pattern has a
different outcome. Experiment some.
You can also use the gold
fill from the ZIP. See what's best.
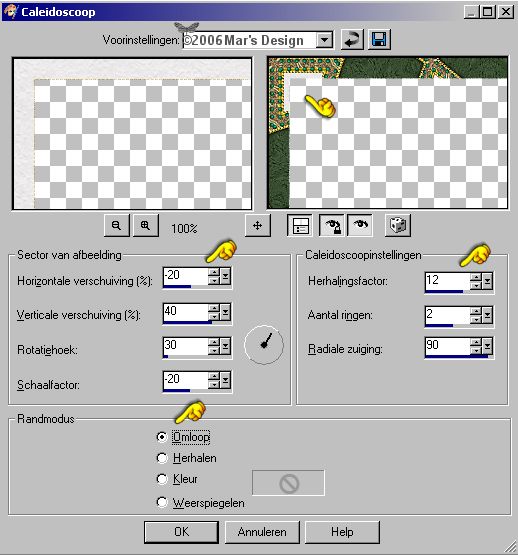
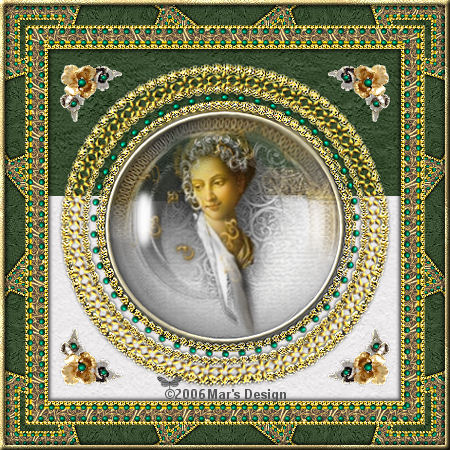
Effects > Reflection-effects
> Kaleidoscope.
From this point the tutorial
proceeds for both frames.
19. Selections > None.
20. Image > Add borders > 5
Pixels > Symmetric > Color yellow.
21. With your magic wand
select the yellow border.
22. Fill the yellow part with one of
the three patterns.
Look for yourself what matches best. I used
the green.
23. Effects > 3D-effects > Inner
bevel > Color white.

24. Repeat the drop shadow at 2 and at
- 2 like before.
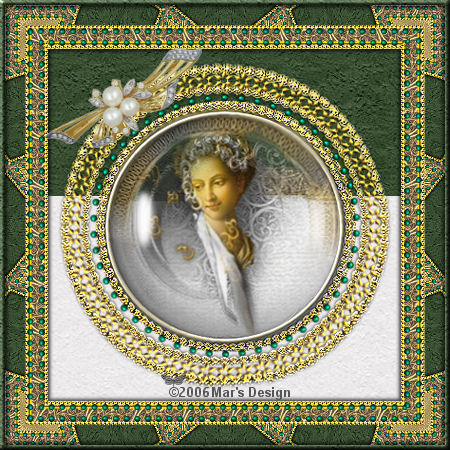
25. If you like you can open one of the
decorations to put on your frame.
Look in the ZIP and to the
examples below.
26. Open the MD-decoration-1.psp 2, 3
or 4 and copy.
27. Edit > Paste >
Paste as a new layer.
28. Move  the
decoration to the left top like on the screenshot. the
decoration to the left top like on the screenshot.
Or put a
decoration like on the examples if you only want to use
one.

29. Layers > Duplicate.
Image
> Mirror.
Layers > Duplicate.
Image > Flip.
Layers
> Duplicate.
Image > Mirror.
Your Courtesan
Frame is done.
I hope you like this tutorial.
Thank you for
putting it to the test.

This tutorial is written and
designed by Mar and therefore her property.
This tutorial may not be
downloaded for any purpose other
than to follow the tutorial. If
you're a Moderator of a group,
please e-mail me
before adding this tutorial to any lessons,
etc.
When you do have my permission..... only a text link is
allowed.
My tutorials are never ever to
be sent over any mailing list or to leave my
site.

Since
07-14-2006:
|