|
Decorated Line
Frame
(PSP 7, 8 &
9 - no filters)
A tutorial by Mar ©
2005.

Copyright image: Gary Benfield
What you need:
PSP. Download a 30 day trial
here.
The image can be downloaded
here. Open in PSP.
Save
often.
Let's go. Good
luck.....
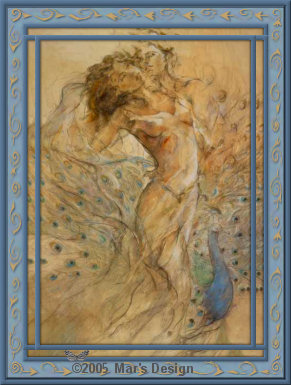
For this tutorial I used
a gorgeous art piece by Gary Benfield.
More of his
beautiful work can be found here.
Foreground to
#b47a7b.
Background to #d8bfc2.
1. Open the Benfield image or use
one of your own.
Make sure the largest part (height) is about 300
pixels.
If you use a picture of your own, click with the color
picker in your
image to select 2 matching colors. Foreground to
the darkest color.
2. Image > Add borders > 5
Pixels > Symmetric > Color blue.

3. Select  (feather 0 - tolerance 20) the blue border.
Fill with #b47a7b.
(feather 0 - tolerance 20) the blue border.
Fill with #b47a7b.
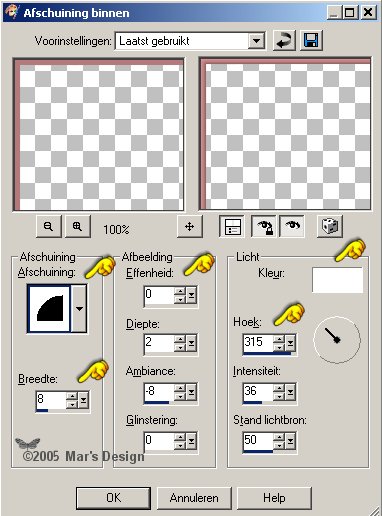
4. Effects > 3D-effects > Inner
bevel > Color white.
5. Effects > 3D-effects > Drop
shadow > Black.
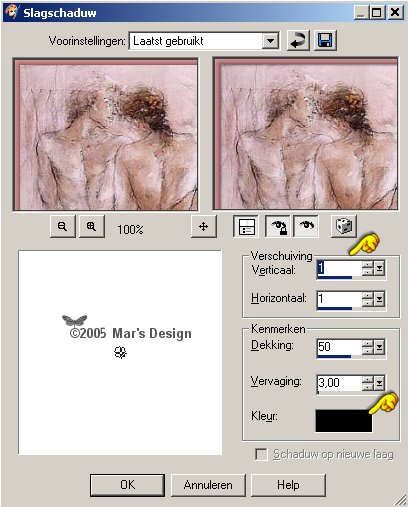
6. Repeat the drop shadow but now
Vert. and Horiz. to - 1.
7. Image > Add borders > 25
Pixels > Symmetric > Color blue.
8. Select
the blue border and and
fill with #d8bfc2.
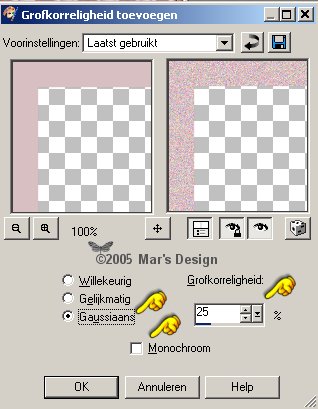
9. Adjust > Add noise/....
> Add noise.
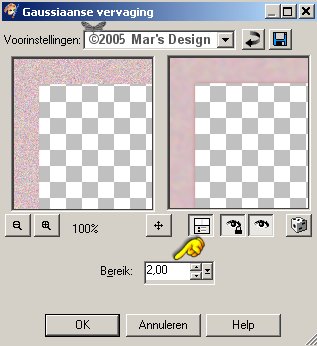
10. Adjust > Blur > Gaussian blur
at 2.00.
11. Image > Add borders > 5
Pixels > Symmetric > Color blue.
12. Select with the bleu border
and fill with #b47a7b.
13. Repeat the inner bevel and the drop
shadow at 1 and - 1.
14. Selections > Select
nothing.
15. Now lock your background
color.
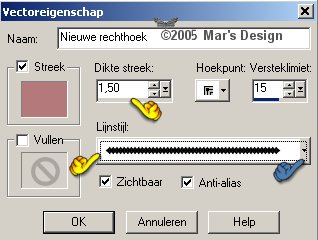
16. Shapes > Rectangle.

Rectangle > Vector > Stroke 1.50.
The
name for the line is "Opposing
Arrowheads Equal".

If
you change the stroke, make sure to put in a comma. Don't put in a
dot.
I always select the two zeros behind the comma and change
it in to 50.
17. Now draw a rectangle in the large
part of your frame.
18. With  you can resize if needed. you can resize if needed.

19. Do you prefer a different line??
Let's do some magic.
20. In the Layer Pallet you see a plus
(+) in front of your vector layer.
Click it and your layer will
fold out.
21. Double click the layer "New
rectangle".

22. You will get the vector and
line style menu.
23. Click the arrow (bleu hand) right
and another menu appears.
24. Now you can choose every line you
like best.
Take a look at your image. The line changes
immediately.
With some lines it is nicer to make them thicker or
thinner.
Change the stroke until you are satisfied.
25. Made your choice??
In the Layer
Pallet > Convert to raster.
26. Effects > 3D-effecten > Drop
shadow at 1.
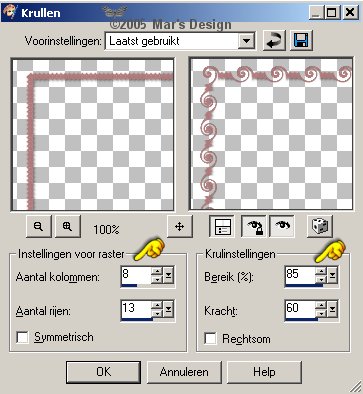
27. Effects > Distortion effects
> Curly Q-s.
28. Layers > Merge > Merge
visible.
29. Selections > Select
all.
30. Selections > Modify >
Contract with 30 pixels.
Selections > Invert.
31. Effects > Geometric effects >
Cylinder horizontal at 18.

32. Effects > Geometric effects >
Cylinder vertical at 24.

33. Selections > Select
nothing.
34. Layers > Merge > Merge all
flatten.
35. Image > Add borders > 5
Pixels > Symmetric > Color blue.
36. With your select
the bleu border.
Fill
with #b47a7b.
37. Repeat the inner bevel and the drop
shadow at 1 and at - 1.
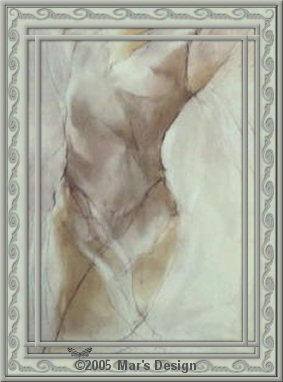
Your Decorated Lined Frame is done.
I hope you like this tutorial.
Thank you for trying them out.
Copyright image: Gary Benfield
Copyright image: Gary Benfield

Copyright image: Gary Benfield
This tutorial is written and
designed by Mar and therefore her property.
This tutorial may not be
downloaded for any purpose other
than to follow the tutorial. If
you're a Moderator of a group,
please e-mail me
before adding this tutorial to any lessons,
etc.
When you do have my permission..... only a text link is
allowed.
My tutorials are never ever to
be sent over any mailing list or to leave my
site.

Since
09-22-2005:
| 