|
Cinderella
(PSP 8, 9 & 10)
A tutorial by Mar ©
2003

This is my first tutorial using PSP
8.
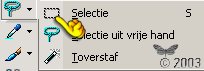
To help you get use to the program, I will use more
pointers, such as the little hands.
I used a blue hand to
point out things that can use some
extra attention.
What you need are some tubes I did
already prepare for you.
Tubes and pattern download
here . Open in PSP.
You
don't have PSP 8, but want to make this frame
in PSP 7? Download
PSP
7 files.
A 30 days trial version PSP download here.
Save
often.
Let's go. Good
luck.....
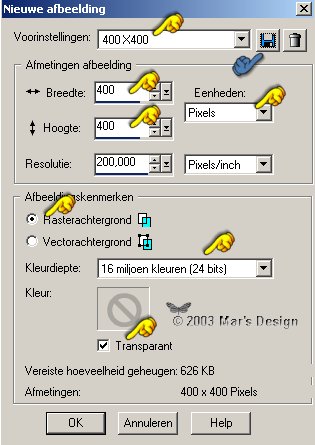
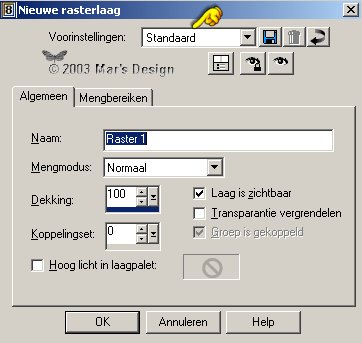
1. Open a new image 400 X 400  >
Transparent. >
Transparent.
If you often use an image (size 400X400) click the
blue diskette (above blue hand) to save your settings.
2. Open White_Satin.jpg in
PSP.
Adjust > Hue and saturation
> Colorize.

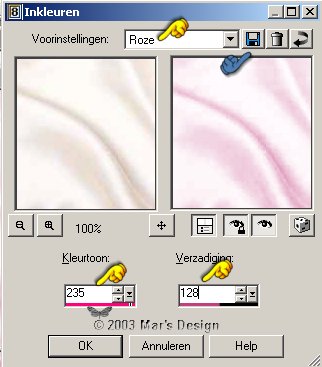
3. You can save this setting too (f.e
as Pink) for
later use (see the little blue hand).
Click OK.
Image > Copy.
4. In your 400x400 image
> Selections > All.
Selections > Modify >
Contract 25 pixels.

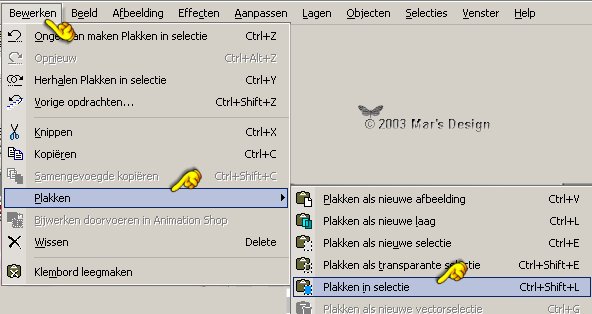
5. Selections > Invert.
Edit > Paste > Paste into selection.
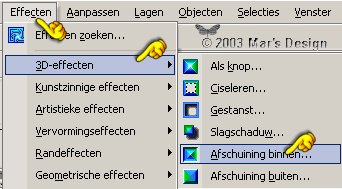
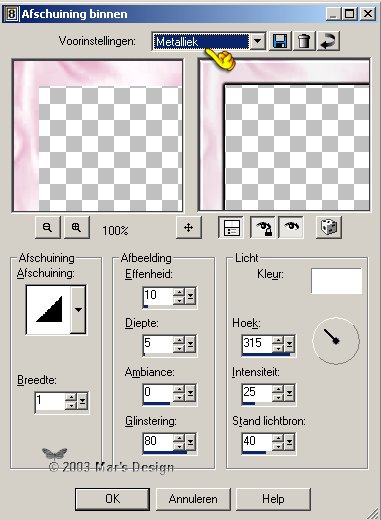
6. Effects > 3D-effects > Inner bevel.
7. Preset > Metallic.
Apply.
8. Copy.
Selections >
None.
Edit > Paste > Paste as new layer.
9. In your Layer Palette > Activate layer 1.

10. Image > Resize
at 95% > All layers unchecked.
 
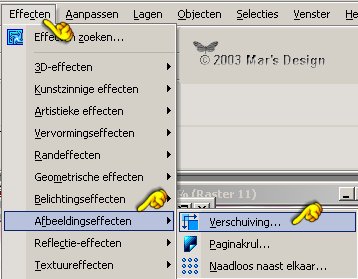
11. Effects > Image effects or....
Geometric > Offset.
12. Save this preset if you like.
((Here
is how you could do this in PSP 7.))
**Site gone!**
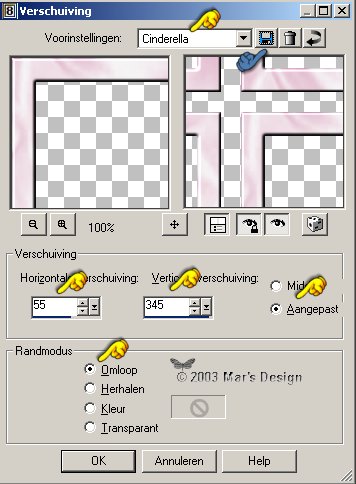
13. Hit OK and apply.
Copy and paste as a new layer
 or....
Duplicate in your layer palette.
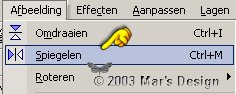
14. Image > Flip.

Image > Mirror.
15. Make sure you're on the above layer
(check your palette).
Use selection  . .
16. Select the overlap at the bottom.
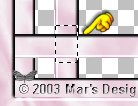
17. Hold shift key and select the above
overlap as well.

18. Use the selection very precise.
Zoom in if you need to.
If you have trouble selecting..... use
the eraser  size
5. size
5.
19. You did select?
Hit delete once.
Layers > Merge > Merge visible layers.

20. With your magic wand  click the
transparent parts. click the
transparent parts.

21. Hold shift to select the rest
transparent parts as well
Don't forget the little square
corners.
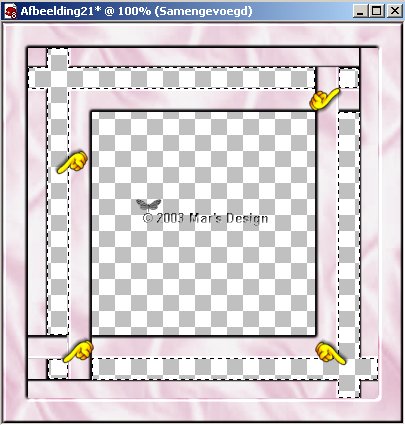
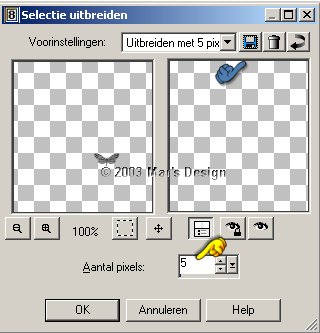
22. Selections > Modify >
Expand 5 pixels.
23. Layers > New raster layer.
24. Foreground to #EA9EC2.
Background to #F5F0F4.
To change the colors in
your pallet > Click on your color menu.

This is what you'll see.
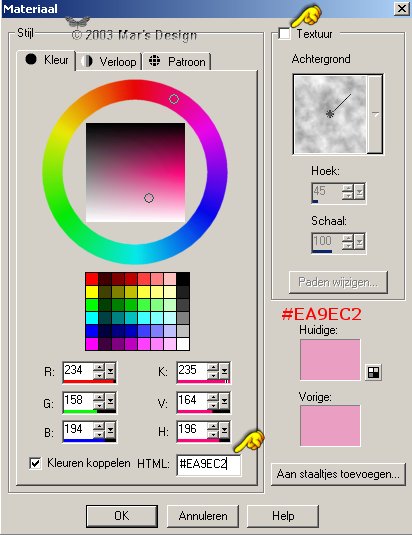
Foreground color.
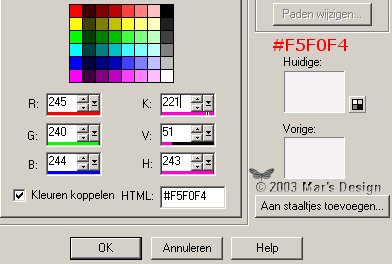
Background color.
25. Fill  the new layer with the bright pink,
it goes into all the selected parts.

26. Layer palette >Move layer
1 (=Raster 1) below your merged layer.

Selections > None.
27. Make sure layer 1 is activated (=
blue) .
Click with your wand in the middle.
28. Selections > Modify >
Expand 5 pixels.
Fill your
selection with the background color.
Use your right mouse button to fill.
Selections > None.
Layers > Merge visible layers.
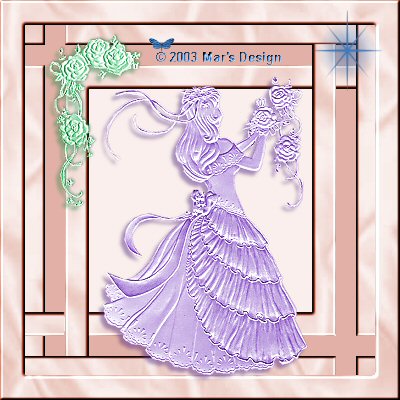
29. Open cinderella.pspimage
from the ZIP.
Copy and paste as a new layer .
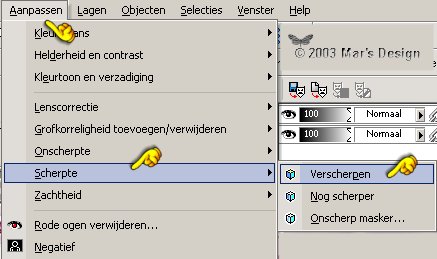
30. This option has moved in PSP8 from
'Effects' to 'Adjust'.
Except if you did load your
workspace from 7 to 8!
Adjust > Sharpen > Sharpen.
31. Effects > 3D-effects
> rop shadow > Vert. at
4 and Hor. at - 4.


32. With your mover tool  >
Put in place. >
Put in place.

33. Open the Roses.pspimage that
was in the ZIP.
Copy and paste as a new layer.
With mover tool >
Put in place.
Use the same drop shadow on
the roses.
34. Open the Ster.pspimage from
the ZIP.
Copy and paste as a new layer.
With mover tool >
Put in place.
Merge all layers.
Notice.... if
you merge flatten, you can't colorize the layers
separately so
don't merge if you want to do other colors.
If you like a different color, colorize all parts and
adjust your fill colors!
Wow.... our first lesson in PSP 8.
Pat yourself on the shoulder.


Created by my friend Tiny van Veelen-Zonneveld.
In
one word: 'breathtaking' Tiny.
This tutorial is written and
designed by Mar and therefore her property.
This tutorial may not be
downloaded for any purpose other
than to follow the tutorial. If
you're a Moderator of a group,
please e-mail me
before adding this tutorial to any lessons,
etc.
When you do have my permission..... only a text link is
allowed.
My tutorials are never ever to
be sent over any mailing list or to leave my
site.
Translation into English
with help of my best friends, Trudie.
Thanks sweetie! Couldn't do
it without you.

Since
08-27-2003:
|