A
Digital Swamp Painting
Using Paint Shop Pro
This
tutorial is best viewed at 1024x768.
Please read my Terms of Use if you have any
questions.
At this time I am not allowing my tutorials to be
translated
so please don't ask!
All images are the sole property of ©
Designs By Astro
Do not copy, place on CD, make into Scripts or send
through email without my prior written permission.
A link is always
welcomed and appreciated though!!
All rights reserved.
The
image/images you make using this tutorial
is your property to do with as you
wish.
If you have any questions or need further help you can
Email me
Tutorial written January 27, 2005.
This tutorial assumes you have a working knowledge of Paint Shop Pro the use and location of tools.
This tutorial is written using PSP 8.1 and but can be done using other version. This tutorial is not
for beginners, you will be working with multi layers and painting techniques so it is recommended for advanced users. This tute uses Eye Candy 4000 Fur Filter but can be done without it.Open a 650x525 transparent canvas.
You may also want to open a small canvas to use as a color palette or you can use a layer on your
large canvas to make a color palette on.1. Add a new Raster Layer. On this layer we will be creating our sky and water.
Set your foreground color to a medium sky blue, I'm using #A9C8DDUse the flood fill tool to fill your layer with color.
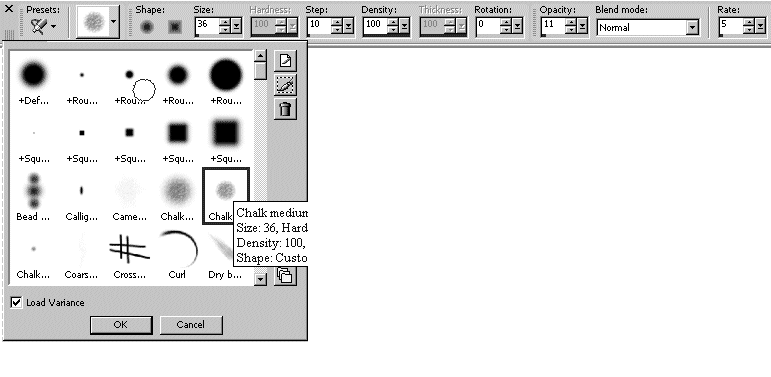
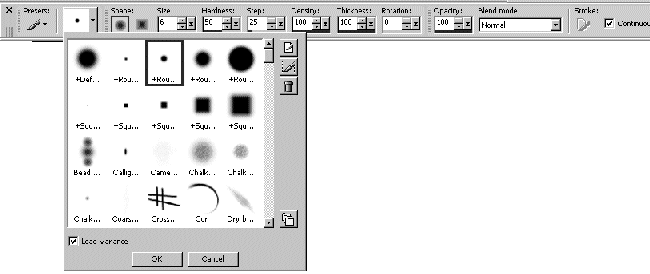
2. Add a New Raster Layer. Click on your Airbrush Tool, set to these settings...
Use the medium Chalk brush to create some fluffy clouds. I found it best to spray in a small
circular motion but do whatever works best for you.3.Use the Push Tool with these settings to smudge around your clouds until you're happy with
the look....You will end up with something like this...
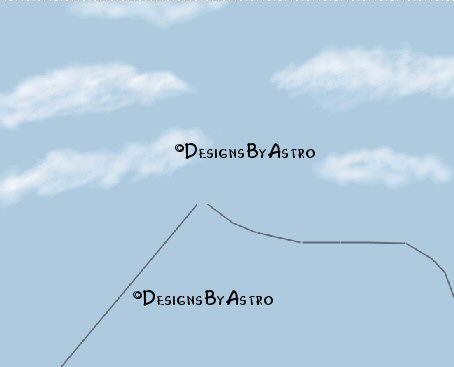
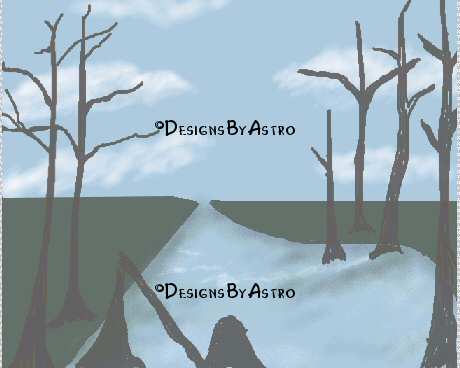
4. Add a New Raster Layer. Next, I used my Pen Tool set to line width 2, Drawing Mode
(the little pencil). Simple Mode should be checked, foreground set to #656974. Draw out
out the swamp area.
Something like this...It doesn't have to be perfect. it's just to give you an idea of about where your swamp will
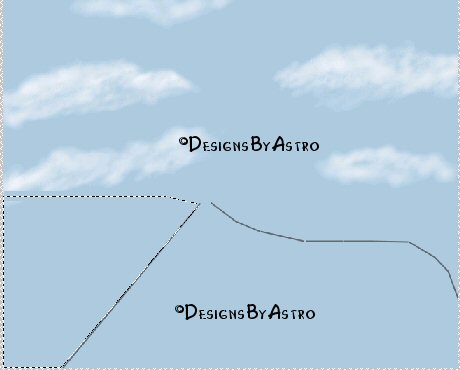
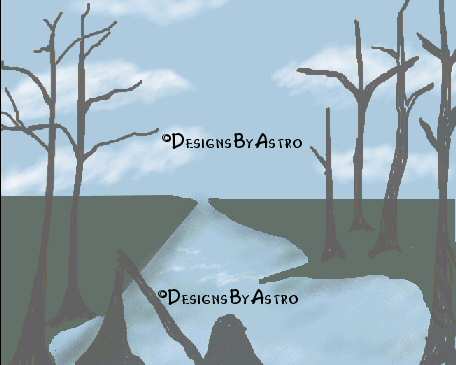
be.4. Oh the same layer, using the Freehand Selections Tool, select the area on the left
of your swamp line. Something Like this...
Flood Fill this selection with #65716A.5. On the same Layer, use the Freehand Selection Tool to select the area to the right
of your swamp line. Flood fill that area with the same color.
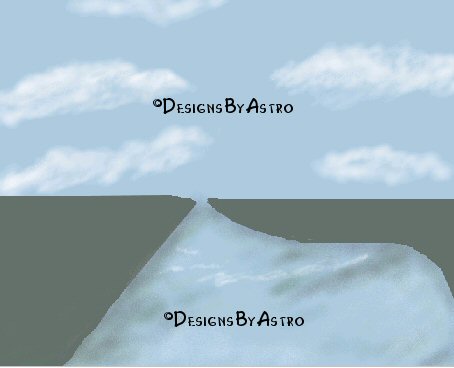
6. On a New Raster Layer I used the Airbrush settings for the clouds to make ripples and
foamy areas in my water. I also used #65716A color and my airbrush setting to add some
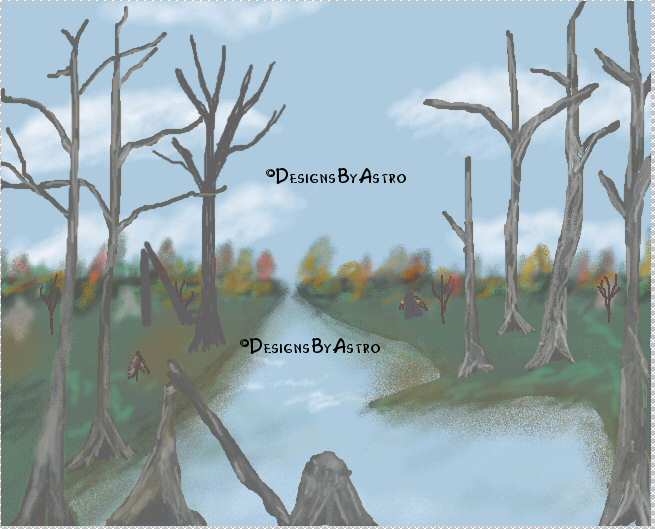
of that color in my water. This is where I am now...
7. Add a New Raster Layer. Set your foreground color to #606060.
Set your Paint Brush Tool to the 3rd Round Brush, then lower the size to 6...
Use the Paint Brush to do a rough sketch of the large trees. You should have something like
this...8. I decided to go back to my land layer of my swamp and make a small area to the right
in front of the 3 trees. I also used the Eraser Tool to remove some of the land area on the
left side. This is what I have now...
9. I made my land area layer my active layer. Using the Push Tool with the same settings
I used for the clouds I pushed up on the back area of my land to make a tree/shrub line off
in the distance. Most of our work from here on out will be using the push tool, airbrush and
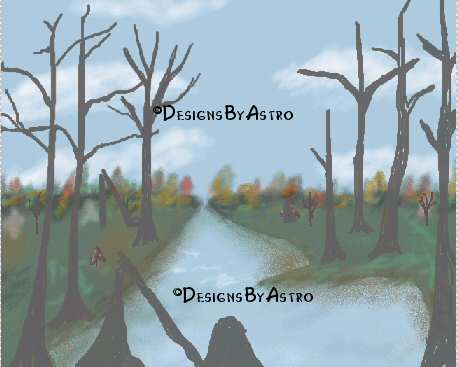
paint tool.10. With the airbrush and paint tool add some reds, yellows, browns and oranges to your
tree line. You can also make more larger trees off in the distance. Add New Layers as you wish.
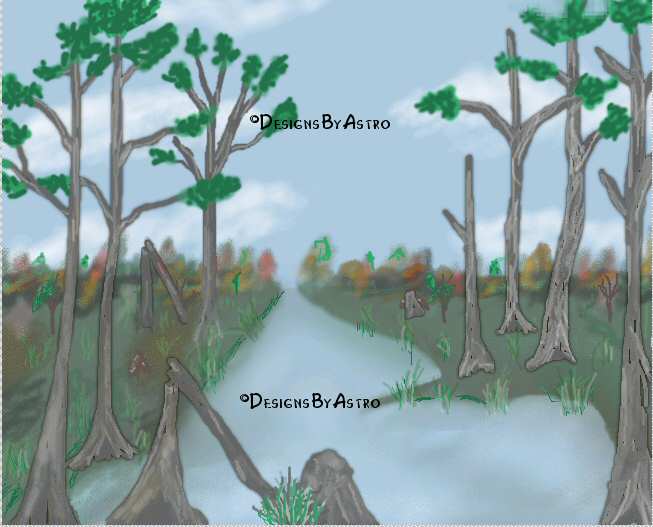
This is what I have now...11. Make active your large tree layer, go to Selections, Select All, Selections, Float.
Add a New Raster Layer. We will give our trees some detail and some foliage.
Set your foreground color to White. You will need to switch between your paint tool and the
push tool, below are the settings for them...Paint Tool settings...
Push Tool settings...

Start adding lines of white with your paint tool, blend them with the push tool as you go. Keep your
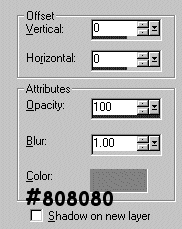
trees selected until you have the desired look you want. This is how mine looks now...12. With your trees still selected, add a drop shadow with these settings...
13. Next I did the same treatment to the dark trees and stumps in the distance.
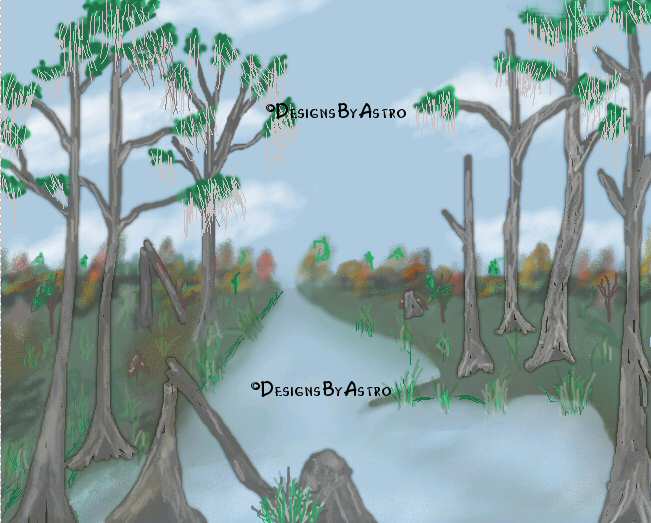
14. Now for the foliage. Make your top layer your active layer, add a new Raster Layer.
Using your paint brush set to these settings...Foreground set to #30A269 Background set to #24724B. Start out with the light green and then
switch to the darker green and paint in some leaves and even some grassy area here and there.
This is what I have now...15. Add a new Raster Layer, set your foreground color to #C0C0C0. Use the same settings
for your paint tool as before except lower the size to 1. On this layer make long straight
lines coming off your foliage. This will become the moss that hangs on trees in the southern
US swamp lands. You should have something that looks like this...16. Below I will give you the settings for Eye Candy's Fur Filter....
Setting should be set to "Short Grey Whiskers" Color should be set to #A2A2A2, Lighting Color
to #C0C0C017. For those that do not have Eye Candy you can use the push and soften tool to get a moss look.
18. Apply a Gaussian Blur with a Radius of 1.
19. Apply a Drop Shadow with these settings...
That's it, do any touchups you'd like, maybe add some birds and a frame. I used a Filter called
Texturizer to give my painting a canvas look. Don't forget to sign your work!
Until next time... God Bless!
Connie
Designs By
Astro Index of
Tutorials
Tutorial written January 27,
2005
© Copyright 2005 Designs By Astro
All rights reserved.