|
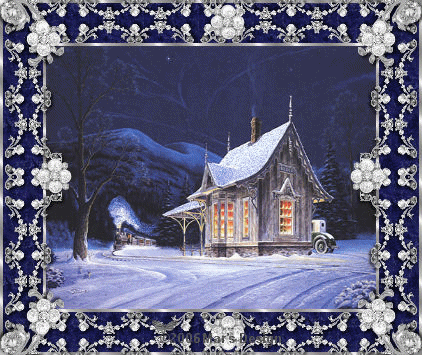
Crystal Palace
Frame
(PSP all
versions - no filters)
A tutorial by Mar ©
2006
"The Crystal Palace" © Randy
Sounders.
What you need:
Corel PSP. Download a 30 day trial
here.
The materials: Download
here.
Open all images from the ZIP in PSP.
Save
often.
Let's get
started.
Good luck with your
Crystal
Palace Frame.
This tutorial is done
in PSP 9.
We are going to work with a lovely
image but
we will get that later. First some
explanations.
This tutorial is done
with the gorgeous
Crystal Palace painting by Randy Souders.

Randy Souders has granted
permission to use his art
for this tutorial. If you want to
use his art too, please take
the politeness to put a link to his
site in your work or email.
Thank you Randy for granting me
permission to use
your gorgeous art for this Paint Shop Pro
tutorial.
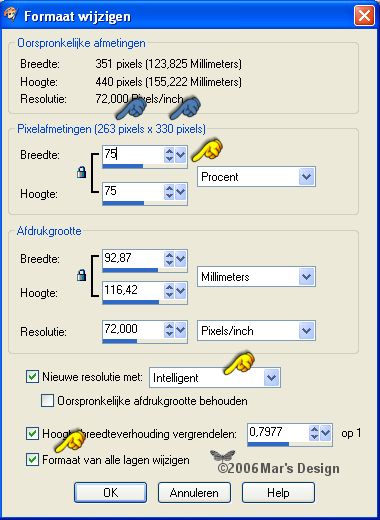
It is most important that your
image for this tut is always 263 X 330.
Be very accurate
otherwise your Kaleidoscope frame won't work.
For every other
size you will have a different effect. Do you want
to make this
tutorial with a landscape (wider as the height) image?
Edit
> Rotate > Rotate clockwise.
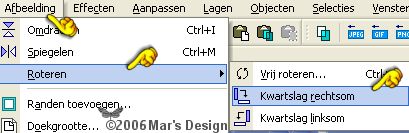
I know your image is the wrong way now but
we
will rotate that back after your frame is done.
You can use the
crop tool  if
you like. I do it different. if
you like. I do it different.
I always open a new image with the
size I need.
In this case 263 X 330. Select all. Copy your
image and
paste your image into selection. Resize first if
needed.
Edit > Paste > Paste into selection.
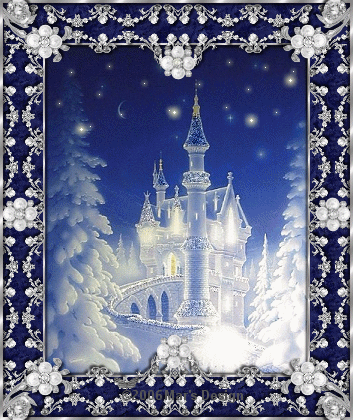
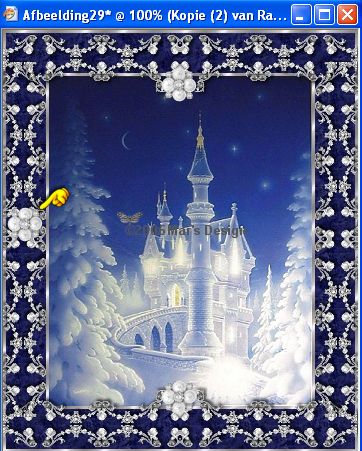
1. Open the Crystal Palace that can be found on the
Sounders site.
Of course you can use another picture of
your own but your have to make it the right size.
If you
do use the Crystal Palace image from the Sounders site:
Image
> Change size to 75%. See the size (=blue hands)?
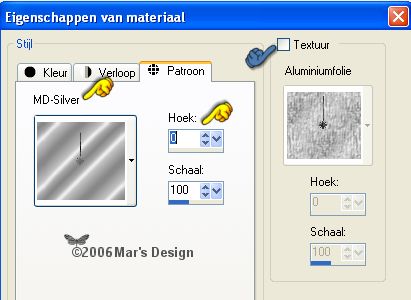
2. Open the MD-Silver
from the ZIP.
Foreground to pattern and find the opened
pattern.
Texture
unchecked (blue hand).
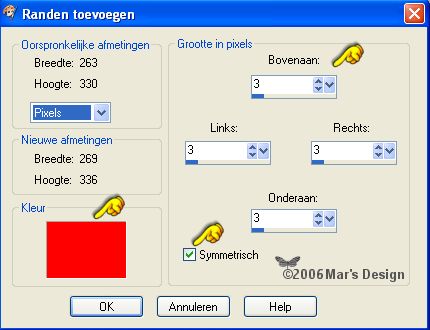
3. Image > Add borders > 3
Pixels > Symmetric > Red.
4. With your magic wand  select (feather 0 - tolerance 15) the red border.
Fill the
selection with the silver pattern.
5. Image > Add borders > 40
Pixels > Symmetric > Red.
With your magic wand select the red border.
6. Open the MD-CrystalBlue from the ZIP.
Background to pattern
and find the opened pattern.
Texture unchecked
(blue hand).
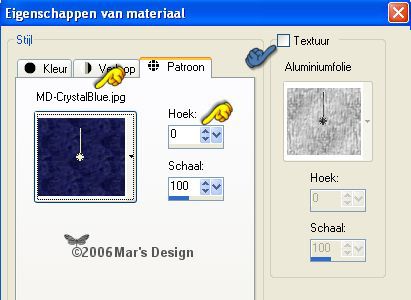
7. Fill the selection with your right
mouse button, the blue pattern.
8. Image > Add borders > 3
Pixels > Symmetric > Red.
With your magic wand select the red border.
9. Fill the selection with the silver
pattern again.
Selections > None.
10. Open the MD-CrystalGem.psp and copy.
Edit > Paste > Paste as a new layer.
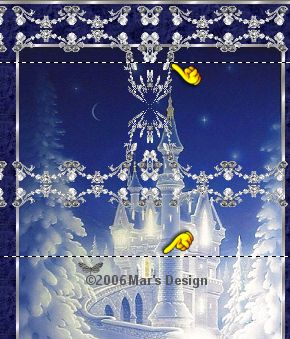
11. Move  the decoration all the way up to the top against the
edge.
the decoration all the way up to the top against the
edge.
Notice.........., the position of the jewel is
important.
This is how an image that is
rotated clockwise looks like:
12. Effects > Reflection-effects
> Kaleidoscope.

13. Move
the decoration up for a good view.
14. With your rectangle selection tool
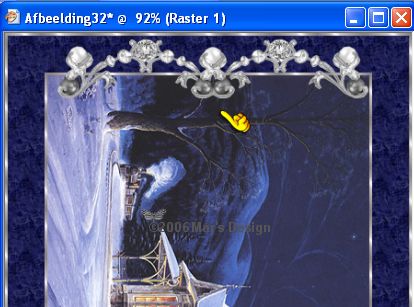
pull a selection like on the screenshot.
Take a better look at the
screenshot that is
zoomed in..
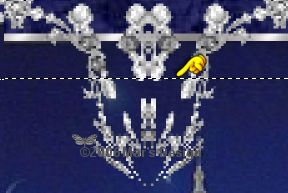
15. Click delete to remove the part we
are not going to use.
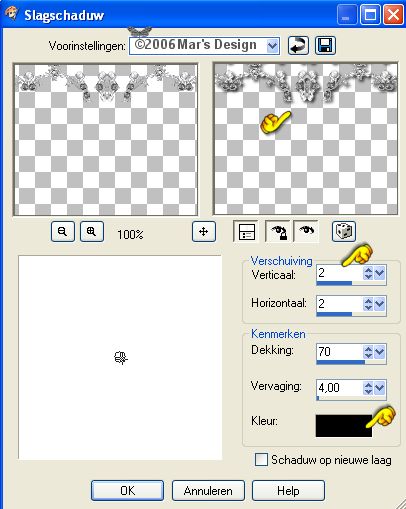
16. Effects > 3D-effects > Drop
shadow > Black.
17. Layers > Duplicate.
Image
> Flip.
18. Layers > Duplicate.
Image
> Rotate > Free rotation > 90 Degrees left.
All
layers unchecked.

19. Move
the border to the left against the edge.
Make sure the border
lines up
against the first 3 pixels silver border.
20. Layers > Duplicate.
Image
> Mirror.
21. Open the MD-CrystalGem-2.psp and copy.
22. Edit > Paste >
Paste as a new layer.
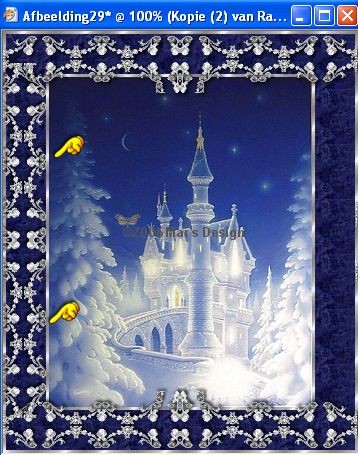
23. Move the jewel to the top middle as
on the screenshot.

Don't use a drop shadow on this
gem.
24. Layers > Duplicate.
Image > Flip.
25. Layers > Duplicate.
Move it to the left (make sure it
is in the middle)..
26. Layers > Duplicate.
Image
> Mirror.
27. Open the MD-CrystalGem-3.psp and copy.
28. Edit > Paste >
Paste as a new layer.
29. Move this jewel to the left bottom
corner of your frame.
Repeat the drop shadow like you used
before.

30. Layers > Duplicate.
Image
> Mirror.
Layers > Duplicate.
Image > Flip.
Layers
> Duplicate.
Image > Mirror.
31. Layers > Merge > Merge
flatten.
32. If your image was rotated, rotate
it counter clockwise now.
33. With your lasso tool  (feather 0)
select the parts that you (feather 0)
select the parts that you
want to
animate. Don't select to much. Be selective. When you want
to
select an additional piece, keep your Shift-Key down (PSP 7.)
PSP 8+ users can put their selection settings to add.
If you are satisfied with the
pieces you want to animate:
34. Layers > Duplicate. Repeat this again.
You now have 3 layers in
total.
35. The top layer is selected
(=blue).
36. Adjust > Add noise/....
> Add noise.
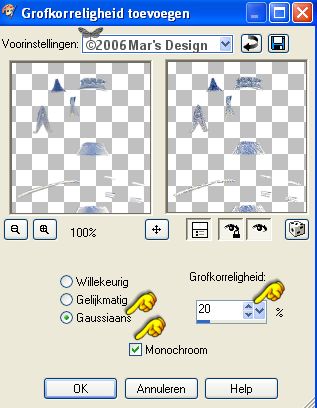
37. Lock your top layer for now and
repeat the noise to the other two
layers. For layer 2 the noise
at 30 and for layer 3 the noise to 40.
38. Unlock all layers.
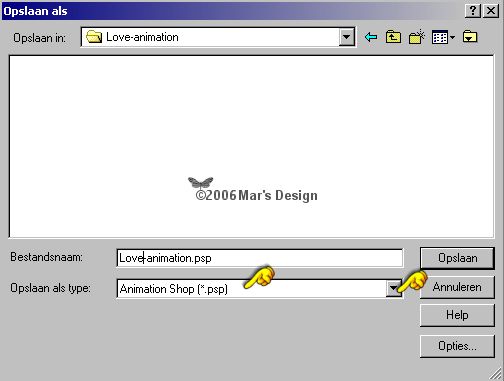
39. Save your image as crystalpalace.psp.
PSP 7 users can just save
as.
PSP 8 - 9 and 10 users......
Because Animation Shop
doesn't recognize *.pspimage you have to save as *.psp.
This can
be done in 2 different ways:
Use this one for all
early 8 and 9 versions.
Animation
Shop doesn't recognize *.pspimage from
PSP 8 and 9 so
we save as a PSP 7 or 6 file. Like this:
Save as > Click
options and save as a *.PSP 6 or 7 compatible file.
.jpg)
Use this one for the
latest versions.
The latest PSP 9
and all PSP X versions have the option to
directly save as PSP
for Animation Shop.
Look in the pull down menu and select
Animation Shop (*psp).
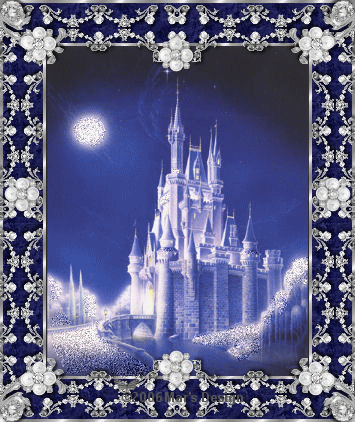
1. Open your crystalpalace.psp in Animation Shop (AS)  . .
You
have 3 frames. Zoom in and out again. Now you see them.
2. Click Ctrl-A to select all 3
frames.
3. Animation > Properties for frame
> Set your frame time at 10.
Save your frame as a
GIF.
Your Crystal Palace Frame is
done.
I hope you like this tutorial.
Thank you for putting it
to the test.

© Randy Sounders
© Randy Sounders
© Randy Sounders
This tutorial is written and
designed by Mar and therefore her property.
This tutorial may not be
downloaded for any purpose other
than to follow the tutorial. If
you're a Moderator of a group,
please e-mail me
before adding this tutorial to any lessons,
etc.
When you do have my permission..... only a text link is
allowed.
My tutorials are never ever to
be sent over any mailing list or to leave my
site.

Since
10-28-2006:
|