|
Charmed Frame
(PSP
all versions - no filters)
A tutorial by Mar ©
2005.
What you need:
PSP. Download a 30 day trial
here.
Base fire images: Download
here.
All other materials: Download
here.
For the animation: Save the vuur.tub in your tube folder.
Save
often.
Let's get started.
Good luck with you Charmed
Frame
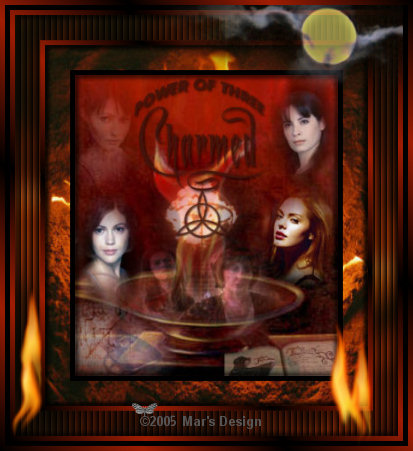
Charmed is one of my
favorite TV series.
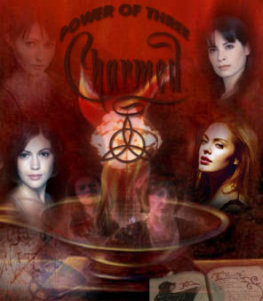
1. Open one of the
4 base fire images (ZIP 1).
Open MD-Charmed-blends.psp I prepared
(ZIP 2).
Make your own blend image.
Or....... Use this one I
made (below).
2. When done blending > Merge >
Merge all layers flatten.
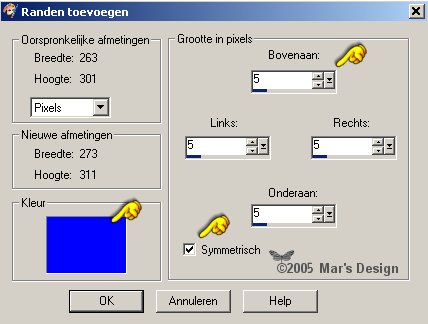
3. Image > Add borders > 5
Pixels > Symmetric > Blue.
With your magic wand  select
(feather 0) the blue border. select
(feather 0) the blue border.
4. Fill the selection with
black.
5. Effects > 3D-effects > Drop
shadow > Black.
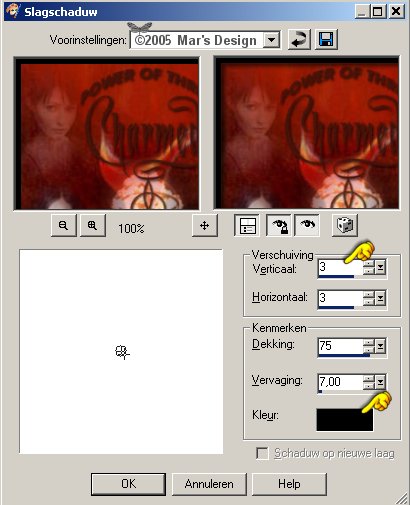
6. Repeat the drop shadow but this
time Vert. and Horiz. at - 3.
7. Image > Add borders > 25
Pixels > Symmetric > Blue.
With your magic wand select the
blue border.
8. Open the Charmed-Fireborder.psp and
copy.
Go back to your frame.
Edit > Paste >
Paste into selection.
9. Image > Add borders > 5
Pixels > Symmetric > Blue.
With your magic wand select the
blue border.
10. Foreground to back and background
to #9f1d02.
11. Foreground to gradient.
Look for
the "Fore-back" gradient.
Texture unchecked.
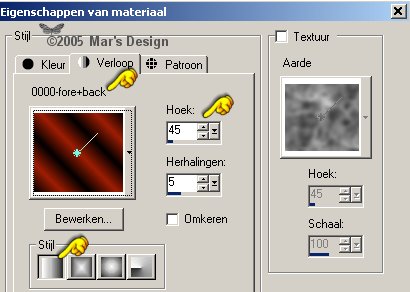
12. Fill your selection with the
gradient.
13. Repeat the drop shadow at 3 and at
- 3.
14. Image > Add borders > 25
Pixels > Symmetric > Blue.
With your magic wand select the
blue border.
15. Again paste the
Charmed-Fireborder.psp in selection.
Edit > Paste > Paste
into selection.
16. Adjust > Blur > Gaussian blur
at 10,00.
17. If you want to animate your frame
with fire (advanced PSP-ers):
Selections > Selections
load/save > Save selection in alpha channel.
If you plan to
animate, skip the next step with the blinds.
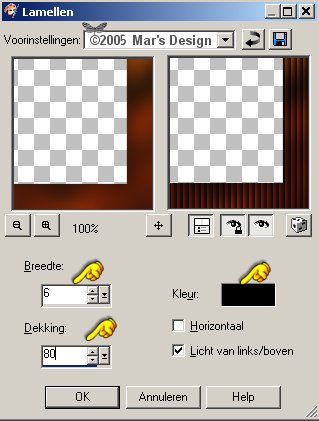
18. Effects > Texture effects >
Blinds > Black.
19. Image > Add borders > 5
Pixels > Symmetric > Blue.
With your magic wand select the
blue border.
Fill your selection with the gradient.
20. Repeat the drop shadow at 3 and at
- 3.
21. Image > Add borders > 5
Pixels > Symmetric > Blue.
With your magic wand select the
blue border.
Fill your selection with black.
22. Image > Add borders > 5
Pixels > Symmetric > Blue.
With your magic wand select the
blue border.
Fill your selection with the gradient.
If you are going to animate, skip the
next copy,
paste and merge steps 23, 24, 25.
23. Open the MD-Charmed-overlay.psp and
copy.
24. Edit > Paste > Paste as a new
layer.
It's in the right spot so no need to move
anything.
25. Layers > Merge > Merge
visible
For the more advanced
PSP-er.
There is a fire tube in the ZIP to animate the
border.
Look at the bottom of this tutorial to see what I
mean.
The animation:
1. Selections >
Selections load/save > Selection load from alpha channel.
Load
your saved selection.
2. Layers > Duplicate two times.
You have 3 layers now.
With your tubes tool click a few times
in the selection (size 100) at
different spots of the border. Do
this on all 3 layers at different places.
3. Open your psp image in Animation
Shop.
In AS.... Set the time for each frame at 40.
Save your
frame as a GIF.
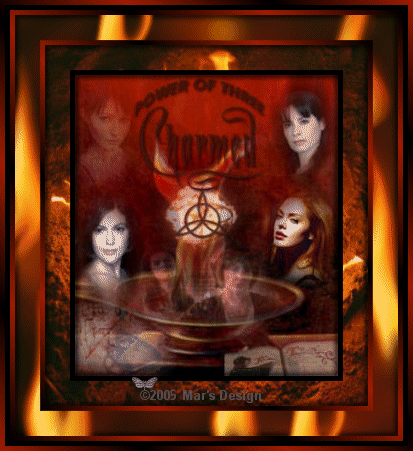
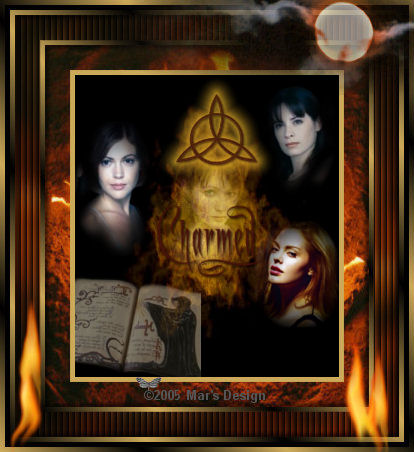
Your Charmed Frame is done.
I
hope you like this tutorial.
Thank you for trying them out.
This tutorial is written and
designed by Mar and therefore her property.
This tutorial may not be
downloaded for any purpose other
than to follow the tutorial. If
you're a Moderator of a group,
please e-mail me
before adding this tutorial to any lessons,
etc.
When you do have my permission..... only a text link is
allowed.
My tutorials are never ever to
be sent over any mailing list or to leave my
site.

Since
11-17-2005:
|