 |
|
 |

For some time now I have had a very
special lady test my tutorials
She has always kept me on the
straight and narrow
Corrected all my mistakes and basically
looked after me
I had the good fortune to meet Diana and her
husband this summer
I am so lucky to have met her and to have her
for a friend
Diana,
This is just a small token of my
appreciation for all you have done for me
Sending you lots of
hugs
Marlie *S*
Tutorial written December 10,
2003 using Paint Shop Pro 8
It can easily be worked in other
versions
Supplies
Paint Shop Pro
MuRa
Seamless
**Select MuRa's Seamless Filters D - Version
1.0**
Greg's Factory Output
Funhouse Filters
Eye Candy 3 -
Here
Graphic,
Gold Pattern and Corner - Here
*Unzip
and open all in PSP*
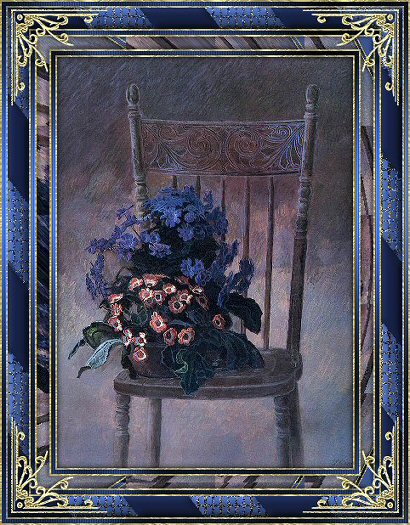
1. Open your graphic,
duplicate, and close the original
Choose a color from your
graphic and set as the background color
I used #4849b3
Set the
foreground pattern to the supplied gold pattern
2.
Selections - Select All
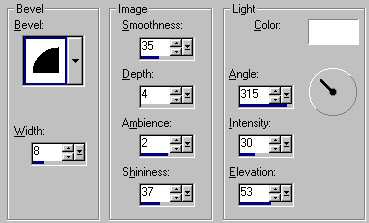
Effects - 3D Effects - Cutout
Select
none
3. Add 2px border - select with magic
wand
Flood fill with the gold pattern
Select none
4.
Add 5px border - select with magic wand
Flood fill with the
background color
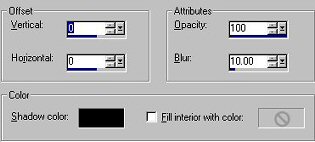
Effects - Plugins - Greg's Factory Output - Pool
Shadow
Apply the default settings
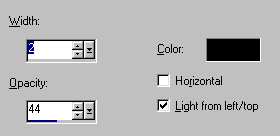
Effects - Texture Effects -
Blinds
Select none
5. Add 2px
border - select with magic wand
Flood fill with the gold
pattern
Select none
6. Add 15px border - select with
magic wand
Flood fill with background color
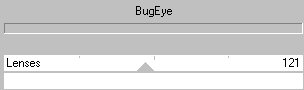
Effects - Plugins
- Funhouse - Bug Eye
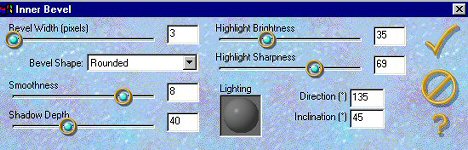
Effects - Plugins - Eye Candy 3 - Inner Bevel
Select none
7.
Add 2px border - select with magic wand
Flood fill with the gold
pattern
Select none
8. Add 5px border - select with magic
wand
Flood fill with background color
Effects - Plugins -
Greg's Factory Output - Pool Shadow
Apply the default
settings
Effects - Texture Effects - Blinds
Apply the same
settings as previous
9. Add 2px border - select with magic
wand
Flood fill with the gold pattern
Select none
10.
Add 25px border - select with magic wand
Flood fill with the
background color
Effects - Plugins - MuRa Seamless -
Stripe
Select none
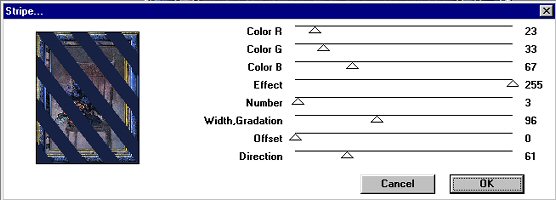
The
red, green, and blue settings above produced the blue color I am
using
Play around with the settings to get a color that matches
your graphic
11. Select the magic wand - tolerance and
feather set at 0
Select all the dark blue sections of the
border
Effects - 3D Effects - Inner Bevel
Select none
12.
Select the magic wand again, click on the other sections of the
border
Mine are the light blue sections
Effects - Texture
Effects - Mosaic Antique
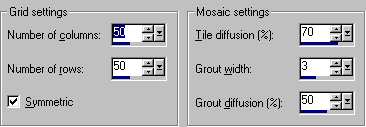
Appy twice
Effects - 3D Effects -
Inner Bevel
Apply the same settings as in the previous
step
Select none
13. Add 2px border - select with magic
wand
Flood fill with the gold pattern
Select none
14.
Add 5px border - select with magic wand
Flood fill with
background color
Effects - Plugins - Greg's Factory Output - Pool
Shadow
Apply the default settings
Effects - Texture Effects -
Blinds
Apply the same settings as previous
15. Add 2px
border - select with magic wand
Flood fill with the gold
pattern
Select none
Add any embellishments you
wish
I hope you have enjoyed this tutorial
As always
if you have any questions please feel free to Email me.

 |
Tutorial Copyright Marlie© 2003
Page Design and
Graphics Copyright Marlie's Web Design© 2003 |
 |
|
|
|
|