|



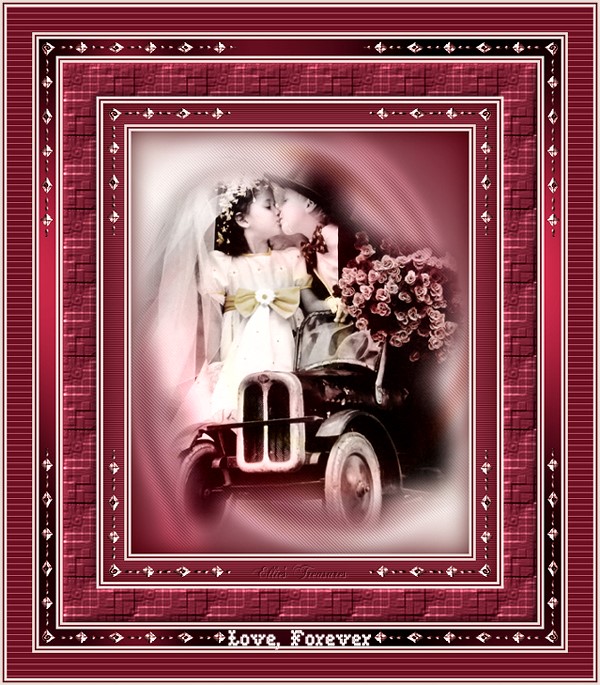
Translated
with permission from the creator, Violette at
Violettegraphic tutorial site.


See the original
tutorial here for PSP in French
This
is not my tutorial, it belongs to Violette. If
you would like to translate into another
language, you must ask her permission.
You
can contact her here.
 
They will both open
in a new window and print out on standard 8½" X
11" paper
For
information about which fonts, programs, etc I
used to construct my pages and my headers,
click
here.
|
For this tutorial you will
need:
 or or 
I've done this
tutorial in PSP 9 and Violette did it in PSP
XII.
I believe it can be
done in most versions.
You may have to look
around for the commands but it's likely they are
there.


Filters and materials
needed
Filters Unlimited 2, available here
Pentacom>VTR2 and
Jeans, available free here
Graphics Plus>Cross
Shadow, available free here
Supplies in zip file
here
for version 8 and up
Supplies in zip file here
for older psp versions has .psd tubes instead of
pspimage. these can be opened in any
program.
Both Zips contains the tubes, the
texture and the
font.
*************
Credits
Boy
and girl tube is by LaManouche
Corner tube is
by unknown tuber
************
My plugin
windows may look different from yours as I use
Filters Unlimited 2 to manage my
plugins.
It's available for purchase here:
http://www.icnet.de/filters_unlimited/
*************
I am assuming you
know the basics of Paint Shop Pro and where the
tools can be located. |
Here are some
arrows and bars you can drag and drop where you
need to mark or underline where you are. .
Just left click and drag to where you want
it then let go.
They will stay where you put
them until you close your browser.


Here's a small version of
the tag that you can drag with you for
reference
 |
1. Preparation
Open
your tubes, duplicate them (shift-D) and close
the originals.
I always open all of my tubes
and close as I use them
None of the tubes are
used more than once.
Put
the bmp texture file "ET Pixelated 4" in your
textures folder
Double click the font to open
it and keep it open to make it available in your
program.
Drag the smaller version just
above with you for reference. |
2 - Make your foreground color
#e0d6d1 (pale smoky rose) and the background
color #6f1d2d (burgundy)
 |
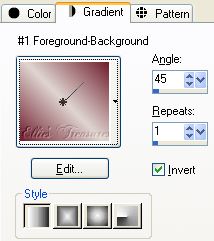
3 - Make your foreground a
gradient, style Linear, angle 45°, repeats 1,
invert checked
 |
4 - Open a transparent image of
400 X500 pixels/With your bucket took, fill with
gradient
 |
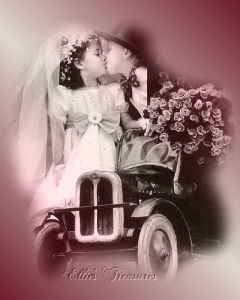
5 - Activate the couples tube
"K__Anderson_34"/Edit/Copy
(control-C)/Edit/Paste as new layer
(Control-L)
Blend Mode: Luminance
(Legacy)


 |
6 - Duplicate layer/Close the
copied layer (click the eye to turn off)
 |
7 - Highlight the original
layer
Image/resize 120%, aspect ratio
checked, resize all layers not
checked
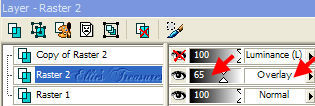
Effects/ Distortion Effects /Twirl:
720
Blend Mode: Overlay
Opacity:
65%

Adjust>Blur>Gaussian Blur,
set at 7
Effects/Pentacom/Jeans at default of
62-4


 |
8 - Turn on the top layer (the
copy of the couples tube layer) and keep that
layer selected
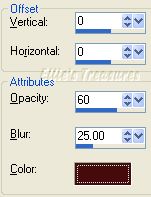
Effects/3D Effects/Drop
Shadow: 0/0/60/25 color #470a0c (very dark
burgundy)

 |
9 - Duplicate this
layer
Blend Mode: Soft light
Opacity:
60%
 |
| 10 - Layers/Merge all |
11 - Selections/Select
all
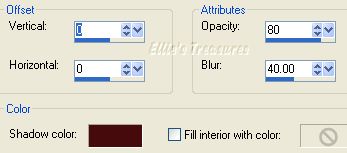
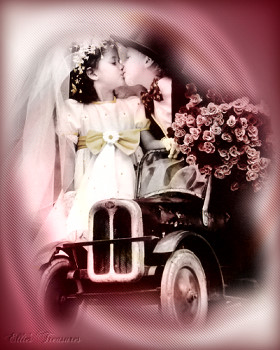
Effects/3D Effects/Cutout:
0/0/80/40/color #470a0c

 |
12 - Image/Add borders: 3
pixels color #e0d6d1 (foreground color)
 |
| 13 - Image/Add borders: 2
pixels color #6f1d2d (background
color) |
| 14- Image/Add borders: 3 pixels
color #e0d6d1 (foreground color) |
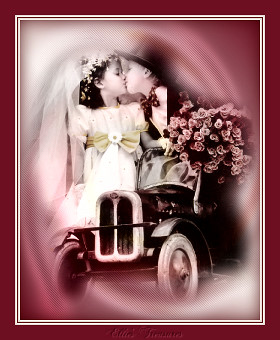
15 - Image/Add borders: 25
pixels color #6f1d2d, select with Magic
Wand
 |
16 - Effects/Pentacom/VTR2 at
default: 26-0-169-0


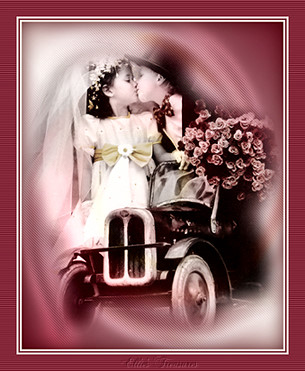
Deselect |
17 - Image/Add borders: 3
pixels color #e0d6d1
Select with magic
wand
Selections/Invert |
18 - Repeat the cutout
effect
Deselect |
19 - Repeat steps 13 and 14
(add borders 2 dark, 3 light)
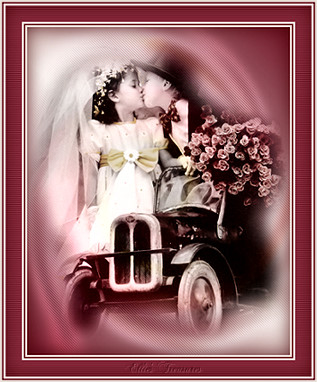 |
| 20 - Image/Add borders: 40
pixels color #6f1d2d (background
color) |
21 - Effects/Textures
Effects/Texture, find ET Pixelated 4:
125-1-3-54-56-332-32-32-white
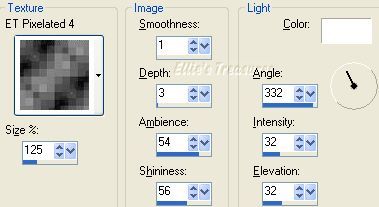

If you change the texture
file you use, you may have to play with these
numbers a bit to get the effect you
want. |
22 - Effects/3D
Effects/Interior Bevel: Bevel
2-5-40-2-0-10-315-67-21-white
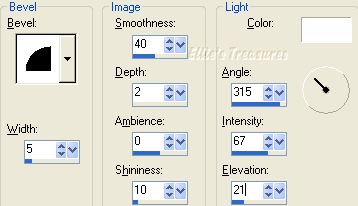

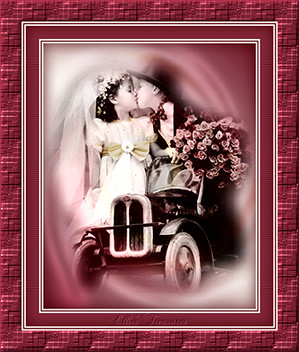
Deselect |
| 23 - Repeat steps 12, 13 and 14
(add borders 3 light, 2 dark, 3 light) |
24 - Image/Add borders: 20
pixels color #6f1d2d (background
color)
Select with magic
wand
Effects/Graphic Plus/Cross Shadow at
default
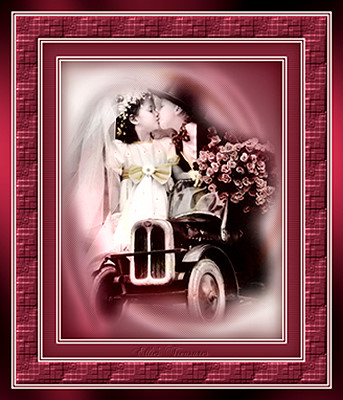
Deselect |
| 25 - Repeat steps 12, 13 and 14
(add borders 3 light, 2 dark, 3 light) |
26 - Image/Add borders: 30
pixels color #6f1d2d (background
color)
Select with magic
wand
Effects/Pentacom/VTR2 with these
settings: 76-0-196-0
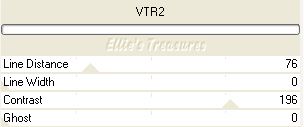


Deselect |
27 - Repeat steps 12, 13 and 14
(add borders 3 light, 2 dark, 3 light)
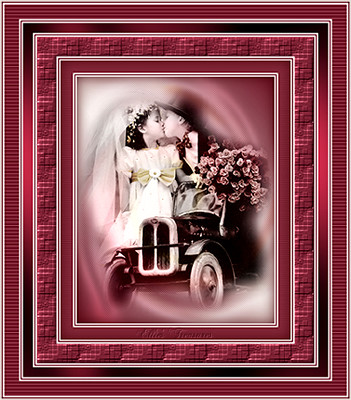 |
28. Activate the corner tube,
place in top right corner, in the cross shadow
section. In the layer palette, duplicate layer,
then Image>Mirror; duplicate this layer,
then Image>Flip; duplicate this layer, then
Image>Mirror to put in all 4 corners.
 |
29. Duplicate the corner at the
top right again. Move to the inner frame as
shown in the next screenshot.
Using your
selection tool, crop off the left end and the
bottom end so it doesn't extend
past the
ends of the original corners, as shown, 1 dot
past the diamond.
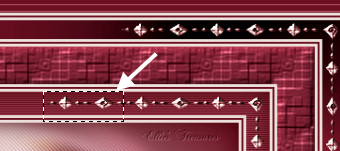
You can't reduce the size
for this as it would make the diamonds too
small.
Now duplicate, mirror and flip as in
step 28 to get in all 4 corners.
See
screenshot in next step to see how the corners
ended up. |
30. If you want to add text,
I've included the font I used, Needlepoint
Regular.
I put my foreground color on white,
background color #6f1d2d as used in the tut.
Set text toolbar at Vector, size 18, typed
the text, moved it to the right spot,
Objects>Align, center horizontally.


You're done. Merge
all. |
Resizing
To resize,
make sure, to retain the texture and the
clarity, resize at 90% bicubic and repeat till
you get close to the size you want.
At that
point you can resize by pixels as usual. You
will find this makes a big difference in your
final result.
If you resize, use the unsharp
mask or Brightness/Contrast to sharpen it a bit.
Adjust>Sharpness>Unsharp mask at
Radius 1, strength 60, clipping 4.
or
Adjust>Brightness and Contrast set
to Brightness of 5-contrast of 15. |
Watermark and
Save
Layers>New raster layer. Add your
water mark on this new
layer
Layers>Merge>Merge all
(flatten)
Save: File>Export>Jpeg
optimizer - compression of 20. |
l
hope you had fun!
Back
to top |
| If
you have any questions or suggestions, click on
the email button below to contact me. Have a
wonderful day! |
Tutorial
translated February 23, 2008
* * *
These
tutorials are translated with permission from
the original writer.
Any resemblance to any
other tutorial is purely coincidental and
unintentional.
Feel free to share any of my
tutorials on this site by a link back to my
site,
but do not copy and send the entire
tutorial to anyone or any group.
©2003-2008
Ellie's Treasures

|


 |
|
Back
to top
Webpage Design
Information
This webpage background was
made in PhotoImpact with a tutorial by Deb
DeHaven
Sadly, she passed away but
her tutorials just came back online, thanks to
PIRCNet.
You can find the tutorial
here.
The font I used for all of
the text on the buttons is BrockScript
The
font I used for the "Cadre Valentin " tutorial
header is 4
my lover.
Click on the font name
to download the font.
I use PhotoImpact to
make all of my headers due to the amazing
3D
text it has and the wonderful presets available
free online
Most of the presets I use
are either the ones that come with PhotoImpact,
usually the Gel ones,
or from Deb's PI
Tutorials and More (see below) or
Carol Oyl's
site
This is the address to
Deb's old pages
http://www.fortunecity.com/skyscraper/millenit/1716/pitutorials/objects/presets/presets1.html
I can't find any links to
her new pages but the presets are still on this
page for download.
For more sites to find PI
Presets, take a look at my
Great
Beginnings
page. |