

|
Peacock Tile |
||||
|
|
||||
|
For this tutorial you will need: ULead PhotoImpact - available for purchase here or Adobe Photoshop - available for purchase here or Jasc Paint Shop Pro - available for purchase here
Filters needed |
||||
|
|
Screenshots |
|||
|
1. Open new canvas,
200 X 200. Flood fill with color of choice.
|
 |
|||
|
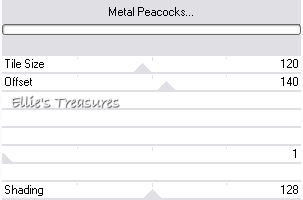
2. Go to
Effects>Filter Factory E>Metal Peacocks, apply at defaults as
shown
|
 |
|||
|
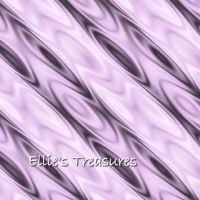
3. It should look like
this now.
|
 |
|||
|
4. Go to
Effects>Simple>4 Way Average and apply. It should look like this
now.
|
 |
|||
|
5. reduce opacity for
a lighter effect In PI go to Edit>Fill, white at 50% or higher transparency. Play with it to find transparency you prefer. In PSP, right click in layer palette>new raster layer. Fill with fill tool, white, reduce opacity in layer to transparency you prefer. In Photoshop: Layer>New>Layer, then using the Paint Bucket tool, fill with white, go to the layer palette and reduce opacity. Play with it to find transparency you prefer. A good number to start with is 50, see if you like it, if not play with it till you get it looking the way you like it. Here is mine with reduced opacity. |
 |
|||
| 6. You're done, save as a jpg. | ||||
|
If you have any questions or suggestions, click on the email button below to contact me. Have a wonderful day! |
||||
|
Alternate Results
|
||||
|
|
||||