

Tutorial created April 01,
2003.
Any resemblance to any other tutorial
is purely coincidental.
Supplies
Paint
Shop Pro
Super Blade Pro
Graphic of choice
1. Open your image, duplicate and close
original graphic. Choose a colour from
your graphic and set as your foreground colour.
Set background to white.
2. Add
3px border - select with magic wand.
Effects - Plugins - Super Blade Pro -
preset of choice. Selections - Invert.
3. Effects - 3D Effects - Cutout
Vertical - 3
Horizontal -
3
Opacity - 60
Blur - 10
Color - Black
Repeat Cutout - Vertical and Horizontal
-3
Select none.
4. Add 3px
border - select with magic wand. Flood
fill with foreground colour. Select none.
5. Add 3px border - select with magic
wand. Effects - Plugins - Super Blade
Pro. Select none.
6. Add 15px
border - select with magic wand. Flood
fill with foreground colour. Keep
selected.
7. Effects - Illumination
Effects - Sunburst
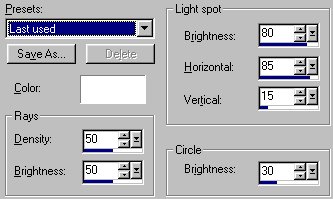
Using the arrow to access the
presets - select Upper left.
8.
Repeat Step 7 - select preset Upper Right.
9. Repeat Step 8 - select preset Bottom
Left.
10. Repeat Step 7 - select preset
Bottom Right. Keep selected.
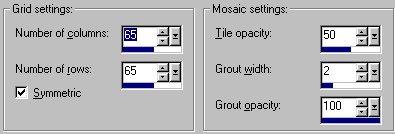
11.
Effects - Texture Effects - Mosaic Antique.
Keep selected.
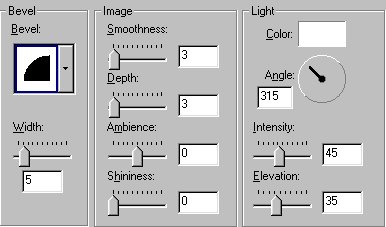
12. Effects - 3D
Effects - Inner Bevel Select none
13. Add 3px border -
select with magic wand. Effects - Plugins
- Super Blade Pro. Select none.
14. Add 3px border - select with magic
wand. Flood fill with foreground colour.
Select none.
15. Add 3px border -
select with magic wand. Effects - Plugins
- Super Blade Pro. Select none.
16. Add 20px border - select with magic
wand. Flood fill with foreground colour.
Select none.
17. Repeat Steps 13 -
15.
18. Add 25 Px border - select with
magic wand. Flood fill with foreground
colour.
19. Repeat Steps 7 - 15.
I hope you have enjoyed this
tutorial.

Tutorial Copyright
Marlie
©2003 | | | | | | | |