
Please read my **TERMS OF USE** before doing
this tutorial.
Thanks! Auntie Em
This
tutorial assumes you have a basic knowledge of the workings of Paint Shop Pro.
Bring up a blank image form, transparent background, size 300 X
500 pixels in size.
Floodfill with white.
Add a new raster layer.
Set
your foreground pattern for a nice wood fill at 100%, angle 45. Background,
null
Use your Draw Tool, size 10, curve tracking 6, with a rounded end
line.
If you'd like a nice "crooked" handle on the broom, you could also use
the Point to Point setting for the line.
Draw a line with a slight diagonal
from near the top of the form to about two thirds down.
Naturally, if you'd
like a longer handle on your broom, make your canvas size longer and draw a
longer line.
The good part here is that the shakier you are, the better the
handle looks. *LOL*
*ahem*....News Flash...Auntie Emerelda here.
I
have been informed that, in order to make this broom
more...umm...accomodating
for those of us with slightly larger than
normal...ahh...derrieres,
the extra "flight deck length" mentioned previously
would be in order.
Also...one must leave room for one's cat of
course!
Thank you for pointing this out to me, Anneli! *g*
Go to:
Effects > 3D Effects > Inner Bevel and use these settings on your
handle:

Add a new raster layer.
Use your Draw Tool again
for the broom itself.
Set your foreground to any dark patterned
floodfill,
or you may use this seamless tile of mine if you wish, at 100%,
angle 0.
Just right click to save it to your hard drive.

Begin with a Bezier Curve, width 1, and the rounded
end line.
Make just a couple of bezier curves to kinda "outline" the edges of
the broom.

These will just be a guideline for the rest of the
filler lines you add freehand.
Switch to Freehand Line, or Point to Point if
you'd rather, same settings as before, and begin to fill in the "strands" of the
broom.
Begin drawing lines between your guidelines. Don't worry if they are
not perfect....witch's brooms get a lot of use. *g*

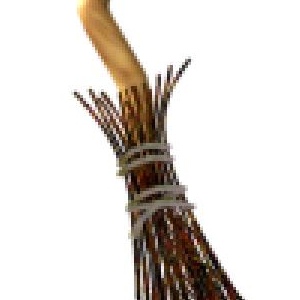
Keep adding lines....now remember...not all straight
ones....*LOL*...until your broom is nice and full.
You may want to add a new
raster layer behind the broomstick to use to fill in some lines too and add a
bit more depth.
Add a new raster layer above all the other layers.
Switch
your foreground pattern to Bean Thing (click here if you don't have that pattern in your version of
PSP).
I always wondered what I would use that pattern for! *ROTFL*
Zoom in
twice to better see what you are doing here.
With your Line Tool set to
Bezier Curve again, size 2, draw two curved lines where the broom attaches to
the handle.
A bit lower, draw one curved line and two others in an X
shape.
Add the same inner bevel to this layer with the
lines, only changing the width to 3 and the depth to 1.
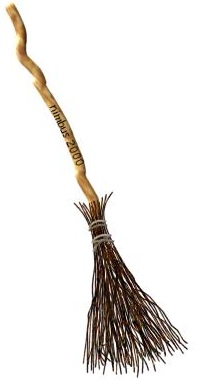
Alrighty, you're all
done, unless you want to add a layer with text to give your broom a
"name".
Just turn off your white background layer, merge visible layers, copy
and paste as a new image and export as a tube!
Vroom...vroom! *g*

Home
tutorial and graphics © Auntie Em
2001-2007