Corners are a nice way to embellish a frame
or other projects that you make.
They can
make a frame look so elegant, they can also make
a webpage standout from the rest.
I have used
corners on my webpage here as I love to
play.
**Smiles**
I use Paint Shop Pro, so these guidelines for
adding corners is written using that
program.
Believe me, they are only guidelines - the
way I do it.
I have been asked on a number of
occasions how I add the corners,
so finally
decided to put up a page.
The only supplies you will require for this
is a framed image and a corner.
I have
included a corner up for you to use but feel
free to use your own.
Corner - Here
The above image was made from my tutorial
entitled Alone
Fire up PSP and lets go!!
1. Open your
frame and your corner in PSP
2. If the
corner needs to be prepared then go ahead - use
a gold fill, silver fill, super blade
pro,
blade pro or whatever look you are going
for.
The one I have supplied for you is
already prepared
There are several sites
that have corners already prepared with the
different golds, silvers
and colors - I
always make mine to go with whatever project it
is that I am working on at the
time.
**I know, I know - get on with
it!!! LOL
3. Make the corner the active
image - Edit - Copy
4. Move to the
framed image - Edit - Paste - Paste As A New
Layer
When doing this type of work, I
always use layers - it leaves you in control and
you can delete
layers, move them around, send
them up, send them down etc. etc.
5.
Using the mover tool - place the corner using my
framed image as a guideline or where it
is
pleasing to the eye on your image.

6. Effects - 3d Effects - Drop
Shadow - play around with the settings to get
one that works with
your frame and
corner
The drop shadow isn't always necessary
on every frame.
You have to be the judge of
that.
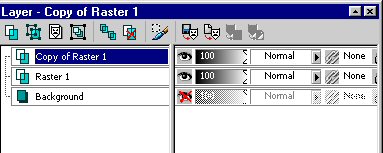
7. Layers - Duplicate
Image -
Mirror
You now have a perfectly lined up set
of corners.
If you are happy with them -
click on the eye on the background or frame
layer to hide it.
Merge - Merge Visible

8. Layers -
Duplicate
Image - Flip
Click on the eye
again to unhide the background or frame layer

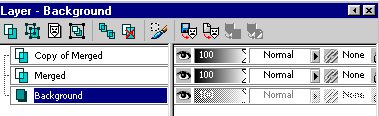
Admire the beauty of your work
for a little bit
9. Layers - Merge -
Merge All(Flatten)
You will have one layer -
a background layer

I hope this has been understandable
to you and that you enjoyed it.
If you have
any questions,
please feel free to Email
Me

Applets
Link
To Me Links
Digital Scrapping
 |
Graphics and Design
Copyright Marlie's Place© 2004 |
 |