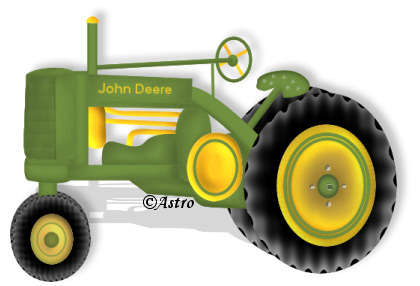
"John Deere
Tractor"
from the
"Heavenly Farm Angels Series"
This tutorial is best viewed at 1024x768.
Please read my Terms of Use if
you have any questions.
At this time I am not allowing my tutorials to
be translated
so please don't ask!
All images are the sole property of
© Designs By Astro
Do not copy, place on CD, make into Scripts or send
through email without my prior written permission.
A link is always
welcomed and appreciated though!!
All rights reserved.
The
image/images you make using this tutorial
is your property to do with as you
wish.
If you have any questions or need further help you can
Email me
Tutorial written August 10, 2005.
This tutorial is written using PSP 9 but can be done in other version with a little
modification of tool locations and settings. Although there are a lot of layers, all
the vector shapes are pretty basic and should be able to be done by most all users.Normally I make all my vector layers before converting any of them to raster
but because this tutorial has so many layers we will convert and name our layers
as we go but feel free to do yours however you like. We won't be going into shading
our tractor, I'm going to leave that up to your own creativity.Ok, let's do some vectoring.
1. Open a 550 x 450 transparent canvas.
2. Set your background color to #719040, foreground color should be off.
3. Preset Shapes Tool
set to rectangle.....
4. Draw out a small long narrow rectangle about left center your canvas. For those that
like having the coordinates here they are, but remember, they don't have to be
exact, just close....5. While still on the Preset Shapes tool, right click the mouse button on your rectangle
and choose, Convert to Path. Click on the Pen Tool.
NOTE... This takes you into Node Edit mode. To edit nodes in PSP 9 you have to do
those steps before they can be edited.6. If you prefer to edit your nodes with the color invisible like I do, then look on your
Layers Palette and click on the eye beside Vector 1.7. Notice you now have a rectangle that has 4 small boxes in each corner, those are
called nodes and are what is used to change the shape when working with vectors.8. First, I want you to click your left mouse button on the top right node to make it
your active node. Click again and hold the button while pulling down just a little on
the node to angle the rectangle down on the left end a little....9. Now click on the left bottom node and move it up just a little so that you
have a slanted rectangle something like this....10. Right click on your rectangle and choose Apply.
Note... if you clicked on the eye in your Layers Palette to hide your color, you will
need to click on it again to make it visible to be able to see your color.11. Right click again and choose Convert to Raster, right click one more time and
choose Rename. Rename this layer to Part 1.Go to Layers, New Vector Layer.
12. Preset Shapes Tool, same as above. Draw out a long vertical narrow rectangle
in front of the one you first drew.
Coordinates...13. Right click on the rectangle and choose Apply. Right click, Convert to Raster, right
click, Rename to Part 2.14. Add a New Vector Layer, like you did above.
Preset Shapes tool, same as above. Draw out another long vertical rectangle
across the bottom.
Coordinates....15. Right click, Choose Apply, convert to raster and rename as Part 3
16.Add a New Vector Layer. Change your Preset Shapes Tool to Ellipse, all other
settings the same.17. Draw out an oval at the front of your tractor...
18. Right Click on the oval and choose Convert to Path. Click on the Pen Tool.
Click on the eye in the layers palette if you want the color invisible.19. We need to add two new nodes to our oval. To do this, place your mouse
curser on the line of the oval between the top node and the right middle node.
Hold down the CTRL key on your keyboard until you see an +add, once you do,
click once and a new node will be added.20. Add another node in the same manner as above between the right middle node
and the bottom node....21. Click on the first new node you added to make it your active node. Click and hold on
the node while moving it up until it is level with the left top node. Move the top node over
to the left to square off the top...22. Now, square off the bottom by using the other node you added and the bottom
node.
Make the left top node you added your active node (as shown in the screenshot
above). Right click on the node and change the type to Cusp.....23. By changing the node type to Cusp we can use the handles on the node
to change the shape. First, let's pull the bottom handle on the node inward
so that it is straight on our line....24. Make the bottom right node your active node. Right click on it and change
the type to Cusp. Use the top handle to straighten your line. Adjust all 3 of the
nodes on the right side so that the line follows the edge of the straight rectangle
beside it....25. Make the top left node your active node, right click and change the type
to Cusp. Adjust the handles something like this...26. Make the bottom left node your active node. Right click and change the type
to Cusp. Adjust the handles something like this....27. Move the left and right bottom nodes so that they are a little above the
bottom of the long rectangle beside it....28. Right click, choose Apply, convert to raster and rename as Part 4.
29. Make Raster Layer 1 your active Layer. Add a new Vector Layer.
30. Preset Shape set to Rectangle, other settings the same as we've been
using.31. Draw out a narrow long rectangle below Part 4...
32. Right click on the rectangle and choose Convert to Path. Click on the Pen Tool.
33. Make the left top node your active node. Right click and change the type
to Symmetric. Make the left bottom node active, right click and change the type
of it to symmetric too.34. Slide the handles on both of those nodes in a little to get a rounded end something
like this....35. Right click, choose Apply, convert to raster and rename as Part 5.
36. Make Raster 1 Layer your active layer. Add a New Vector Layer.
37. Preset Shapes, same as above. Draw a rectangle below the one you just
finished.38. Right click, choose Convert to Path. Click on the Pen Tool.
39. Make the right bottom node your active node, right click and change the
type to symmetric, right click again and change the type to Cusp. (note; cusp
will not be available until you first change the node to symmetric).40. Make the left bottom node active, right click and change the type as you
did above ending with it as a cusp.41. Shape the 4 nodes as I have below...
42. Right click, Apply, convert to raster and rename as Part 6.
43. Make Raster Layer 1 your active layer. Add a New Vector Layer.
44. Preset Shapes set to Rectangle. Draw out a rectangle at the
back of where your Vector 1 layer is....45. Right Click, Convert to Path. Click on the Pen Tool.
46. First, I want you to move the 4 nodes until you have them angled like this....
47. Make the top left node your active node. Right Click, change the type to symmetric,
then right click again and change to Cusp. Square the left handle back off, pull up on the
top handle to round the top line....48. Move the bottom two nodes down ....
50. Make the bottom right node your active node. (the one that is active in the
screenshot above) Right click and choose Curve After....51. You will only have one handle on your node using this node type. Pull up and
slightly inward on the handle to form a curve underneath, something like this...52. Right click, choose Apply, convert to raster, rename as Part 7.
53. Make Raster 1 your active layer. Add a new Vector Layer.
54. Preset Shapes set to Rectangle. Draw out a long narrow rectangle
just below the large rectangle you first drew....55. Right Click, choose Convert to path. Click on the Pen Tool.
56. We just need to lightly shape the rectangle so that it follows the line of the
larger rectangle. Do this by moving the two bottom end nodes a little to give a
slight taper to the right bottom node. Make sure that this rectangle goes a little
over into the top rectangle and into the front also so that there won't be a gap
between them....57. Right click, choose Apply, convert to raster, rename as Part 8.
58. Make Raster 1 Layer your active layer. Add a New Vector Layer.
The next steps will be filling in the motor parts. We will be using the rectangle
and Ellipse to do this with. It is important that each vectored part is on a separate
layer so always remember to Apply when you're finished editing and add a New
Vector Layer.59. The screenshots below show you the motor parts. I won't go through each step
I took to make the part, you've been working with vectors a good bit in this tutorial and
should know the steps by now. Just remember to right click and Convert to path, click on
the Pen Tool to go into node editing mode then once you're finished editing, right click and
choose Apply, right click, convert to raster, right click, rename in the order as we've
been renaming.60. Make Raster Layer 1 your active layer, Add a New Vector Layer.
Motor Part 1.
Preset Shape used, Rectangle. Added one node in the top middle,
changed type to symmetric on new node and on top left node. Shape as below...
(Rename as Part 9)61. Motor part 2.
Preset Shape used, Ellipse. Drew out an oval and expand existing
nodes...
(Rename as Part 10)62. Motor part 3.
Add New Vector Layer so that it is ABOVE Motor part 2 layer.
Change background color to #ffe683. Preset Shape, Ellipse.
Drew out an oval and use existing nodes to shape....
(Rename as Part 11)63. Motor part 4.
Added New Vector Layer above Motor part 3. Foreground color set to the
green, background color, off. Preset Shape Ellipse, Line Width set to 4.
Draw out AN oval. Use existing nodes to shape to fit motor part 3....
(Rename as Part 12)64. Make Raster 1 Layer your active layer.
Motor part 5.
Background color set to #ffe683 foreground, off. Draw out an oval, use
existing nodes to give a "pill" like shape...
(Rename as Part 13)65. Make Raster 1 your active layer.
Motor part 6.
Background color to the yellow. Preset Shape, Ellipse. Draw out a long
horizontal oval. Add one new node between the left end node and the top
middle node. Change the type of this node to Cusp. Use the nodes to shape
a pipe that is bent at the left top....
(Rename as Part 14)66. Motor part 7.
Add a New Vector Layer. Same preset shapes and color as above.
Draw out another oval below and to the left of the first one. Add nodes
to shape into a pipe something like this....
(Rename as Part 15)67. Add a New Vector Layer.
Motor part 8. Preset Shapes, Rectangle, background color, yellow. Draw
out a long narrow rectangle above motor part 7. Use the existing nodes to
shape into a pipe something like this....
(Rename as Part 16)Okay, that's all of our motor parts. This is where your tractor should be now...
Ready to move on? *L* I know it's a lot of vectored parts but look at it this way,
by the time you finish this tutorial you'll be an old pro at vectoring in PSP 9. Besides,
the vectors are simple ones, nothing too hard about ovals and rectangles. *LOL*68. Make Raster 1 your active layer. Add a New Vector Layer. Preset Shape set to
Rectangle. Background color to the green.69. Draw out a narrow horizontal rectangle, look at the screenshot below to
see placement. Extend the rectangle out past the yellow circle....70. Convert to path, click on the Pen Tool. Start by moving the bottom left node
back toward the yellow circle some...71. Move the top right node up....
72. Add two new nodes on the bottom line about at the yellow circle. Change the
second node type to symmetric and move it down just a little until you have something
like this...73. Add two new nodes on the top line between the middle node and the right
end node. Move them up something like this.....74. Right click, choose Apply, convert to raster, rename as Part 17.
75. Add a New Vector Layer. Preset Shapes, Rectangle. Background color, green.
76. Draw out a small rectangle at the front of your tractor....
77. Right click, Apply, convert to raster, rename as Part 18.
78. Add a New Vector Layer. Preset Shapes and color same as above.
79. Draw out a vertical narrow rectangle to be the smoke stack....
80. Right click, Apply, convert to raster, rename as Part 19.
81. Add a New Vector Layer. Set your background color to the yellow. Preset
Shapes, Ellipse. Draw out a small oval at the top of your smoke stack. Right click,
Convert to path. Click on the Pen Tool. Pull up slightly on the top middle node to
make a dome. Adjust the other nodes so that you have a half circle like shape...82. Right click, Apply, convert to raster, rename as Part 20.
Hang in there, you're doing great! Just a few more vector pieces and we'll be through.
83. On your Layers Palette, make Raster 1 layer your active layer. Add a New
Vector Layer.84. Set your foreground color to the green, background should be off.
85. Make your Pen Tool your active tool and set to these settings.....
86. With this line setting, click once to start, then place your mouse where you want the
line to end and click once to stop.
Look at the screenshot below to see where to start and stop your line.87. Right click, Apply, convert to raster, rename as Part 21.
88. Add a New Vector Layer. Using the same Pen Tool settings EXCEPT, lower the
width size to 4 draw another line like shown in the screenshot below...89. Right click, Apply, convert to raster, rename as Part 22.
90. Preset Shapes, set to Ellipse. Leave your green as your foreground color, set
the line width to 4.91. Draw out a small oval at the end of your first line.....
92. Right click, Apply, convert to raster, rename as Part 23.
93. Add a New Vector Layer. Switch your green foreground color so that it is your
background color.94. Draw a small oval in the center of the last oval....
95. Right click, Apply, convert to raster, rename as Part 24.
96. Make Raster 1 your active layer. Add a New Vector Layer. Set your foreground
color to the yellow, background should be off.97. Make the Pen Tool your active tool. Uncheck Connect Segments, the rest of the
settings the same as we used for our other lines.98. Make an X on the inside of your larger oval....
Note: so that you could better see I've moved my center oval, but leave yours as is.99. Right click, Apply, convert to raster, rename as Part 25.
100. Look on your Layers Palette, make the very top layer your active layer.
Add a New Vector Layer.101. Set your background color to black, foreground should be off.
102. Preset Shapes set to Ellipse. Draw out an oval at the front of your
tractor to be the front tire....Right click, Apply, convert to raster, rename as Part 26.
103. Add a New Vector Layer. Set your background color to the yellow.
Draw out another smaller oval in the center of the black one...104. Right click, Apply, convert to raster, rename as Part 27.
105. Add a New Vector Layer. Set your background to black, foreground off.
Using the Ellipse preset, draw out another larger oval to the back of your tractor...
NOTE: Sharron Austin tested this tutorial for me. For her back tire she used the
Gear 5 preset shape that came with PSP 8 and it turned out really cute so use it
if you want. You can see her finished tractor at the bottom of the page.106. Right click, Apply, convert to raster, rename as Part 28.
107. Set your background color to yellow. Draw a smaller oval just off center of the
big black one....Right click, Apply, convert to raster, rename as Part 29.
108. Make Raster 1 layer your active layer, add a New Vector Layer.
Set your foreground color to the green, background should be off.109. Set your Pen Tool to these settings...
110. Draw a line as I have in the screenshot below...
111. Remember how to add a new node? Place your mouse pointer on the line while
holding the CTRL key on your keyboard until you see the +add and click. Place the
new node on the right upper area of your line....112. Right click on the new node and change the type to symmetric. Move the node up
to make a hump in your line.....113. Right click, Apply, convert to raster, rename as Part 30.
114. Switch your foreground color (the green) so that it becomes your background
color. Add a New Vector Layer. Preset Shapes set to Ellipse. Draw a small oval on
top of your line. Right click, Convert to Path. Click on the Pen Tool.115. Add two new nodes on the bottom of the oval and shape using the existing
nodes and the two new nodes something like this....116. Right click, Apply, convert to raster, rename as Part 31.
All we like vectoring is the inside wheel areas. The next steps will show you how I did
those. You can use the yellow or you can use the green as I have, I'm using the green
so that you can see better. If you choose to use the yellow, once you add shading
it will show.117. Make active your Part 29 layer. Set your foreground color to the yellow we've been
using, background should be off. Preset Shapes set to these settings....118. Draw out an oval as I have below...
119. Apply, convert to raster, rename as Part 32.
120. With the same settings as above, draw out another oval a little smaller than the
first....121. Apply, convert to raster, rename as Part 33.
122. Switch your foreground color so it becomes your background color.
Using the same preset shape to draw out a solid oval in the very center
of your wheel....123. Apply, convert to raster, rename as Part 34.
124. Using the same preset shape, draw out a small oval to be used as the lug nuts...

125. Apply, convert to raster, rename as Part 35.126. Go to Layer, Duplicate. Move this layer so that it is your bottom nut. Duplicate
the layer again, move the oval to the left side of the center. Click on the Deformation tool
to rotate the oval, duplicate that layer and move into position on the right side. This is
what you should have...127. Rename the lug nut layers, you should have Part 36, 37, & 38.
128. Make your front tile center your active layer, should be Part 27 layer.
129. Switch your background color so that it is your foreground color. Preset
Shapes to the Ellipse settings we used but change the width size to 2 instead of 4.130. Draw out two outline ovals just as we did for the back and a solid center oval.
Convert to raster and rename as you go (Parts 39, 40, & 41) ....Wahoo, THAT'S IT! You just vectored a tractor! Give yourself a pat on the back,
you've well earned it!Now, once you have applied shading and whatever else you want to add to the black tires,
you can duplicate the layers and move them behind so that the tractor has two large tires
in back and two small tires in front. This is my finished tractor after shading...Sharron's finished tractor...
Hints for shading!
On some of my pieces I used a cutout to shade them, on others I used an Inner
Bevel and on a few, I hand shaded them using the Airbrush.
For the black tires, I first applied a cutout using white as my shade color, I then
applied the Wave filter to get a knobby look to the tire. For the lug nuts, I first
applied a cutout, then the Button filter in PSP, then the Chrome filter that is also in
PSP.
To make the front of my tractor, I first shaded with the Airbrush then I selected
an area in the front and applied the Blinds filter to get a louver look. These are only
tips on how to do your finished tractor, try different things to see what works best
for you!I hope you've had fun doing this tutorial and will have fun shading your tractor!
Until next time... God Bless!
Connie
Designs By
Astro Index of Tutorials
Tutorial written August,
2005
© Copyright 2005 Designs By
Astro
All rights
reserved.