|




Scroll down
or click
here for alternative
versions.
Translated with
permission from the creator, Lien at X-clusive
Designz tutorial site.


See the original
tutorial here for PSP in Dutch
This
is not my tutorial, it belongs to Lien. If you
would like to translate into another language,
you must ask her permission.
You can contact
her here.
 
They will both open
in a new window and print out on standard 8½" X
11" paper
For
information about which fonts, programs, etc I
used to construct my pages and my headers,
click
here.
|
For this tutorial you will
need:
 or or 
I've done this
tutorial in PSP 9 and PSP XI.
I believe it
can be done in most versions.
You may have
to look around for the commands but it's likely
they are there.


Filters and materials
needed
Bordermania, available free here
Xero>Porcelain,
available free here (it's in set 1)
VM
Instant Art, available free here
Transparency>Eliminate
Black, available free here
Supplies
in zip file here.
Supplies in zip file here
for older versions if the other ones don't work
for you. These are in psd
format.
***********
Credits:
Tubes by
Sil
Angel
***********
My plugin
windows may look different from yours as I use
Filters Unlimited 2 to manage my plugins -
available for purchase here
http://www.icnet.de/filters_unlimited/
***********
I am assuming
you know the basics of Paint Shop Pro and where
the tools can be located. |
Here are some
arrows and bars you can drag and drop where you
need to mark or underline where you are. .
Just left click and drag to where you want
it then let go.
They will stay where you put
them until you close your browser.
       

 |
Preparation
Before
opening PSP, double click the font to open it
and leave them open
so it will be available
for use in PSP (or install it)
Put the
plugins into your plugin folder.
Put the mask
into your mask folder. If you are using an older
version of PSP,
put the jpg mask in your
mask folder or open it into PSP.
Now open
PSP. Open your tubes in PSP, duplicate them
(shift-D) and close the originals
None of the
tubes are used more than once, so each can be
closed after use. |
Step 2
Open a new
transparent image 640 x 480 pix.
Using your
flood fill tool, fill with color #e8f2f6 (very
pale blue). |
Step 3
Layers (or right
click in layer palette)>New raster layer
Effects>VM Instant Art>Vernissage -
default settings
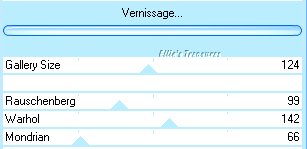


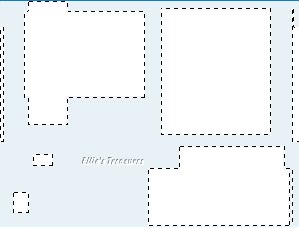
Activate your magic wand,
tolerance at 0, and select the white part then
click on your delete key.
Selections>Invert, hit your delete key
again.
Fill the selection with
white.
 |
Step 4
Effects>3D
Effects>Drop Shadow with the settings:
1,
1, 100, 1, color black

repeat with -1, -1.

Layer palette - layer
opacity to 23.


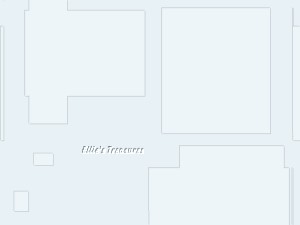
Deselect. |
Step 5
Layers (or right
click in layer palette)>New raster layer
Effects>VM instant Art>LightLines at
these settings: 212 - 133 - 139.


Image>Mirror
 |
Step 6
Effects>Transparency>Eliminate Black.


Layer palette - layer
opacity to 26.
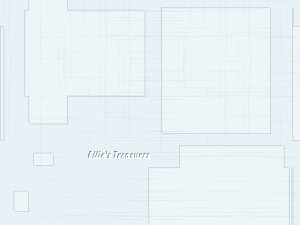
Layer palette - put
bottom layer on lock (click eye).
Layers (or
right click in layer palette)>merge
visible
Unlock the bottom layer. |
Step 7
Layers (or right
click in layer palette)>New raster
layer
Selections>Select all

Activate the tube
"Ml-PC-Seashoregarden"
Copy (control-C) and
Edit>Paste>paste into selection in your
working canvas

Layer palette - layer
opacity to 31.

Deselect |
Step 8
Activate the tube
"Sil12" - what a cute little guy!
Copy
(control-C) and paste as new layer (control-L)
in your working canvas
Move the tube to the
left with the foot exactly at the edge, as
shown
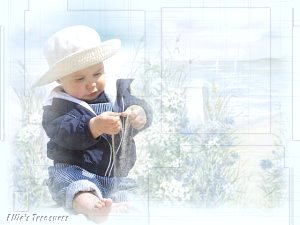

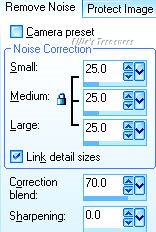
Adjust>PhotoFix>Digital
camera noise removal at these settings:
25-25-25-link detail sizes
checked-70-0
 |
Step 9
Effects>Xero>Porcelain - default
settings of 50-128-128-0-0-255


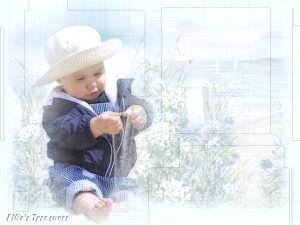

Eraser tool - size 50,
hardness 10 and opacity 13.


Activate your merged
layer, the one with the lines in it
Carefully
remove the lines from the boy tube.
Layers
(or right click in layer palette)>merge
visible
Layers (or right click in layer
palette)>Duplicate. |
Step 10
Layers>Load/Save
Mask>Load mask from disk.
If you are
using the opened jpg mask, go to Layers>New
Mask Layer>From Image
Find mask dmmask101
- source luminance, fit to canvas, invert
transparency
and hide all mask, all checked
- load. You won't see anything yet.
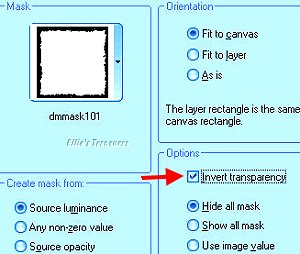

Layers>Merge
group
Effects>3D Effects>Drop Shadow
with the settings: -1, -1, 80, 10, color
#2121319 (very dark navy).
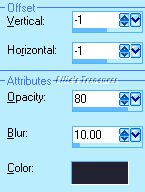

Now you'll see the mask
as a ragged outline.
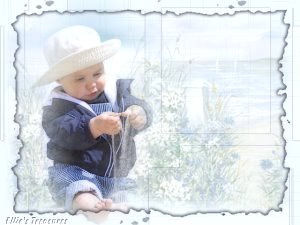

Repeat the Drop Shadow,
but now with 1. 1.
Layer palette - layer
opacity to 50.
 |
Step 11
Eraser tool, change
the size to 20, leave the rest the same as the
last time.
Staying in the mask layer,
carefully remove the mask from the boy's
foot.


Layers (or right click in
layer palette)>merge visible

Effects>Bordermania>Frame 2
at these settings:
3-3-110-30, bevel and
notch corners not checked
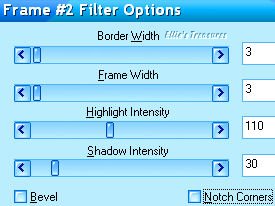

 |
Step 12
Layers (or right
click in layer palette)>New raster
layer
Fill the layer with #e8f2f6.
Layers>Arrange>send to bottom (or drag
the layer down in the layer palette) |
Step 13
Layer palette -
activate your upper layer.
Image>Resize>85%.
Resize all
layers not checked.
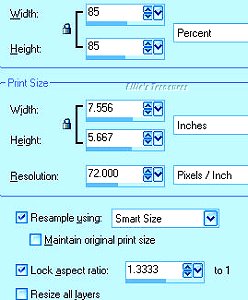

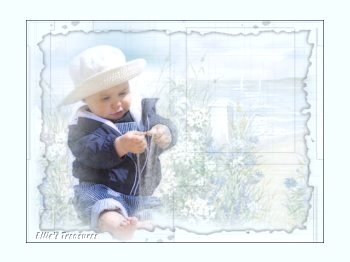

Adjust>Sharpness>Unsharp Mask
with the settings 1 - 64 - 4


Image>Add borders>1
pix black
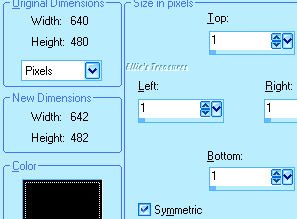 |
Step 14
Layers (or right
click in layer palette)>New raster
layer
Text tool - font is GabbyGauguinSH.


Background color
#e8f2f6. Foreground color on lock.


I made the first three
words (A touch of) smaller (48 pix) and the word
Summer larger (65 pix).
Make the top line
and the bottom word on two separate layers so
you can move them around separately. Convert
to raster layer after each line.

Drop Shadow: 1, 1, 100, 5
- color #2121319 as for mask shadow
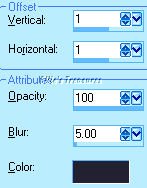

If the text is too large
for you, resize it (Image>Resize) using Smart
Size)
I reduced my text to 85%. You can use
the unsharp mask after reducing but I liked the
softer effect on this tag.
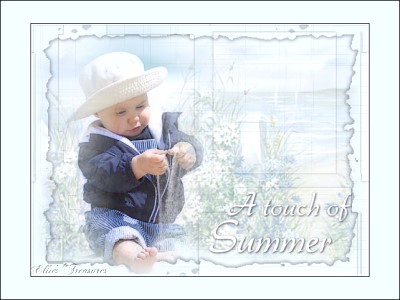 |
| You're done. If you
reduce the size, make sure you use your unsharp
mask at 1-64-4. |
Watermark
Layers>New
raster layer. Add your water mark on this new
layer
Layers>Merge>Merge all
(flatten) |
Save
File>Export>Jpeg
optimizer - compression of 20. |
l
hope you had fun!
Back
to top |
| If
you have any questions or suggestions, click on
the email button below to contact me. Have a
wonderful day! |
These
tutorials are translated with permission from
the original writer.
Any resemblance to any
other tutorial is purely coincidental and
unintentional.
Feel free to share any of my
tutorials on this site by a link back to my
site,
but do not copy and send the entire
tutorial to anyone or any group.
©2003-2007
Ellie's Treasures

|


 |
ALTERNATIVE
VERSION
Made by my
friend, Sonel of Sonel's
Corner
 |
|
Back
to top
Webpage Design
Information
This webpage
background was made in PhotoImpact with a
tutorial by Deb
DeHaven
Sadly, she passed away but
her tutorials just came back online, thanks to
PIRCNet.
You can find the tutorial
here.
The font I used for all of
the text on the buttons is BrockScript
The
font I used for the "A Touch of Summer" tutorial
header is flower1.
Click
on the font name to download the font.
I use
PhotoImpact to make all of my headers due to the
amazing
3D text it has and the wonderful
presets available free
online
Most of the presets I use
are either the ones that come with PhotoImpact,
usually the Gel ones,
or from Deb's PI
Tutorials and More (see below) or
Carol Oyl's
site
This is the address to
Deb's old pages
http://www.fortunecity.com/skyscraper/millenit/1716/pitutorials/objects/presets/presets1.html
I can't find any links to
her new pages but the presets are still on this
page for download.
For more sites
to find PI Presets, take a look at
my Great
Beginnings
page. |