
Sweethearts
This
tutorial is best viewed at 1024x768.
Please read my Terms of Use if you have any
questions.
At this time I am not allowing my tutorials to be
translated
so please don't ask!
All images are the sole property of ©
Designs By Astro
Do not copy, reproduce, make into Scripts or send through
email
without my prior written permission. A link is always
welcomed and
appreciated though!!
All rights reserved.
The image/images you make
using this tutorial
is your property to do with as you wish.
If you
have any questions or need further help you can Email
me
This tutorial assumes you have a working knowledge of Paint
Shop Pro, the use and location of tools
and vectors. This tutorial is
written for PSP 7 and 8. Instructions solely for 8 are in red.
Please be sure to SAVE your work as you go.
1.) Let's get started by opening a 500 x 500 transparent
canvas. We will be working first to make
our boy sweetheart. Remember while
you are working that on this same canvas we will also be making
our girl
sweetheart so make your boy to the left of the canvas. Your finished heart
should be about
center your canvas.
2.) Set your Background color to a nice skin tone. I'm using
#ECD0BC, foreground should be set to
null.
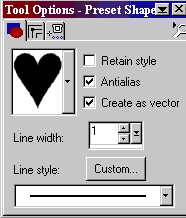
3.) Preset shapes, set to these settings...

![]()
4.) Draw out a small circle for the head. If you wish you can
node edit the circle to give it more of a
"face" shape like I did. Convert
to Raster, rename to head.

In PSP 8, once you have used the preset
shapes to draw your circle you must click on the Pen Tool to
go into Node
Edit mode. If you prefer to work with the color of your shape not showing, in
the Layer
Palette click on the eye to turn the color off. This will give you
the look of vectors like in PSP 7.
5.) Using the same skin color, Preset Shapes set to rectangle,
draw out a neck. Move the neck layer
underneath the head layer. Convert to
Raster and rename to neck.
6.) Making the hair is the next step. Set your background color
to a nice brown or whatever color hair
you'd like for your sweetheart boy to
have. I used #8E6738.
7.) Preset shapes set to head settings above. Draw out an oval,
node edit into the shape of hair. This
is what mine looks like...
(Screenshot enlarged to show node detail)

Once you're happy with your hair, convert to raster and rename to hair.
8.) PSP 7 instructions....The facial features will be next. For
my eyes I used the same brown that
I used on the hair but switched it to be
my foreground color. I added a New Layer and used the
Draw Tool set to
Bezier Line, width 1, Antialias checked to draw two small lines. Pulling down on
the
right bezier handle and up on the left handle creates a nice squiggly
line for the eyes. This is how
mine turned out. ( note.. I created this one
as a vector shape so that you could see how the handles
should be
placed.)....
Screenshot enlarged to show detail.

8.) PSP 8 instructions .... As you probably
know already PSP 8 doesn't have the Bezier line.
Using the Pen Tool set to
these settings....
![]()
Foreground color set to the hair brown color....Zoom in if you
need to. Place the first Node by clicking,
While still holding the click pull
over a little and let go. This will place two Nodes. Right click on the
Nodes
and change to Cusp. Pull up or down on the handles of the Nodes to get the eye
shape you
like....

Once you're happy with the eye, convert to raster, copy, paste
and mirror the eye layer and move
into position as the other
eye.
9.) I used the same settings on the Draw Tool/ Pen Tool to create a smile, a cute little nose and ears,
like
this...


10.) Once I had my facial features in, I selected the head
layer and applied a Cutout using the same
brown and these
settings...

11.) I also applied the same cutout to the neck layer.
12.) Next I worked on his shirt. With my Preset Tools set to
Ellipse and white set as my background
color, I drew out an oval and used
Node Edited to make the basic shape I wanted. I did not convert
the shirt to
raster at this time so that I could later adjust it to fit my overalls and hands
better.
Here is my basic shirt shape...

13.) For my overalls I used a nice red #B03434 set as my
background color. Preset Shapes set
to....
![]()
I drew out an upside down heart. The bottom of the heart
became his legs. I used Node Edit at
the tip of the heart to place some
extra nodes to split the point in half so that it became the top
of his
overalls.
Something like this...

Convert to Raster and rename as pants when you're happy with the look.
14.) Using the same brown #8E6738 I used for the hair, I
made his shoes. I used the Preset
Shape Ellipse to draw out a small oval,
then Node Edit to get this shape...

15.) I used a lighter brown for the detail on his shoes,
using the heart shape for the bow and a
Bezier Line/Pen
Tool for the strings. This is what I ended up with...

I merged the shoe layers visible, duplicated the layer and moved it into position as the other shoe.
16.) I then used the Heart Preset Shape to make little
details on his clothes and to make the Valentine
Card that is between the
two Sweethearts. This is what I have...

17.) Set your background color to the skin color #ECD0BC.
Preset shapes set to Ellipse. Draw out
a small oval to become his hand. Node
Edit to a mitten type hand, like this...

I also used the skin color and the Ellipse preset shape to
make the hint of a hand and thumb to
hold the heart card...

18.) I added a new layer and used the Draw Tool/ Pen tool set to freehand, foreground color #8E6738
to
draw lines to indicate fingers for the right hand. I then placed on a new layer
a rose I had made
following a tutorial written by John Frenzel.
This is what I have now....

19.) Once I had the details and the hands like I wanted, I
then went back to my shirt layer that
I left as a vector layer and made my
finial adjustments before converting to raster.

20.) Do any cutouts or details that you'd like to give your
boy his finished look but don't merge
your layers visible yet because we will
be using some of the layers for our girl. If you find you
don't have enough
room on your canvas to work then adjust the size of your canvas by going to
"Image" Canvas Size and setting the width and height to a larger
size.
21.) Making the girl. You can use the same head that you
used on your boy. Just Duplicate
the head layer and move it to the right of
your canvas placing it a little lower than your
boy so that she will be a
tad shorter.
22.) Chose the hair color you'd like to use for your girl. I
used #AD7F4D on mine. Preset
Shapes, Ellipse, vector a hair shape for your
girl. This is how I did mine...

23.) Convert the hair to Raster. Use the same settings and
hair color to make the back of the
hair, moving the layer below the head
layer. You can add some shading to your hair to give
it some contrast if you
wish. I used the Airbrush and different shades of brown on mine, then
applied
the Wave Filter to the shaded layer.
24.) Use the skin color and the Rectangle preset shape to
make a neck or you can duplicate your
boys neck layer if you
wish.
25.) Using the hair color, draw out the facial features
using the Bezier Line/Pen Tool just like you did
for the boy except I pulled up a little more and over on the right handle to
make a slight difference in
her eyes than in the boys.
Here is what mine
looks like at this point....

26.) For the girls shirt I duplicated and mirrored the boys
shirt. I then went to my Layer Palette
and unlocked my transparency, I flood
filled the shirt with the red I used for the boys overalls.
Screenshot below
shows unlocked transparent layer...
![]()

Note... when transparency is unlocked only where there is color
will be filled in when using the paint
brush or the flood fill tool.
Remember to lock transparency back once desired color is filled.
27.) I used white set as my background color to vector a
skirt using the Ellipse Preset Shape.
I placed the skirt layer under the
shirt layer. This is what I have...

28.) Set your background color to the skin color #ECD0BB.
Use this color to vector her hands.
I placed her left hand in a pocket on her
skirt and the right hand holding the card....

29.) Next, I duplicated her neck layer and used it as her
leg. I used Preset Shapes set to rectangle,
background color set to white to
make a sock. I then set the background color to #8EA69A, preset
shapes to
Ellipse to vector a shoe. I used the preset heart shape with white set as my
foreground
color to make the bow on her shoe.
This is my end
results...

30.) Merge Visible the leg, sock, shoe and bow layers.
Duplicate the merged layer and move into position
as the other finished
leg.
31.) Now comes the detail work for your girl. Using #8EA69A
as my foreground color, Draw Tool/Pen Tool
set to
Single Line, width 3, adding a New Layer, I drew out a straight line across the
bottom of my skirt.
PSP 8 settings for Pen Tool...
![]()
32.) To make the line look like rick-rack I went to Effects,
Geometric Effects, Wave and applied these
settings...


33.) I used the above technique to make her necklace also. I
drew out the line using white, applied the
Wave setting, then used the
deformation tool to rotate and scrunch the line to fit the neck area.
34.) To finish up the detail on the girl, I used the heart
shape to make a pendent for her necklace and
for her skirt and a bow for her
hair. I used the Draw Tool/Pen Tool to make a
"pocket" line for the left
hand. I then used the Airbrush to apply a little
"blush" to her cheeks. Here is my finished girl..

That's it, you're finished! You can place your Sweethearts in any setting you'd like!
Until next time... God
Bless!
Connie
Designs By
Astro Index of
Tutorials
Tutorial written January 22,
2004
© Copyright 2004 Designs By Astro
All rights reserved.