
Supplies
Paint
Shop Pro
Filter
Factory M - Radial Loom
Unzip to your
Plugins Folder
Gold
Pattern
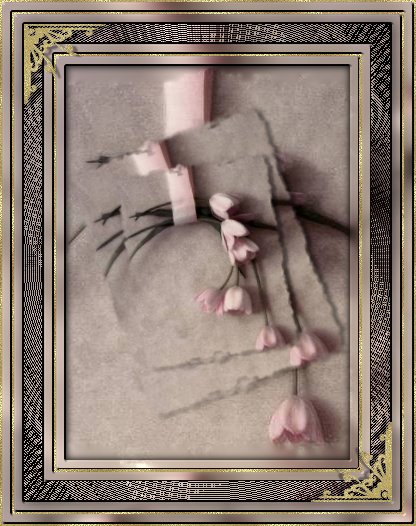
Graphic of choice
1.
Open graphic, duplicate twice and close
original.
Minimize one copy of
the graphic on your workspace.
Set background to white.
2. Set foreground styles palette to
pattern and choose the 2nd copy of the graphic.
3. Add 10px border - select with magic
wand.
Flood fill border with
pattern.
Keep selected.
4. Effects - Blur - Gaussian Blur -
Radius - 7.00.
Keep selected.
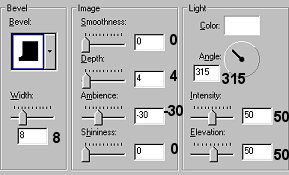
5. Effects - 3D Effects - Inner Bevel
Selections - Invert
6. Effects - 3D Effects - Cutout
Vertical - 2
Horizontal -
2
Opacity - 60
Blur - 10
Repeat
Cutout - Vertical and Horizontal -2
Select
none
7. Set foreground
pattern to gold fill.
8. Add 2px border
- select with magic wand.
Flood fill
with pattern.
Select none.
9. Set foreground pattern to the 2nd
copy of the graphic.
10. Add 10px border
- select with magic wand.
Flood fill
with pattern.
Keep selected.
11. Effects - Blur - Gaussian Blur -
Radius - 7.00
12. Effects - 3D Effects -
Inner Bevel.
Apply the same
settings as in Step 5.
Select
none.
13. Set background colour to
#000000.
You may need to adjust this
colour if your picture is darker than mine
as the following pattern may not show up
correctly.
14. Add 25px border - select
with magic wand.
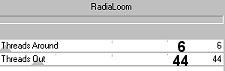
15. Effects - Plugins -
Filter Factory M - Radialoom
Keep selected
16. Effects - 3D Effects - Inner Bevel.
Apply the same settings as in
Step 5.
Select none.
17.
Set background back to white - foreground should
still
be set at pattern - 2nd copy of
graphic.
18. Add 10px border - select
with magic wand.
Flood fill with
pattern.
Keep selected.
19.
Effects - Blur - Gaussian Blur - Radius - 7.00.
Keep selected.
20. Effects -
3D Effects - Inner Bevel.
Apply
the same settings as in Step 5.
Select none.
21. Repeat
Steps 7 & 8.
22. Set foreground
pattern to 2nd copy of the graphic.
23.
Add 10px border - select with magic wand.
Flood fill with pattern.
Keep selected.
24. Effects - Blur -
Gaussian Blur - Radius - 7.00.
Keep
selected.
25. Effects - 3D Effects -
Inner Bevel.
Apply same settings as
Step 5.
26. Repeat Steps 7 & 8 once
more.
I added a couple of corners to mine but
that is your personal choice.
I hope you
have enjoyed this tutorial.

Tutorial
© Marlie 2003
|