|




Click
here or scroll down for an alternative
version
Translated with
permission from the creator, Futura.


See the original
tutorial here for PSP in Italian.
Tutorials are password protected, email
her to get the password.
This is not my
tutorial, it belongs to Futura. If you would
like to translate into another language, you
must ask her permission.
You can contact her
here.
 
They will both open
in a new window and print out on standard 8½" X
11" paper
For
information about which fonts, programs, etc I
used to construct my pages and my headers,
click
here.
|
For this tutorial you will
need:
 or or 
I've done this
tutorial in PSP 9 and PSP XI. I believe it can
be done in most versions.
You may have to
look around for the commands but it's likely
they are there.


Filters and materials
needed
FM Tile Tools, available for trial
or purchase here (blend emboss is one that
keeps working when trial is
done)
Xero>Porcelain, available free here - it's in set
1
Supplies in zip file here.
Supplies in zip file here
for older versions if the other ones don't work
for you. These are in psd format.
The
supplies folder contain everything needed to
make the tag, including alternative words to
make it good for any
year.
***********
Credits
The
Father and Baby tube by Jet, the large flower tube by
LizzyTish, the scrap elements
are from Kit 03 by GwynGrafica
If you would
like to share the tubes, please respect the
tuber and leave the watermark layer
intact.
The original tutorial writer, Futura,
requests that if you use the results of her tut,
please provide a link back to her site
(http://www.futura1.altervista.org/)
***********
I
am assuming you know the basics of Paint Shop
Pro and where the tools can be
located. |
Here are some
arrows and bars you can drag and drop where you
need to mark or underline where you are. .
Just left click and drag to where you want
it then let go.
They will stay where you put
them until you close your browser.
       


Here's a small
version of the tag that you can drag with you
for reference
 |
Preparation
Before
opening PSP, double click the fonts to open them
and leave them open
so they will be
available for use in PSP (or install the
fonts)
Put the plugins into your plugin
folder.
Now open PSP. Open your tubes in PSP,
duplicate them (shift-D) and close the
originals
Only one of the tubes are used more
than once, so each can be closed after use,
except for "Sfondo 2" (floral
background). |
Step 1
Create a transparent
canvas 700 X 500
Foreground color #848487
(dark grey) color background #c0c0c0 (light
grey)
Change foreground to gradient: angle
45-repeats 1


With your bucket fill
tool, fill the canvas with the gradient
 |
Step 2
Selections>Select
all (control-A)
Activate
"sfondo1"
Edit>Copy (control-C)
Return
to your canvas
New raster
layer
Edit>Paste into selection
Deselect |
Step 3
Activate
"sfondo2"
Edit>Copy (control-C)
Return
to your canvas
Edit>Paste as new layer
(Control-L)
Image>Resize 135%, resize all
layers unchecked
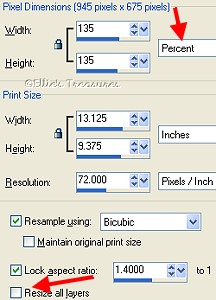

In layer palette, slide
opacity to 92%


3D Effects>Drop Shadow
2/2/50/4
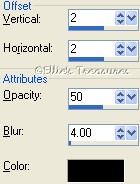

Repeat Drop Shadow with
-2/-2
 |
Step 4
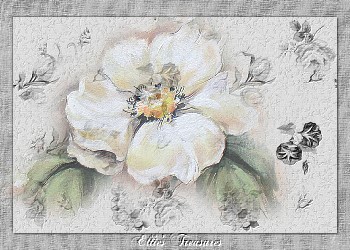
Activate tube "Fiore"
(flower)
Edit>Copy (control-C)
Return
to your canvas
Edit>Paste as new layer
(Control-L)
Move the tube up and to the
center
Opacity to 64 %
Effects>FM Tile
Tools/Blend Emboss at default settings of
-1.000/-1.000/0.250/64/0.938/0.938/0.938
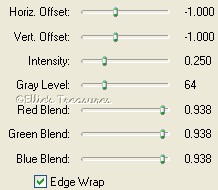

 |
Step 5
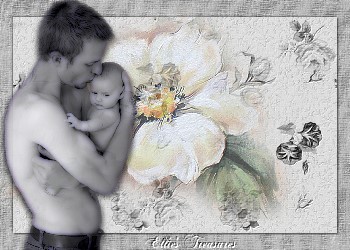
Activate tube
"papa"
Edit>Copy (control-C)
Return to
your canvas
Edit>Paste as new layer
(Control-L)
Image>Mirror
Move the tube
to the left
Opacity to 94%
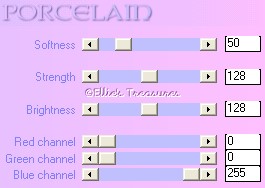
Effect>Xero>Porcelain at default
settings of 50/128/128/0/0/255

3D Effects>Drop Shadow
5/5/50/11
 |
Step 6 (if you want to be able
to change the date on tag, do steps 6 to 10
after doing final border, then save as psp
file in layers so you can change the
dates
or words on the tag, skip to step 11 now if you
want to do it this way)
Activate tube
"cornice" (frame)
Edit>Copy
(control-C)
Return to your
canvas
Edit>Paste as new layer
(Control-L) |
Step 7
Activate tube data
(for Italian) or Happy Father's Day or We Love
You Dad (for English)
(I've left it in
layers so you can change the dates or words. I
used the font "TinplateTitlingBlack" for the
date
and "Tiranti Solid LET" for the "Happy
Father's Day" and for the We (I) Love You Dad,
all words are on a separate layer for you to
choose from - both fonts are in the
supplies)
Edit>Copy (control-C)
Return
to your canvas
Edit>Paste as new layer
(Control-L)

In your layer palette,
pull this layer under the frame layer and place
it so it shows properly
If necessary, use
your deform tool to make this layer fit properly
under the frame ( see my tag)
Highlight the
top (frame) layer and right click and Merge
down

3D Effects>Drop Shadow
2/2/50/4
Opacity to 82%

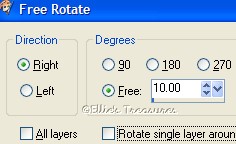
Image>Rotate>Free
rotate 10° to right

Move it up to right
Image>Resize, uncheck resize all layers
and resize to
80%
Adjust>Sharpness>Unsharp mask set
at 1-60-4


 |
Step 8
Activate the tube
"fiorellini" (flower corner)
Edit>Copy
(control-C)
Return to your
canvas
Edit>Paste as new layer
(Control-L)
Move it onto the bottom right
corner of the frame from the last step (see
tag)
 |
Step 9
Activate tube "fiocco
2" (tiny bow)
Edit>Copy
(control-C)
Return to your
canvas
Edit>Paste as new layer
(Control-L)
Move it to left side of the frame
worked on in step 7 (as shown in tag)
 |
Step 10
Activate the tube
"ribbon" (ricrac)
Edit>Copy
(control-C)
Return to your
canvas
Edit>Paste as new layer
(Control-L)
Move it up and to the right (see
my tag)
3D Effects>Drop Shadow 2/2/50/4
 |
Step 11
Activate the tube
"corner" (silver divider)
Edit>Copy
(control-C)
Return to your
canvas
Edit>Paste as new layer
(Control-L)
Move it up and to the
center
3D Effects>Drop Shadow 2/2/50/4
In the layer palette, drag it below the tube
of the man so it goes behind his head,
if
you haven't renamed the layers, it should be
raster 5
 |
Step 12
Activate the tube
"bottone" (button)
Edit>Copy
(control-C)
Return to your
canvas
Edit>Paste as new layer
(Control-L)
Move it up and to the
left
Layers>Duplicate
Image>Flip/Image>Mirror,
this will put the duplicate in the bottom right
corner
3D Effects>Drop Shadow 2/2/50/4 on
each one
 |
Step 13
Activate the tube
"targhetta" (nameplate)
Edit>Copy
(control-C)
Return to your
canvas
Edit>Paste as new layer
(Control-L)
Move it down and to the right
3D Effects>Drop Shadow 2/2/50/4
 |
Step 14
Activate the tube
"fiocco" (ribbon)
Edit>Copy
(control-C)
Return to your
canvas
Edit>Paste as new layer
(Control-L)
Move it onto the nameplate, as
shown
Layers>Merge visible
 |
Step 15 (if you will want to
change the name on this little metal tag later,
do this step last)
In your material palette,
change your foreground color to null (click on
the circle with the diagonal line)
Make your
background a suitable color or gradient, I used
a silver gradient.
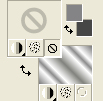

With your text tool, set
to Vector, with a beautiful font of your choice,
type your name
I used TinplateTitlingBlack,
size 20, and a silver gradient


Right click in layer
palette and convert to raster layer
3D
Effects>Drop Shadow 1/1/50/1
 |
Step 16
Image>Add border
of 1 pixel color #848487 (med grey)


Image>Add border of 7
pixel white
Select with your magic
wand
Activate again "sfondo 2"
Edit>Copy (control-C)
Return to your
canvas
Edit>Paste into selection
Adjust>Blur>Gaussian blur set at 18

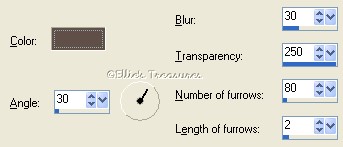
Effects>Texture
effects>Fine Leather with the following
values: 30/30/250/80/2 /color #604f46 (dark
brown)

Selections>Invert
3D
Effects>Drop Shadow 3/3/50 /4
Repeat with
-3/-3
Deselect
Image>Add border of 1
pixel color #848487


Do steps 6 to 10 now
if you have saved these steps to do last. To get
the ricrac cut off at the border,
I selected
around the inside of the border, then
highlighted the ricrac layer, inverted selection
and hit delete.
This will trim the ricrack
to rest inside of the border.
You can do step
15, adding the text to the nameplate, now also,
if you saved this step till last.
If you now
save it as a pspimage in layers, you can change
the date in the tag and the name on the
nameplate when you choose.
See below (or
click here)
for an alternate version I did without using a
date.

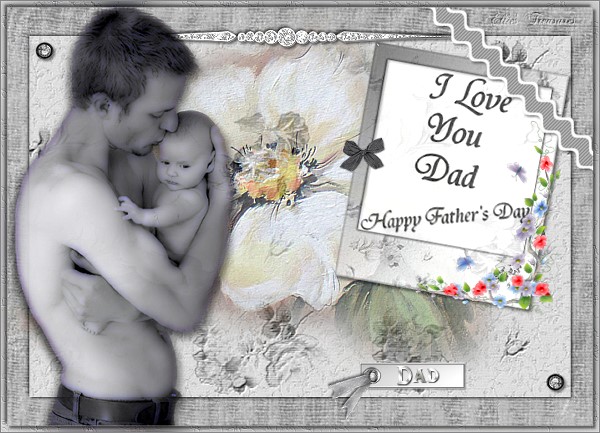
You're done, save as a
jpg, gif or png |
Resizing
To resize,
make sure, to retain the texture and the
clarity, resize at 90% bicubic and repeat till
you get close to the size you want.
At that
point you can resize by pixels as usual. You
will find this makes a big difference in your
final result.
If you resize, use the unsharp
mask or Brightness/Contrast to sharpen it a bit.
Adjust>Sharpness>Unsharp mask at
Radius 1, strength 60, clipping 4.
or
Adjust>Brightness and Contrast set
to Brightness of 5-contrast of 15. |
Watermark
Layers>New
raster layer. Add your water mark on this new
layer
Layers>Merge>Merge all
(flatten) |
Save
File>Export>Jpeg
optimizer - compression of 20.
File sizes:
jpg is normally smallest, gif is a bit bigger
and png is the largest file size |
l
hope you had fun!
Back
to top |
| If
you have any questions or suggestions, click on
the email button below to contact me. Have a
wonderful day! |
These
tutorials are translated with permission from
the original writer.
Any resemblance to any
other tutorial is purely coincidental and
unintentional.
Feel free to share any of my
tutorials on this site by a link back to my
site,
but do not copy and send the entire
tutorial to anyone or any group.
©2003-2008
Ellie's Treasures

|


 |
Alternative
Version
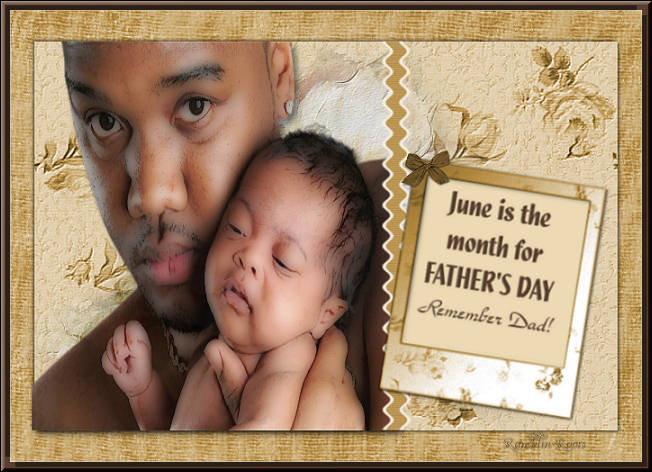
This one doesn't
have my name on it and no specific date so can
be used for any year.
By my
friend Bobbi, of Ramblin
Roots
 |
|
Back
to top
Webpage Design
Information
This webpage
background was made in PhotoImpact with a
tutorial by Deb
DeHaven
Sadly, she passed away but
her tutorials just came back online, thanks to
PIRCNet.
You can find the tutorial
here.
The font I used for all of
the text on the buttons is BrockScript
The
font I used for the "Festa del Papà" tutorial
header is BrockScript.
(Click
on the font names to download the fonts.)
I
use PhotoImpact to make all of my headers due to
the amazing
3D text it has and the wonderful
presets available free
online
Most of the presets I use
are either the ones that come with PhotoImpact,
usually the Gel ones,
or from Deb's PI
Tutorials and More (see below) or
Carol Oyl's
site
This is the address to
Deb's old pages
http://www.fortunecity.com/skyscraper/millenit/1716/pitutorials/objects/presets/presets1.html
I can't find any links to
her new pages but the presets are still on this
page for download.
For more sites
to find PI Presets, take a look at
my Great
Beginnings
page. |