1. Place the mask in your masks
folder Unzip the gold and image, open both on
your workspace
Duplicate the image and
close the original Choose 2 colors from your
graphic - set the darker color as the
foreground and the lighter color as the
background
Set the foreground pattern to
the gold
2. Add 2px border Select and
fill with the gold pattern Selections -
Invert Effects - 3d Effects -
Cutout Select none
3. Add 1px border -
black
4. Add 2px border Select and
fill with the gold pattern Select none
5. Add 1px border - black
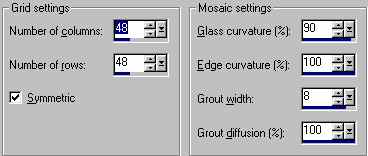
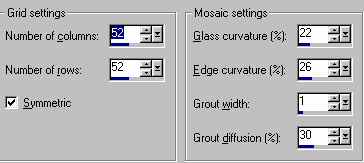
6. Add
5px border Selct and fill with the dark
color Effects - Texture Effects - Mosaic
Glass Select none
7. Add 1px border -
black
8. Add 5px border Select and
fill with the gold pattern Select none
9. Add 1px border - black
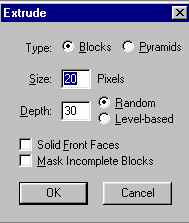
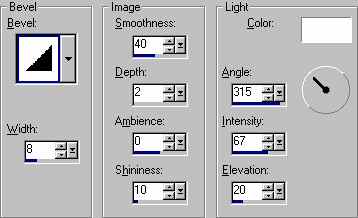
10.
Add 15px border Select and fill with the dark
color Effects - Stylize - Extrude Select
none
11. Add 1px border -
black
12. Add 2px border Select and
fill with the gold pattern Select none
13. Add 1px border - black
14.
Add 5px border Select and fill with the gold
pattern Select none
15. Add 22px
border Select and fill with the dark
color Effects - Plugins - Funhouse -
Evanescence
Select the magic
wand and click on the solid green parts (use
your own co-ordinating color) Effects -
Texture Effects - Mosaic Glass Select none
18. Add 2px border Select and
fill with the gold pattern Select none
19. Add 1px border - black
20.
Add 5px border Select and fill with the gold
pattern Select none
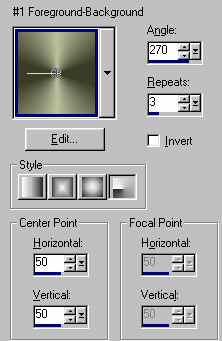
21. Set the
backgorund to gradient and set as follows:
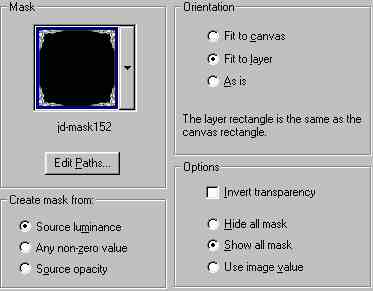
22. Add 27px
border Select and fill with the
gradient Layers - New Raster Layer Fill
with the gold pattern Layers - Load/Save Mask
- Load Mask From Disk
Layers - Merge -
Merge Group Select none
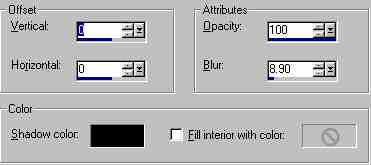
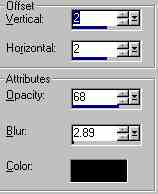
23.
Selections - Select All Selections -
Float Effects - 3d Effects - Drop Shadow
Select
none Layers - Merge - Merge All
24.
Add 1px border - black
25. Add 2px
border Select and fill with the gold
pattern Select none
I hope you
have enjoyed this tutorial If you have any
questions, please feel free to email me