Oriental
Painting
This tutorial is best
viewed at 1024x768.
Please read my Terms of Use if you have any questions.
At this
time I am not allowing my tutorials to be translated
so please don't
ask!
All images are the sole property of © Designs By Astro
Do not
copy, place on CD, make into Scripts or send
through email without my prior
written permission.
A link is always welcomed and appreciated though!!
All rights reserved.
The image/images you make using this tutorial
is your property to do with as you wish.
If you have any questions
or need further help you can
Email me
Tutorial written Sept 27, 2006.
This tutorial is written using PSP X but can done in other version with a little
modification of tool locations.This is a vector tutorial so a working knowledge of PSP and vectors will come in handy.
I don't recommend this tutorial for true newbies. If this is your first time vectoring,
I suggest you give my Vectors 101 tutes a try first before attempting this tutorial.
You can find them listed on my Tutorial Index page.
SAVE OFTEN!You will need this font or some type of Asian.
Let's get started!
1. Open a 500X650 transparent canvas. Flood fill Raster Layer 1 with #dadbd3
2. Set your foreground color to #a3a28d
3. Activate your Airbrush with these settings.....
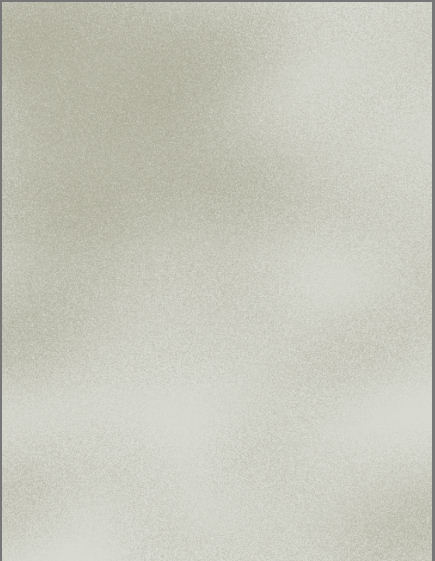
4. On Raster 1 layer, spray color on your canvas. Start on the left top edge of the canvas
and spray in a crossword motion. Continue down the canvas to the bottom. Come back to the
top left and spray some darker areas. This is what I have......5. Go to Adjust, Add/Remove Noise, Add Noise and apply these settings...
Note.. you can adjust the level of noise if you need to. We are going for a rice paper look.
6. Activate your Smudge Tool with these settings...
7. Lightly and I do mean lightly, smudge some of the areas to blend them. Mainly, you want the
outer right side blended a little and a little in the top left area....8. Set your background color to #7a7e7d and your foreground color to #404040
9. Preset Shapes set to Ellipse with these settings......
Notice the width is set to 1.10. Draw out a small oval in the left bottom corner of your canvas. This will be our sitting rock.....
11. Right click on your canvas and select, Convert to path. Click on your Pen Tool.
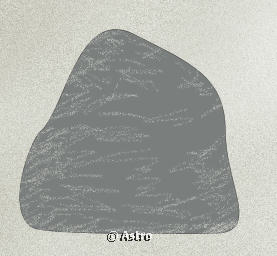
12. By adding a node on both sides of the bottom node and shaping the existing nodes, I shaped
my oval like this....13. Convert the Raster and rename as Rock.
14. Activate your Eraser Tool and set to these settings...
15. Lightly erase areas on your rock something like this....
16. Go to Adjust, Add/Remove Noise, Add Noise. Same settings we used above, except
set the noise to 20.17. In your Layers Palette, set the Opacity on your Rock layer to around 70 (it doesn't
have to be exact).Save!
18. Leave your foreground color set to #404040, set your background color to #f4ffff
19. Activate your Preset Shapes, same settings as for the rock.
20. Draw out an oval about center your canvas....
21. Right click on your canvas, Convert to path, click on the Pen Tool.
22. I started out using the existing nodes to get a rough shape of the lady's bottom
sitting on the rock....23. The screenshot below will show you the steps I took to shape her body....
24. Once you're happy with your body shape, convert to Raster and rename as Body.
25, Apply a Noise setting of 18.
26. Preset Shapes same as above, Draw out a small oval to be her right arm....
27. By adding one new node and using the existing nodes, I shaped mine like this...
28. Convert to Raster, rename as Arm. Apply the same Noise settings to the arm.
29. Activate your Eraser Tool, Size 8, Hardness, Density and Opacity set to 100.
Erase some of the line between her back and body.....Save!
30. Set your background color to Black, foreground should be turned off.
31. Preset Shapes set to the same settings as for the body and rock.
32. Draw out an oval above her body...
33. Using the existing nodes, shape your hair something like this...
34. Convert to Raster, rename as Hair.
35. Set your foreground color to #404040 and your background color to #ccbba9.
Preset Shapes set to our Ellipse settings.36. Make your Rock layer your active layer. Draw a small oval for her right hand.
Convert to path and use the Pen Tool to shape it something like this........37. Convert to Raster, rename as Hand.
38. With the same settings as for the hand, draw out another small oval at her foot...
39. Convert to Raster, rename as foot.
Save!
40. Make your Hair layer your active layer. Preset Shapes same as above. Set your background
color to #c91e0d leave your foreground set to the dark gray.41. Draw out a small oval to be her hair bow. Convert to path, click on the Pen Tool. Move the bottom
and top nodes in a little to meet in the center...42. Convert to Raster, rename as Bow.
43. Make your top layer, should be your Bow layer, your active layer. Add a New Raster
Layer naming it Grass.44. Activate your Paintbrush and set to these settings...
45. Set your foreground color to #404040, background doesn't matter.
46. On this new layer, draw a small bush and grass along the rock bottom....
47. In the Layers Palette, lower the opacity on the grass layer to around 65.
48. Make your background layer your active layer, add a New Raster Layer naming
it Tree. Change the size of the Paintbrush to 10, all other settings the same.49. Draw out a large branch to the left top of your canvas. Lower the size on your
paintbrush to make smaller branches....50. Make your top layer your active layer. Add a New Raster Layer naming it Text.
Make your dark gray your background color, foreground off. Use the Japanese font
to write something down the right side.. Mine says Peaceful!That's it, merge your layers flat, add a frame or a nice border!
Until next time, God Bless!
Connie
Designs By Astro Index of
Tutorials
Tutorial written September,
2006
© Copyright 2006 Designs By Astro
All rights
reserved.