Ninjie Turtle
Please read my Terms of Use before doing my tutorials.
All images are the sole property of Designs By
Astro
Do not copy or reproduce in any
manner
without prior written permission.
Feel free to LINK to any of my tutorials.
©2001 Designs By Astro
All images created using this tutorial or any of my
other
tutorials are YOUR property to do with as
you please.
If you have any questions or need
further help you can
Email me
Some of the screenshot in this tutorial have been
resized and colors lowered to save on load time,
the images may not look the same as what yours
will.
This tutorial is written using PSP7 but should
work in PSP6. Note: that if 6 is used the
position of the tools, effects, and filter will be
different or not available with 6.
This tutorial uses vectors and assumes you have a
working knowledge of PSP using Vectors and Nodes.
Let's get started.
Open a 500x450 transparent.
Background color to a turtle green, I'm using
#0EA40E
Ellipse, create as a vector Checked, Antialias
Checked.
At the top right of your palette
draw a medium size oblong oval.
Let's edit
the oval. Click on Object Selector then right click on your palette, select Node
Edit. Place a node on both sides
of the
top node like this...

Grab the left node you just added and bring it inward a
little. Use the arrows to round out the top. Do
the same thing with the right node you added. You want
something that looks sort of like an alien
space ship *L*.... Like this..
When you are happy with the look, go to Layers, Convert to
raster and rename as head if you want.
Add
a new layer and lets make him two eyes and a mouth.
I hope you've been saving as we've been going
along?? If not please do so now incase your computer
decides it's had enough of playing in PSP for awhile *L* Go
to File, Save As, and save as a PSP file.
Now after every couple of steps just go to File and click
save.
Add a new layer...
With black as your foreground and white as your
background use the Ellipse preset shape, Line Width 2, Create as a vector
UNChecked, draw out an oval for the
eye.
Add a new layer....
Switch the colors so that black is the background
and make your foreground Null.
Make
another ellipse smaller than the first to be the center of his eye.
Add a new layer..
Foreground color back to white. Click on the
paintbrush tool
Round
Size 3
Hardness
41
Opacity 100
Step 100
Density
100
Paint a couple of connecting dots on
the left side of the center of the eye. Go to Effects,
Blur, Gaussian Blur, radius of 3. Close all layers but the
3 eye layers and merge visible.
Go to
Layers, Duplicate, Image, Mirror. Move into position as the right
eye.
Make visible all layers...
Add a new layer...
Foreground color black...
With your draw tool, Freehand line, width 2, antialias
Checked, Solid line.
Draw out a mouth and
some brows.
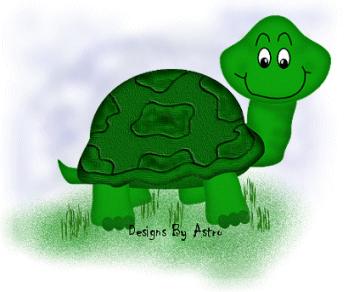
You should end up with
something like this...
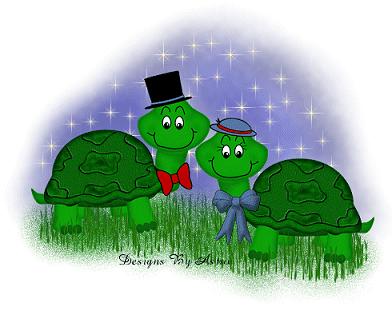
Now isn't he looking cute??? He reminded me of the Ninja
turtles my sons loved as kids.
Add a new layer..
Using the Airbrush (setting below), foreground
color a darker green, I'm using #0D670D

Spray some highlights just above the corners of his mouth
and some on both sides of his eyes
where
the curve of his face is. You should have something like this...
Go to Effects, Blur, Gaussian
Blur, radius of 5 or 6.
Close Layer 1 and merge visible all face layers. Go to Selection,
Select all, Selection, Float.
Effects, 3D Effects, Cutout and apply these
settings...
Deselect
You may want to hit that save button about
now!
Add a new layer and let's work on making this
fellow a body!
With Layer 1 your
active layer, foreground Null, background the turtle green #0EA40E we used for
his head.
Preset shapes, Ellipse. Draw out
an narrow oval something like the one below..
Click Object Selector then right click on the palette and
chose Node Edit. Add 4 extra Nodes to the 4 that
are already there.
Look at the image below to see the positions of the nodes
and how the oval should look
after a
little editing..

Kind of looks like a stocking
doesn't it?
When you are happy, convert to
raster and name neck.
Go to selections,
Select all, Selection, Float.
Add a new
layer and lets put some highlights on his neck using the AirBrush with the same
settings as
we used for the face area,
using the darker green #0D670D
Something like this...
Go to Effects, Blur, Gaussian
Blur, radius of 5
Deselect..
Hide Layer 1, the face layer and merge visible those two layers.
Go to Selections, Select all, Selection, Float.
Apply a cutout with these
settings..
Deselect..
Let's work on making him a shell...
Background color set to the dark green #0D670D,
foreground Null.
Preset shapes tool set to
Ellipse
Draw out a large oval behind his
neck area but overlapping the neck some. Leave some room at the
back of his shell so that we can add a cute little tail
later on. Something like this..
Click the Object Selector, then right click on your palette
and chose Node Edit.
Add 6 extra Nodes,
Note the position I have them on the screenshot below.

Grab Node 1 and pull it out and to the left until you get
something that looks like this
Now take Node 2 and pull the right handle down a little to
round out the area between Node 1 and 2.
This should also put a dip inwards between Node 2 and 3,
that's what we want. Continue with
Node 3,
the Node that was already there, 4, & 5 to get the dip in-between all of
them. You should
have something that looks
like this..
Now take Node 6 and pull it
down and out to the left a little, (not to much because we want to leave room
for the
tail.) You want something that
looks kind of like this..

If you find the shell has used to much of the area behind
him that you won't be able to put a tail just use the
Vectors to resize it before converting to raster. I also
used the vectors to tilt my shell upward in the front a little.
When you have his shell the way you want it, go to Layers
Convert to Raster.
Go to Selection, Select all, Selections,
Float.
Add a new layer...
With black as your foreground color and your Draw
Tool set to the settings below...

Let's Draw a line starting from the left side of the shell
and try to follow the dips that are in the
shell. Something like this..
 Continue to draw patches on his shell like
this.
Continue to draw patches on his shell like
this.
Add a New Layer..
Make your foreground color #0EA40E. Switch to the AirBrush
Tool with these settings..
Spray the areas inside of the black lines you made. Now
make your foreground color Black and spray a
little black in the line areas. Don't forget the area below
the long line you drew, spray some green and black
there also. Go to Blur Gaussian Blur with a radius of
3.
Go to Selections, Invert, make the layer that you
drew the lines on your active layer and hit the delete key.
Make the layer with the Airbrushing your active layer and
hit the delete key. This should remove any
areas that you over sprayed on.
Select None..
Close
the head Layer and Layer 1, merge the shell layers visible.
Make your shell layer the active layer.
NOTE... You can leave the shell just like this if you want.
If so skip the next section
and go to the
sections where we apply the cutout to the shell.
Let's add a little texture to his shell..
Go to Effects, Texture Effects,
Straw-Wall.
First click on the Presets,
(where I have the arrow pointing) Select Custom 1
Then set the other settings to what is in the screenshot
below..
Add a New Layer and apply a
cutout using these settings...

Add another layer and apply the same cutout but with minus
3 for both Vertical and Horizontal.
Deselect, Hide all layers except the shell and the cutouts,
merge visible. Rename to shell. You
should
now have something that looks like the image below....
Make Layer one your active layer.
Let's make some feet for the little
fellow.
Make your background color #0EA40E
Preset Shapes tool Ellipse, same settings as
before..
Draw out a small oval, about
where the first dip is behind the neck, click Object Selector, then right click
on the
palette, select Node Edit.
Place one Node to the left of the bottom Node
that's already there. Bring it down to square off the
bottom of the foot, something like this...

Now use the vector handle to turn the foot slightly upward
if you rotated your shell upward.
Convert
to Raster. Copy and paste this foot as a NEW IMAGE to use later.
Back to the original image...
Switch the background color to the darker green #0D670D and
lets put 3 circles on his foot
that looks
sort of like toes, You can make one toe then convert to raster and copy and
paste
as new selection for the other two
toes if you wish. Like this...

Close all layers except the foot and toe layers,
Merge them visible.
Go to Selections,
Select All, Selections, Float.
Add a new
layer and apply a cutout with these settings...
Close all layers except the foot layer and cutout layer,
merge visible. Rename to rt front foot.
Make visible all layers, leaving the foot layer as
your active layer. Go to Layers, Duplicate and move into
position as the back foot, use the deformation tool to
rotate it if you wish, rename to lt front foot.
Now remember that foot we copied and pasted as a new layer?
Make it active and copy it, then make your
original image active, Top layer your active layer, paste
it as a new layer. Move it down to where your
front right foot is, Now on you layer palette take that
layer and drag it down to be the layer above Layer 1
so that it is behind all the other layers. You should have
something that looks like this..

Go to Selections, Select All, Selections, Float.
Add a new layer and apply a cutout using these
settings...
Close all Layers but those two
layers and merge visible. Rename to rt back foot. Go to Layers, Duplicate
and move into positions as the back left foot.
Rename to lt back foot.
Your image should
look something like this now..
Make your rt BACK foot the active layer..
Set your foreground color to the dark green
#0D670D
Preset Shapes Ellipse
Draw out a long but narrow oval that will make
his under shell, something like this..

Click the Object Selector then right click on the palette,
chose Node Edit. Move the right front Node up so that it
disappears into his neck.
Like this..
Convert to Raster
Selections, Select All, Selections, Float.
Apply a cutout using these settings..

Deselect..
Now for that cute little tail..
Make Layer1 your active Layer.
With your background color #0EA40E Preset Shapes
Ellipse,
Draw out a small oval, right
click on the palette, Node Edit,
Pull up
on the left node to make the tail angle up a little. Then pull a little on the
right node to make it longer.
You want
something that looks like this..
Layers Convert to Raster.
Selections, Select All, Selections, Float.
Apply a cutout using these settings..
Deselect..
Hide Layer
one , Merge ALL layers Visible. Copy and paste to get rid of any excess! There
you have
Ninjie all ready to export as a
tube or whatever you want to do with him.
Here are a couple more examples of what I did with
him/her..
Designs By
Astro Index of
Tutorials
© Copyright 2001 Designs By
Astro
All rights
reserved.