|

WHAT
YOU WILL NEED
Tutorial done using
PSP8
Supplies
(Image, tube, corner,
silver pattern and my presets for Flaming Pears
Silver)
Graphic
Plus
Flaming Pear
Silver
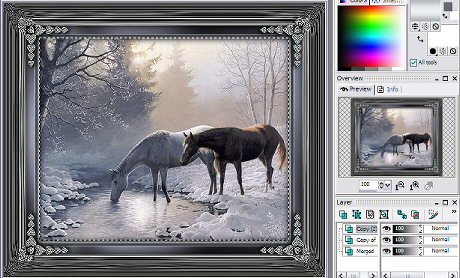
1.
Open up the image of the horses and add a 2px
white border
2.
Select the border and flood fill with the silver
pattern ---> keep selected ---> Invert and
apply the following cut-out

3.
Select none
4. Add
a 5px border using #676978
5. Add
a 1px white border ---> select and flood fill
with the silver pattern
6.
Keep selected ---> invert and apply the same
cut-out as in step 2
7.
Select none
8. Add
a 15px border using #676978 ---> select and
apply Graphic Plus - Cross Shadow at the default
setting
9.
Select none
10.
Add a 15px white border ---> select and apply
Flaming Pear Silver ---> apply the
sde_doubleframe1 preset
11.
Keep selected and sharpen once --->
Invert and apply the same cut-out as in step
2
12.
Select none
13.
Add a 25px white border ---> select and apply
Flaming Pear Silver ---> this time apply my
sde_doubleframe2 preset
14.
Keep selected ---> sharpen
once
15.
Select none
16. At
this point if you want to add corners to the
frame now's the time to do it, so either using
my corner or your own apply them to your frame
and merge all layers visible
17.
Using your selection tool set it to rectangle
then select your image inside the frame then on
your layer palette duplicate your layer twice -
don't deselect until I say ok ?
18.
Turn the visibility off on your top two layers
and highlight your bottom layer as we'll be
working on this one first
19.
Select your Airbrush tool and set it to the
following
Size
150
Hardness
25
Step
25
Density
25
Thickness
100
Rotation
0
Opacity
25
20.
Now spray here and there lightly, don't cover it
totally as we have another two layer to work
with yet... you don't have to worry
about going outside onto the frame because while
you have it selected it will only go on your
image
21.
Turn the visibility off on the top and bottom
layers and working on the 2nd layer repeat the
airbrushing but this time change the opacity to
30
22.
Turn the visibility off on the 1st and 2nd
layers, working on the top layer now apply the
airbrushing again but change the opacity to
35
23.
Select none
Now
that we've applied the snow to the images we
need to add the tube
Open
up the Father & Son tube copy it then close
it, click on your image and paste as a new
layer
What
we have to do is add this tube to each layer and
I found the easiest way to do it and get it in
the same place on each image was to duplicate
the tube layer twice, you now have 3 layers of
the tube and 3 layers of the
image.
X off
all layers except for one image layer and one
tube layer then merge visible
Keep
doing this until all 3 images have been merged
with a tube layer, you now are left with only
three layers
24. X
off the 1st and 2nd layers, highlight the 3rd
layer and SAVE AS --->
a.psp
25. X
off the 3rd and 1st layers ---> save as
---> b.psp
25. X
off the 2nd and 3rd layers ---> save as
---> c.psp
Ok
we want to animate our picture now but don't
close off your work because if you don't like
how the snow effect is when it's animated you
can just come back to psp and undo your snow and
reapply it again
Open
up Animation Shop ---> click on the animation
wizard
Select same size as 1st
image
Next
Transparent
Next
Upper left corner &
with canvas colour
Next
Yes
repeat the animation & 40 is the number for
how long we want it displayed
for
Next
Press on the Add image
and browse to where you saved your psp images
and add each one
Next
Finish
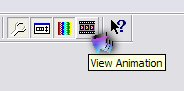
Now
you should have all 3 of your psp files showing
in animation shop, to see what your animation is
going to look like before saving it press on the
View Animation button
If
your happy how it looks press File ---> Save
---> give your animation a name then follow
the prompts
all
done !
Hope
you enjoyed this one
*s*
All
tutorials on this site are written and created
by Sandee and copyrighted to Designs by
Sandee.com
You may not remove
any images, HTML or zip files for the purpose of
reproducing these tutorials in any
way.
You
may not store or archive these pages in any
Yahoo Groups files,
or any
mailing list sites. These pages may not be
sent through any email
groups.
These
tutorials may not be
translated and placed on any site
due to some people removing my
name
from the tutorials
and adding their own.
PSP
groups are welcome to give a text link only to
any of my
tutorials.
©
Designs by Sandee 2000 - 2004. "All rights
reserved".
No portion of this site may be
reproduced or redistributed in any
form.
|