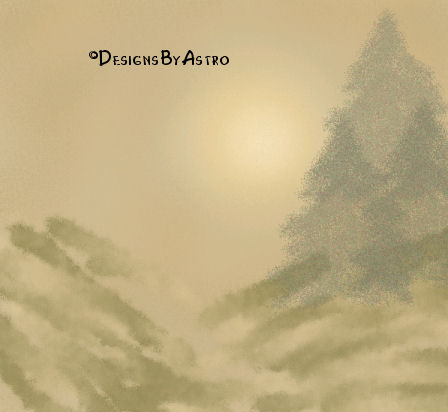
"A Misty Morning"
This tutorial is best viewed at 1024x768.
Please read my Terms of Use if
you have any questions.
At this time I am not allowing my tutorials to
be translated
so please don't ask!
All images are the sole property of
© Designs By Astro
Do not copy, place on CD, make into Scripts or send
through email without my prior written permission.
A link is always
welcomed and appreciated though!!
All rights reserved.
The
image/images you make using this tutorial
is your property to do with as you
wish.
If you have any questions or need further help you can
Email me
Tutorial written June 4, 2005.
A no vector tutorial!
This tutorial is written using PSP 9 but can be done in other version with a little
modification of tool locations and settings.Supplies needed....
Paint Brushes "SET 2" .... PJ's PSP Stuff
Follow the instructions for installing them. These only work for PSP 8 and 9.
We will be using pj-fuzz-fade and pj-0-magique of these brushes. If you're
using an older version of PSP you can find settings on the regular brush found
in PSP to create close to the same effects.
Let's get started. Remember to SAVE often!1. Open a 600 X 550 transparent canvas.
2. Add a new Raster layer, flood fill this layer with #cfc099
3. Add a new Raster layer. Set your foreground to #ead298
4. Make your Airbrush your active tool.
From the drop down choose the "+ Round 50" brush and change the settings to these....5. Place your brush so that it is at
This doesn't have to be exact, close to it will be fine.6. Click and hold as you count to 15 to yourself. Let go of the mouse.
7. Set your foreground color to #f8efd8
8. Airbrush, same settings except lower the size to 100.
9. Click and hold in the center of the color you just sprayed to a count of 6.
10. Make your Smudge Tool your active tool, set to these settings...
11. Click and hold in the center of your light area. Go in a circular motion 3 or 4 times to
lightly blend your center....12. Set your foreground color to #987738
SAVE!
13. Add a new Raster layer. Airbrush, settings used for the lightest center color.
14. With quick whisking clicks of the mouse spray color on your canvas. Keep away from
the lightest center color but spray small amounts on the outer edges...15. Set your Smudge Tool to these settings...
16. Go around the sprayed area to blend the color in leaving some dark and light areas.
This is going to be hard to tell on my screenshot due to the compression....17. Set your foreground to #85845b and your background to #f1edf1. Add a new Raster
layer. Note.. as you can see I'm not naming my layers but if you like you can name yours.18. Activate your Paint Brush. Click on Presets and find the pj-fuzz-fade.
19. In the right hand corner of your canvas start making upside down V motions with your
brush.Keep adding upside down V's to form a tree something like this....
SAVE!
20. Move the tree up closer to the top of your canvas. Go to Layer, Duplicate.
Move this tree down and off to the right edge of the canvas a little. Duplicate
this layer and move it down to the left a little. This is what you should have now...
Note... I've already added my color change so that you could see the placement.21. Go to Adjust, Brightness and Contrast, Brightness/Contrast with the settings
below on both the duplicate tree layers. The above screenshot is what you should
have after the brightness level has been changed.22. In your Layers Palette, I want you to lower the opacity of the 3 tree layers
to 54. We want them to just fade off into the distance....23. Make layer 4 your active layer. This should be your sky layer.
Add a new Raster Layer so that it is above layer 4 and below your tree layers.24. Set your background color to #e4cf9f and your foreground color to #746e38
25. Make the Paint Brush Tool your active tool. Look in the Presets and find pj-0-magique.
26. This brush will give you light and dark areas. On your new layer using a sweeping
side to side and back and forth motion, lay out some land creating a "valley" about center
of your canvas....27. Make your Smudge Tool your active Tool. Set to these settings....
28. Smudge the colors around until you have something like this....
Now, I suggest you save a copy of this just as it is because you could come
back later and turn this into a creek painting by placing a steam down the
valley and duplicating the trees and moving them to the other side or making more
trees.29. Keep smudging until you have something that looks more like a rolling meadow.
This is what mine looks like now....30. Now comes our main attraction! *L* Make the very top layer your active layer.
Add a new Raster Layer.31. Set your foreground color to #7a6532, background doesn't matter.
32. Make your Airbrush your active tool. Set it to these settings....
33. Starting at the left side of your canvas at about Y-0 X-510 spray up to form a limb that
splits into two limbs as you go up and off the top of the canvas. Continue to fill in the lower
part of the limb to make it larger than the two ending limbs. Look at the screenshot below.
(Remember, these are just limbs extending onto our canvas from a tree that is out of our view.)34. Lower the airbrush size to around 5 and make smaller branches off of the
two larger ones...35. Set your foreground color to #a18843 Use the Airbrush with these settings to
spray in some light areas on your branches....You should have something like this....
36. Make active your Soften Tool with these settings....
37. Go around the areas of your limbs and branches to soften them and blend the
light color a little.38. Set your foreground color to #b6c7cc and your background color to #e3ebed
39. Make active your Airbrush with these settings....
Add a new Raster layer above your limb layer.
40. Using the foreground color spray some blossoms on your smaller branches....
41. Switch your colors so that your foreground color becomes your background and your
background becomes your foreground. On the same layer, spray areas of the lighter color
on top of the darker color.....42. Duplicate this layer, move it out of place slightly then drag the layer below your
limb layer in your layer palette. Off set this layer so that it looks like more blooms are
on the backside of your limbs....43. Set your foreground color to #9a8c61. Add a new Raster layer so that it is below
your trees but above your sky and meadow.44. Set your Airbrush to these settings...
45. Use the Airbrush to draw in some grass and flower foliage. On a new raster
layer, add some small flower blooms if you want. I know you have some that will
work saved as a tube! *L* You can lower the opacity on these two layers if
you need to.That's it, all that is left is to sign your work and frame it!
Until next time... God Bless!
Connie
Designs By
Astro Index of Tutorials
Tutorial written June,
2005
© Copyright 2005 Designs By
Astro
All rights
reserved.