|


Click here
for an alternative version
Translated with permission from the
creator, Lien at X-clusive Designz tutorial
site.


See the original
tutorial here for PSP in Dutch
This
is not my tutorial, it belongs to Lien. If you
would like to translate into another language,
you must ask her permission.
You can contact
her here.
 
They will both open
in a new window and print out on standard 8½" X
11" paper
For
information about which fonts, programs, etc I
used to construct my pages and my headers,
click
here.
|
For this tutorial you will
need:
 or or 
I've done this
tutorial in PSP 9 and PSP XI.
I believe it
can be done in most versions.
You may have
to look around for the commands but it's likely
they are there.


Filters and
materials needed
Filters Unlimited 2,
available for trial or purchase here
Xero>Porcelain,
available free here (it's in set 1)
Mura's
Meister, available free here
FM Tile Tools,
available free here
Supplies in zip file
here.
Supplies in zip file here
for older versions if the other ones don't work
for you. These are in psd
format.
***********
Credits:
Tubes by
Lien and
Gini
***********
My plugin windows may look
different from yours as I use Filters Unlimited
2 to manage my plugins - available for purchase
here
http://www.icnet.de/filters_unlimited/
***********
I am assuming
you know the basics of Paint Shop Pro and where
the tools can be located. |
Here are some
arrows and bars you can drag and drop where you
need to mark or underline where you are. .
Just left click and drag to where you want
it then let go.
They will stay where you put
them until you close your browser.


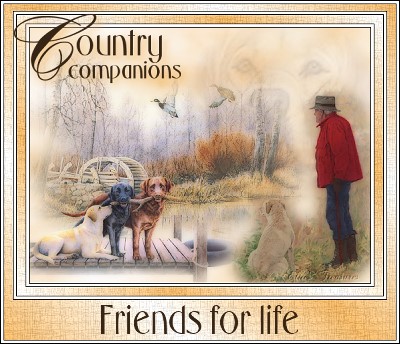
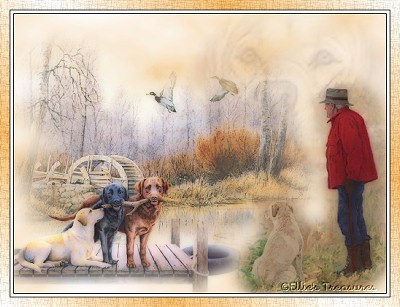
Here's a small version of
the tag that you can drag with you for
reference
 |
Preparation
Before
opening PSP, double click the font to open it
and leave it open
so it will be available
for use in PSP (or install it).
Put the
plugins into your plugin folder.
Put the
brush tip and script into your brush folder. If
you are using an older version of PSP,
or
have trouble with brushes, use the Country
Companions text psp file to make a custom
brush.
Now open PSP. Open your tubes in PSP,
duplicate them (shift-D) and close the
originals.
None of the tubes are used more
than once, so each can be closed after
use. |
Step 1
Open a new
transparent image 600 x 450 pix.
Make your
foreground color white and your background color
#f3b969 (a golden orange)
( or choose
another color which is appropriate to the tubes
you're using)
 |
Step 2
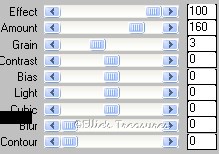
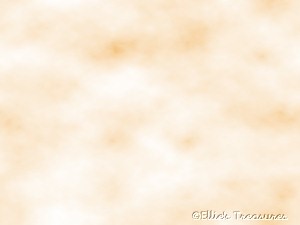
Effects>Mura's
Meister>Cloud with these
settings:
100-160-3 then all the rest at
0

 |
Step 3
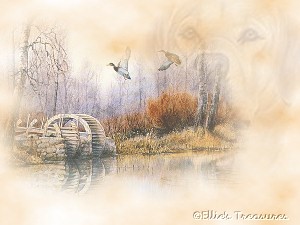
Activate the tube
"MillpondMallards_HerBooth_MistedByGini_04-01-06".
Edit>Copy (Control-C), Edit>Paste as
new layer (control-L).
Move the tube with
your move tool to the left-hand side as shown.
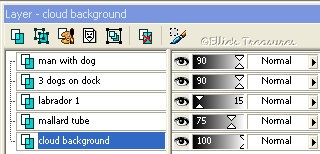
Change the opacity in your layer palette to
75.


 |
Step 4
Activate the tube
"Lg-labrador" (large lab head) .
Edit>Copy (Control-C), Edit>Paste as
new layer (control-L).
Move the tube with
your move tool to the top right corner.


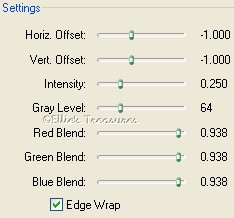
Effects>FM Tile
tools>Blend Emboss, default settings.
-1,
-1, .250, 64, .938, .938, .938, edge wrap
checked

Change the opacity in
your layer palette to 15.
 |
Step 5
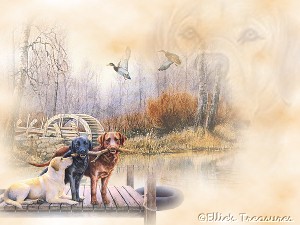
Activate the tube
"LG-labrador-2" (3 dogs on dock).
Edit>Copy (Control-C), Edit>Paste as
new layer (control-L).
Move the tube with
your move tool to the bottom left corner
Change the opacity in your layer palette to
90.
 |
Step 6
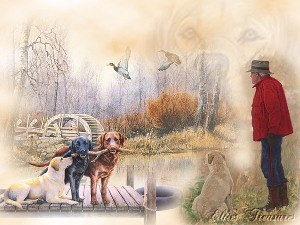
Activate the tube
"LG-labrador-3" (man and dog).
Edit>Copy
(Control-C), Edit>Paste as new layer
(control-L).
Move the tube with your move
tool to the bottom right corner
Change the
opacity in your layer palette to 90.

 |
Step 7
Layers (or right
click in layer palette)>merge>Merge
visible
Image>Resize>85%.
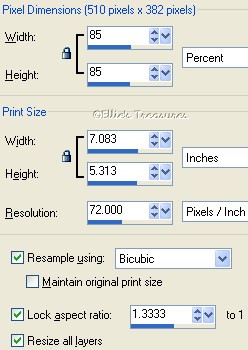

Effects>Xero>Porcelain with
the following
settings:
50-128-128-0-0-0


 |
Step 8
Image>Add
borders>symmetrically - 1 pix black,
4
pix white, 1 pix black, 13 pix white.
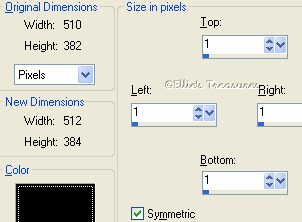

Select the last white
edge with your magic wand.
Settings: add,
RGB Value, contiguous, tolerance and feather at
0, anti-alias checked.
 |
Step 9
Change your
foreground color to gradient.
linear, angle
45, repeats 3.
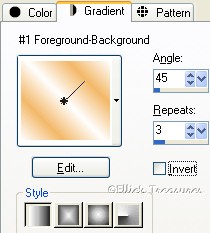

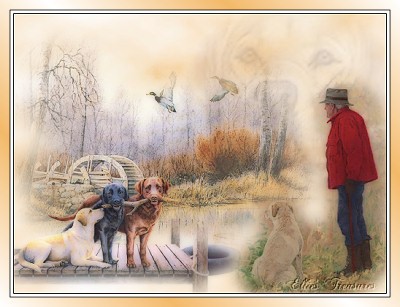
Fill your selection with
the gradient.
 |
Step 10
Effects>Filters
Unlimited 2>Paper
Textures>Papyrus>default settings of
66-96.



Selections -
None. |
Step 11
Image>Add
borders>symmetrically - 1 pix black,
4
pix white, 1 pix black
Image>Add
borders>with these settings:
top 10-left
13-bottom-60-right-13 white
 |
Step 12
Activate the magic
wand, same settings as before (they'll still be
in there).
Select the last white edge.
In your gradient settings, check the box
Invert.
Fill your selection with the
gradient. |
Step 13
Repeat step 10 (the
papyrus filter).

Deselect |
Step 14
Image>Add
borders>symmetrically - 1 pix black,
4
pix white, 1 pix black
 |
Step 15
Activate the text
tool and find the font AL Evening Stroll.
Text tool settings: size 48, stroke width 0,
vector, background color #362414 (dark brown),
foreground color turned off
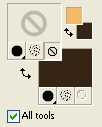


Type the text in the
bottom of the frame and move to a place that
suits you.
Objects>Align>Horz centre in
canvas


Deselect. |
Step 16
Layers (or right
click in layer palette)>New raster layer
Activate the brush tool and find the brush
Country Companions.
Size 250 - stamp the
brush with color #362414 as your foreground
color where you choose.

(If you have trouble
getting brushes to show or can't use the format
supplied,
use the included Country
Companions psp file to create a selection,
then click on your brush tool, click on the
dropdown arrow to find the brushes,
and
click on the icon in the bottom right corner,
Create Custom Brush from Selection.
Give it
a name and it will be there for you to
use)


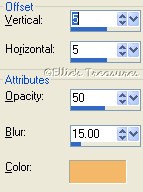
Effects>3D
Effects>Drop Shadow
H+V 5, opacity 50,
blur 15, color #f3b969 (your burnt orange
color).
This will put a glow around the
words.

Layers (or right click in
layer palette)>merge all


You're done! |
If you resize, use the unsharp
mask or Brightness/Contrast to sharpen it a bit.
Adjust>Sharpness>Unsharp mask at
Radius 1, strength 60, clipping 4.
or
Adjust>Brightness and Contrast set
to Brightness of 5-contrast of 15. |
Watermark
Layers>New
raster layer. Add your water mark on this new
layer
Layers>Merge>Merge all
(flatten) |
Save
File>Export>Jpeg
optimizer - compression of 20. |
l
hope you had fun!
Back
to top |
| If
you have any questions or suggestions, click on
the email button below to contact me. Have a
wonderful day! |
These
tutorials are translated with permission from
the original writer.
Any resemblance to any
other tutorial is purely coincidental and
unintentional.
Feel free to share any of my
tutorials on this site by a link back to my
site,
but do not copy and send the entire
tutorial to anyone or any group.
©2003-2007
Ellie's Treasures

|


 |
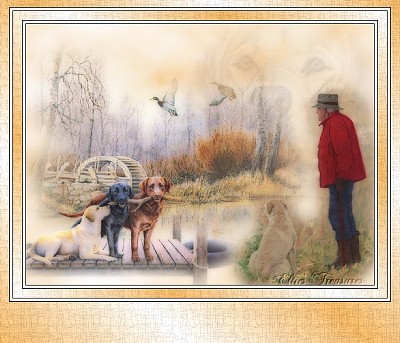
Alternative version
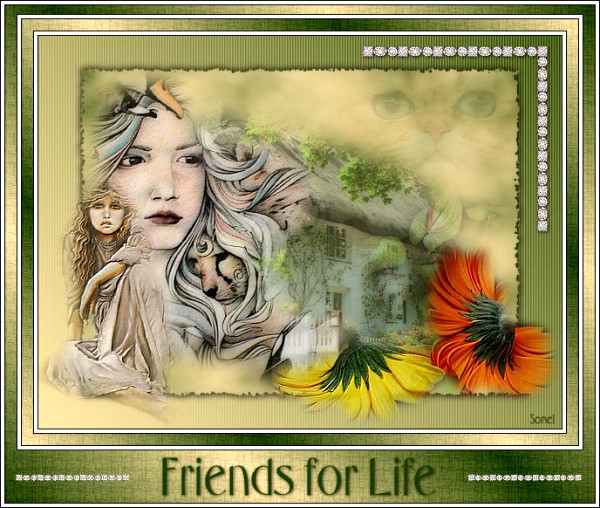
Made by my
friend, Sonel of Sonel's
Corner |
|
Back
to top
Webpage Design
Information
This webpage
background was made in PhotoImpact with a
tutorial by Deb
DeHaven
Sadly, she passed away but
her tutorials just came back online, thanks to
PIRCNet.
You can find the tutorial
here.
The font I used for all of
the text on the buttons is BrockScript
The
font I used for the "Country Companions"
tutorial header is Autumn.
Click
on the font name to download the font.
I use
PhotoImpact to make all of my headers due to the
amazing
3D text it has and the wonderful
presets available free
online
Most of the presets I use
are either the ones that come with PhotoImpact,
usually the Gel ones,
or from Deb's PI
Tutorials and More (see below) or
Carol Oyl's
site
This is the address to
Deb's old pages
http://www.fortunecity.com/skyscraper/millenit/1716/pitutorials/objects/presets/presets1.html
I can't find any links to
her new pages but the presets are still on this
page for download.
For more sites
to find PI Presets, take a look at
my Great
Beginnings
page. |