|
Baptist
Frame
(PSP 7, 8, 9
& 10 - No
filters)
A tutorial by Mar ©
2004.
What you need:
PSP
8. Download a
30 day trial
here.
ZIP with materials: Download
here.
Unzip Bamboe.pspimage (8) or Bamboe.BMP (7) to
your folder Patterns.
Unzip de tubes and Gold Pattern and open in
PSP.
An image of a face. Size not bigger as 350 height or
width.
With  you
can crop your image. you
can crop your image.
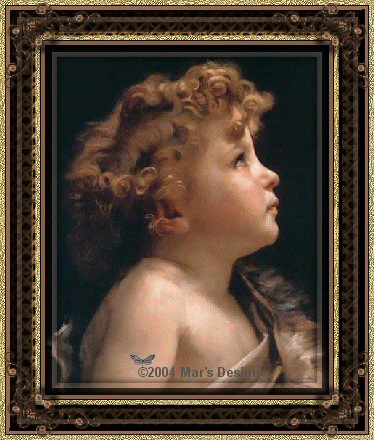
I used John the Baptist by William
Adolphe Bouguereau.
Save
often.
Let's begin. Good
Luck.....
1. Open your image (John the
Baptist is in the ZIP).
2. Image > Add borders > 5
Pixels > White > Symmetric.
3. With  (feather
0) select the white border. (feather
0) select the white border.
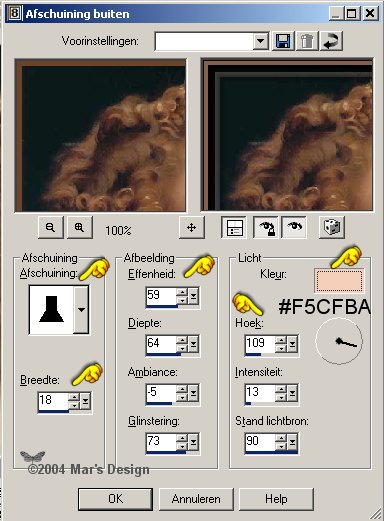
4. Effects > 3D-effects
> Outer bevel > Color #F5CFBA.
If you use another
image choose with  a light
color from your image. a light
color from your image.
5. Add borders > 5 Pixels
> White > Symmetric.
Select the border.
Foreground
color to pattern and look for Gold-MD2.bmp.
Fill your selection
with it.
6. Add borders > 25 Pixels
> White > Symmetric.

Select this border and fill with
#8D6448.
Or.......... use your own color.
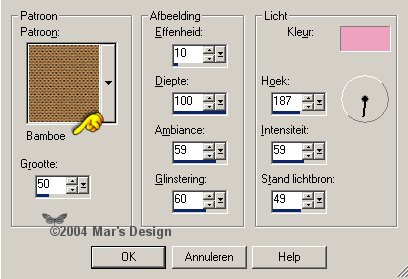
7. Effects > Texture-effects >
Sculpture > Bamboo > color #F4D2B7.
Look at the
following screenshots with pointers if using another
color.

The Bamboo pattern with above
setting is always brown.
If you use an image with different
colors, change your settings.
Use the eye dropper and fill in
your color.
8. Add borders > 5 Pixels >
White > Symmetric.
Select and fill with #8D6448.
9. Repeat the outer bevel > Same
settings.
10. Add borders > 5 Pixels
> White > Symmetric.
Select and fill with gold pattern.
11. Open MD-Baptistcorner.psp
(ZIP) and copy.
Paste as a new layer.
With  place
into top left corner. place
into top left corner.
Place against your gold
border.
12. Layer palette >
Duplicate.
Image > Mirror.
Layer palette >
Duplicate.
Image > Flip.
Layer palette >
Duplicate.
Image > Mirror.
Merge all layers.
The first part is
done.
Your Baptist Frame without the animation is
ready.
Animation:
If you like to animate with the
tears..... continue.
Note!! You will have a large file because
this gif contains 7 layers.
13. Open MD-Baptisteye.psp (ZIP)
and copy.
Paste as a new layer and move over
the eye.
Rename this layer to 'Eye' and lock  . .
Open MD-Baptisttear-2.psp and
copy.
Paste as a new layer on the cheek -where the chin
is.
Rename this layer into 'Tear large'.
Layer palette >
Blend mode Luminance > Opacity to 60.
14. Layer palette >
Duplicate. Move a
little higher.
Opacity on this layer to 70.
If you did the steps right, you
have this:

15. Repeat duplicating the layer and
place the tear a little higher.
16. Open MD-Baptisttear.psp and
copy.
Paste as a new layer above your last tear.
Rename this
layer 'Tear small'.
Blend mode > Luminance > Opacity
70.
17. Layer palette >
Duplicate.
Move in the corner of the eye.
Opacity on this layer
50.
You must have 5 tears on the
face:

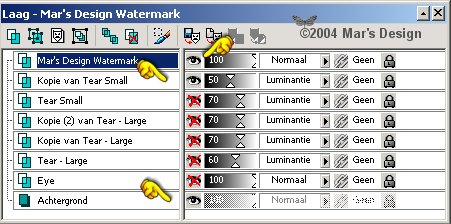
18. Arrange the tears.
19. Lock all layers, except your
background layer.
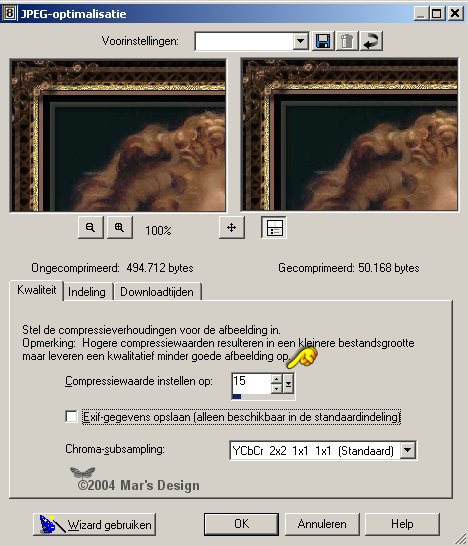
20. Export as
Baptist-frame.JPG.
File > Export >
JPG-optimalisation.
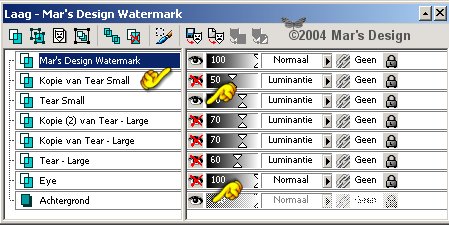
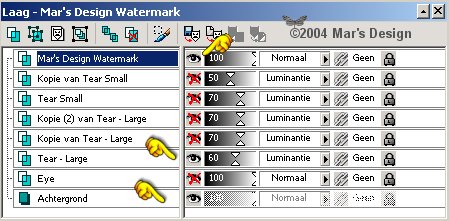
21. In the next steps I will show you
which layers you must
have open or closed before you export as a
JPG.
Save as Barpistframe-1.JPG, Barpistframe-2.JPG, and so on.
I have my Mar's Design mark on an extra layer.
If you want to
put your mark in, do it now.
Use a new layer (at the top) to do
so.
Step 1:

Export
as Barpistframe-1.JPG
Step 2:
Export
as Barpistframe-2.JPG.
Step 3:
Export
as Barpistframe-3.JPG.
Step 4:

Export
as Barpistframe-4.JPG.
Step 5:

Export
as Barpistframe-5.JPG.
Step 6:
Export as
Barpistframe-6.JPG.
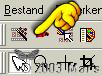
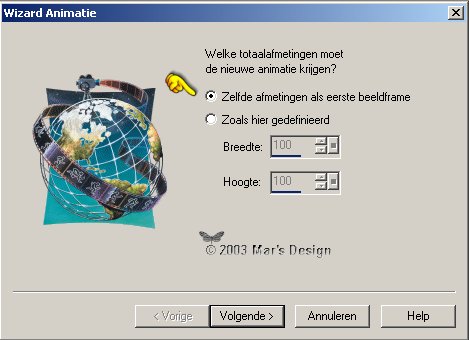
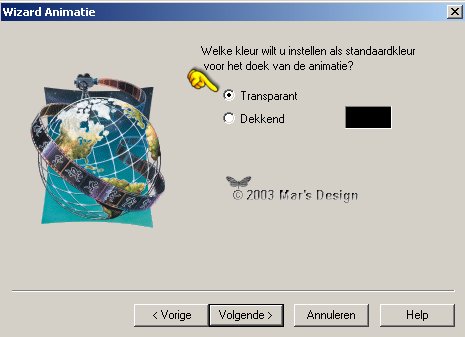
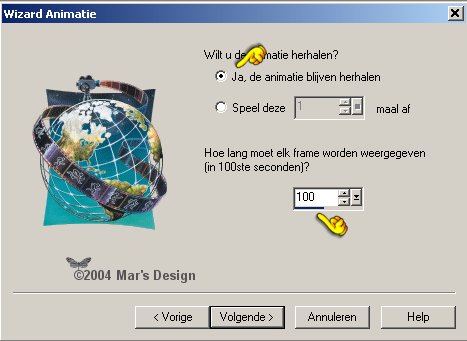
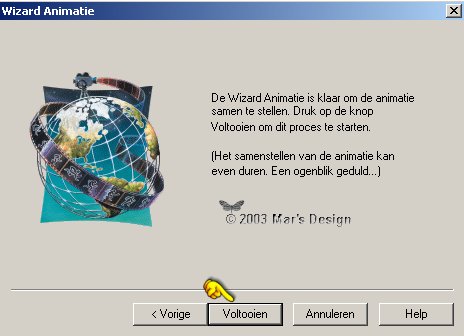
22. Open Animation Shop  and
follow the screens. and
follow the screens.
23. In AS click the first
button.
The Wizzard Animation
starts.

24. Open your 7 files. The order of the
frames is very important.
Make sure frame 6 is at the
bottom.
Use 'up' and 'down' if needed.
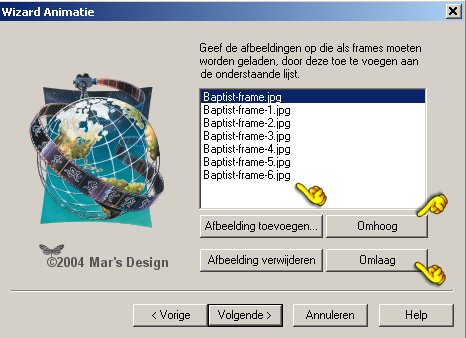
Your animation will appear in AS.
Click .jpg) to play
it. to play
it.
25. We now will save the Baptist
Frame as a GIF.

Great. Your Baptist Frame is
done.
I hope you liked it..... but mostly I hope you learned
some things.
Thank you for trying out my tutorials.

Image: Sheila by © Brenda Hoddinot
Thank you
Brenda, to grand me permission
to use your gorgeous Art in my
tutorials.
This tutorial is written and
designed by Mar and therefore her property.
This tutorial may not be
downloaded for any purpose other
than to follow the tutorial. If
you're a Moderator of a group,
please e-mail me
before adding this tutorial to any lessons,
etc.
When you do have my permission..... only a text link is
allowed.
My tutorials are never ever to
be sent over any mailing list or to leave my
site.
Translation into English
with help of my best friends, Trudie.
Thanks sweetie! Couldn't do
it without you.

Since
02-12-2004:
|