|



Translated
with permission from the creator, Jet at Jetje's
PSP Creaties tutorial site.
See the original
tutorial here for PSP in Dutch
Click
here
or scroll down for an alternate
version
 

This is not my
tutorial, it belongs to Jet.
If you would
like to translate into another language, you
must ask her permission.
You can contact her
here.
 
They will both open
in a new window and print out on standard 8½" X
11" paper
For
information about which fonts, programs, etc I
used to construct my pages and my headers,
click
here.
|
For this tutorial you will
need:
 or or 
I've done this
tutorial in PSP 9 and PSP XI.
I believe it
can be done in most versions.
You may have
to look around for the commands but it's likely
they are there.


Filters and materials
needed
Pentacom>VTR2
Texturizer
Both
included in the supplies folder
Supplies in zip file
here
for version 8 and up
Supplies in zip file here
for older psp versions has .psd tubes instead of
pspimage. these can be opened in any
program.
Also in the psd supplies, I included
a layered canvas I made with the selection
filled with the gradient, in case you can't use
the .pspselection file.
Both zips include the
tubes and the filters, the pspselection file in
the PSP supply folder and the selection canvas
in the PSD supply folder.
I've also supplied
an alternate baby tube in case you don't want to
use the one used in the
tutorial.
************
Credits
Tubes
by Fredo, Marif, Jet, LaManouche, and Melissa
Please leave the
filenames intact if you want to share
them
************
My plugin
windows may look different from yours as I use
Filters Unlimited 2 to manage my
plugins.
It's available for purchase here:
http://www.icnet.de/filters_unlimited/
************
I am
assuming you know the basics of Paint Shop Pro
and where the tools can be
located. |
Here are some
arrows and bars you can drag and drop where you
need to mark or underline where you are. .
Just left click and drag to where you want
it then let go.
They will stay where you put
them until you close your browser.


Here's a small version of
the tag that you can drag with you for
reference
 |
Preparation
Activate
your tubes, duplicate them (shift-D) and close
the originals.
I always open all of my tubes
and close them as I use them
None of them are
used more than once so you can close each one
after use.
Some of the tubes have the actual
tube in the middle layer,
make sure you are
in this layer before copying.
Put the
pspselection file in your Selections
folder.
Put the plugins in your plugins
folder.
Drag the small copy of the tag just
above with you for reference as you
work. |
Step 1
Open a canvas of
640x480 transparent
Put foreground color on
#ba814d (med golden brown) and the background
color on #ebc555 (golden yellow)
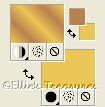

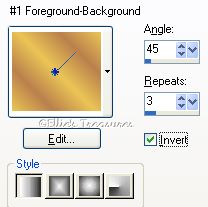
Put foreground on
gradient, settings: linear, angle 45, repeats 3,
invert checked

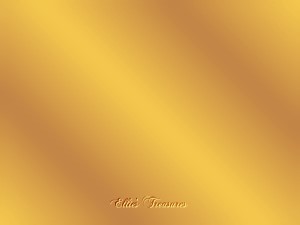
With your bucket tool,
fill canvas with this
gradient
Adjust>Blur>Gaussian Blur set
at 20
 |
Step
2
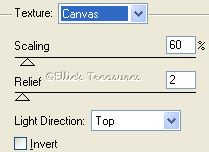
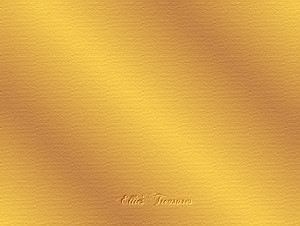
Effects>Texture>Texturizer, settings:
Canvas, Scaling 60, Relief 2, Light Direction
Top, Invert not checked.

 |
Step 3
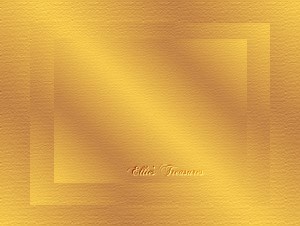
Duplicate
layer
Image>Resize: 80% bicubic, resize
all layers not checked
Call this layer: Layer
2
Duplicate layer
Image>Resize: 80%
bicubic, resize all layers not checked
Call
this layer: Layer 3
 |
Step 4
Go to to layer
2
Effects>Edge Effects>Enhance

Go to layer
3
Edit>Cut
Paste as new image
(control-V)
Merge all
Image>Add
borders: 1 pixel #ffffc8 (very pale
yellow)
Edit>Copy
(Control-C)
Edit>Paste as new layer in
your working canvas (Control-L)
It will paste
right into the middle, leave it there.
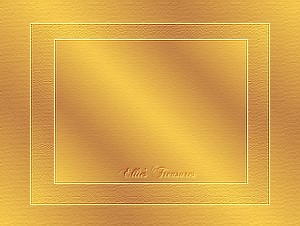

You will now have an
empty layer called layer 3, delete it. Rename
this new layer you just pasted into the canvas
Layer 3. |
Step 5
New raster
layer
Selections>Load/Save
Selections>Load Selection From Disk
Find
selection "paasselectiejet", leave settings at
default and load


Fill it with your
gradient


Deselect
Call this
layer Selections 1 |
Set 6
Effects>Texture
Effects>Blinds, settings: 2-50-color #7B5530
(golden brown), Horizontal and Light from
Left/Top both checked
 |
Step 7
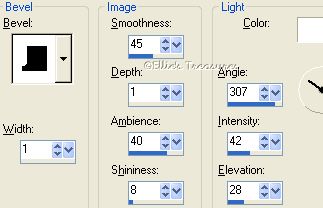
Effects>3D
Effects>Inner Bevel, settings: bevel 5,
1-45-1-40-8-307-42-28-white

Effects>3D
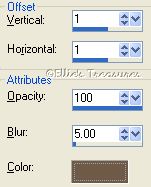
Effects>Drop Shadow, settings: 1-1-100-5
#6f5a47 (dark brown)


Deselect |
Step 8
Duplicate
layer
Image>Flip
Image>Mirror
This
will put the copy in the top right
corner
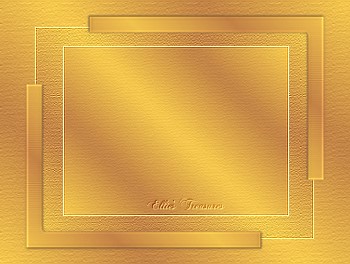

Name this layer
Selections 2 |
Step 9
Go to layer
selections 1
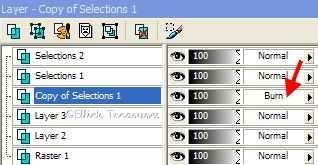
Duplicate
layer
Layers>Arrange>Move
Down
Adjust>Blur>Gaussian Blur set at
20
Effects>Pentacom VTR2, default settings
of: 26-0-169-0


Blend Mode: Burn

Go to layer selections
2
Duplicate
layer
Layers>Arrange>Move
Down
Adjust>Blur>Gaussian Blur set at
20
Effects>Pentacom VTR2, default settings
of: 26-0-169-0
Blend Mode: Burn

You won't see a huge
difference, but just a faint glow in behind the
angle pieces
You won't see it in a small
screenshot so I won't bother making one
here |
Step 10
Make top layer
active
Activate the tube
"Marif_2006_septembre_bebe_Geddes016" (or the
alternate one I've supplied)
Copy
(Control-C) and paste as new layer
(Control-L)
Image>Resize (uncheck Resize
all layers) at 80% bicubic and then once more at
90% bicubic and move into place,
basically
moving it down to about halfway, it will already
be centered horizontally
 |
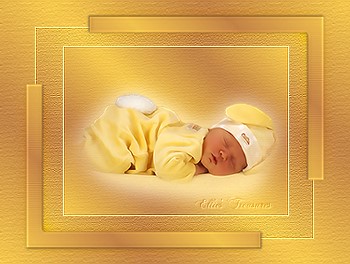
Step 11
Duplicate
layer
Layers>Arrange>Move
Down
Adjust>Blur>Gaussian Blur set at
20
Effects>Pentacom VTR2, default settings
of: 26-0-169-0
 |
Step 12
Make the upper layer
active again
Activate the tube
"fredo_design_nature0056"
Remove the water
mark layer (raster 1)
Activate your lasso
tool, set at point to point, Feather at 0,
select the yellow
flowers so you can
colorize just the flowers and not the leaves
(hold the shift key down and select all the
buds this way)


Adjust>Hue and
Saturation>Colorize, 31-202


Deselect |
Step 13
Paste as new layer
(control-L)
Image>Resize 70% bicubic
Move it into place as shown just touching
the top of the bottom beam
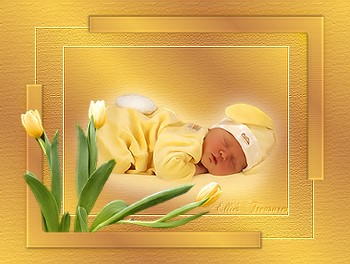 |
Step 14
Activate your
selection tool, Feather at 15
Select the
bottom bit of the plant (you'll see a thin white
line we want to get rid of)
press your delete
key once or twice
Deselect
Drop Shadow
0-0-100-5-#6f5a47 (same color as last drop
shadow) |
Step 15
Duplicate
layer
Layers>Arrange>Move
Down
Adjust>Blur>Gaussian Blur set at
20
Effects>Pentacom VTR2, default settings
of: 26-0-169-0
Blend Mode: Overlay
 |
Step 16
Make the upper layer
active again
Activate the tube "paasstiksel"
(stitching) and copy
Paste as new
layer
Move it on the bottom beam
Blend
Mode: Overlay
Duplicate
layer
Image>Flip
Image>Mirror
This
will place the copy on the top beam
 |
Step 17
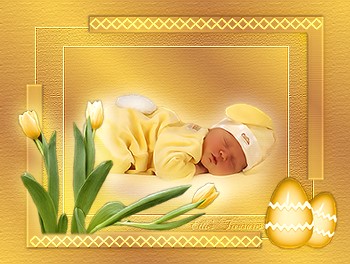
Activate the tube
"paaseieren" (egg) and paste as new layer
Put
it in the bottom right corner as
shown
Duplicate
layer
Layers>Arrange>Move
Down
Adjust>Blur>Gaussian Blur set at
20
Effects>Pentacom VTR2, default settings
of: 26-0-169-0
Blend Mode: Burn
 |
Step 18
Activate the top
layer again
Activate the tube
"chick"
Activate your selection tool, feather
on 0, select around one of the chicks (I picked
the bottom left one).
copy the chick and
paste as new layer
Put the chick on the
egg
 |
Step 19
Now select another
chick from the chick tube (I picked the top left
one)
Copy that one and paste as new
layer
Place that on top of the left beam
above the flowers
Duplicate
layer
Layers>Arrange>Move
Down
Adjust>Blur>Gaussian Blur set at
20
Effects>Pentacom VTR2, default settings
of:
Blend Mode: Overlay
 |
Step 20
Make the upper layer
active
Activate the tube
"SE_Easter_PageTopper"
Adjust>Hue and
Saturation>Colorize, 31-202
Copy it and
paste as new layer
Image>Resize at 90%
bicubic, resize all layers not checked
Place
it as shown
Drop Shadow 1-1-100-5
#6f5a47

Make sure all is where
you want it, then Merge all |
Step 21
Image>Add
borders: 10 pixels white


Select with Magic Wand,
feather on 0
Fill it with your
gradient
Effects>Texturizer, settings:
Canvas, Scaling 60, Relief 2, Light Direction
Top, Invert not checked (same as
before)
Effects>Edge
Effects>Enhance
Effects>3D
Effects>Cutout: 1-1-100-5-#6f5a47
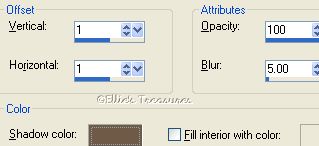
repeat with -1, -1, 100,
5

Deselect

You're done!
See below
for an alternate version. |
Resizing
To resize,
make sure, to retain the texture and the
clarity, resize at 90% bicubic and repeat till
you get close to the size you want.
At that
point you can resize by pixels as usual. You
will find this makes a big difference in your
final result.
If you resize, use the unsharp
mask or Brightness/Contrast to sharpen it a bit.
Adjust>Sharpness>Unsharp mask at
Radius 1, strength 60, clipping 4.
or
Adjust>Brightness and Contrast set
to Brightness of 5-contrast of 15. |
Watermark and
Save
Layers>New raster layer. Add your
water mark on this new
layer
Layers>Merge>Merge all
(flatten)
Save: File>Export>Jpeg
optimizer - compression of 20. |
l
hope you had fun!
Back
to top |
| If
you have any questions or suggestions, click on
the email button below to contact me. Have a
wonderful day! |
Tutorial translated Feb 24, 2008
* *
*
These tutorials are translated with
permission from the original writer.
Any
resemblance to any other tutorial is purely
coincidental and unintentional.
Feel free to
share any of my tutorials on this site by a link
back to my site,
but do not copy and send
the entire tutorial to anyone or any group.
©2003-2008 Ellie's Treasures

|


 |
Alternate
Version

In using this baby
instead of the other one, for step 10, I placed
it, duplicated layer twice,
dragged one
below, then did the gaussian blur, vtr2 and then
a blend mode of overlay on the bottom
copy.
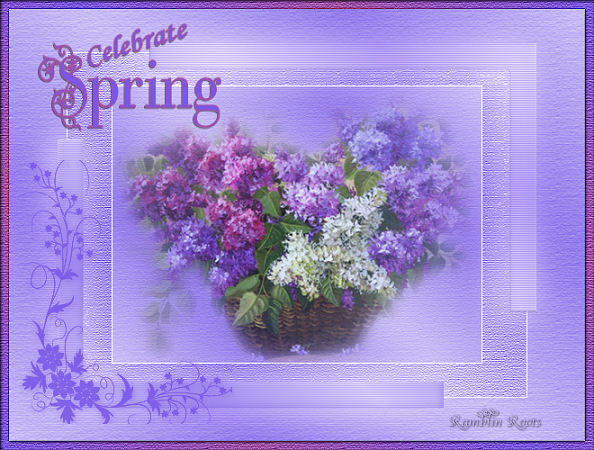
Bobbi's 2 versions
Her website:
http://ramblinroots.com/


 |
|
Back
to top
Webpage Design
Information
This webpage background was
made in PhotoImpact with a tutorial by Deb
DeHaven
Sadly, she passed away but
her tutorials just came back online, thanks to
PIRCNet.
You can find the tutorial
here.
The font I used for all of
the text on the buttons is BrockScript
The
font I used for the "Celebrate Easter" tutorial
header is Daffodil.
Click on the font name to
download the font.
I use PhotoImpact to make
all of my headers due to the amazing
3D text
it has and the wonderful presets available free
online
Most of the presets I use
are either the ones that come with PhotoImpact,
usually the Gel ones,
or from Deb's PI
Tutorials and More (see below) or
Carol Oyl's
site
This is the address to
Deb's old pages
http://www.fortunecity.com/skyscraper/millenit/1716/pitutorials/objects/presets/presets1.html
I can't find any links to
her new pages but the presets are still on this
page for download.
For more sites
to find PI Presets, take a look at
my Great
Beginnings
page. |