|
Autumn Frame
(PSP 7, 8, 9 & 10)
A tutorial by Mar ©2003

This tutorial was made for PSP 8,
but you can easily make it in 7.
Because the frame isn't in PSP
7, I've added it.
Unzip
this file to your folder 'Frames' in PSP 7.
In PSP 8 it
comes with the program.
You need a mask, download
it here.
Extract to your folder 'Masks' in PSP 7 or
PSP 8.
You also need an image.
I did
use this autumn image by Kent Wallis.
Here
you'll find more images from this artist.

image: ©
Kent Wallis
Save
often.
Let's get started. Good
luck.....
1. Open your image.
Image > Frame.

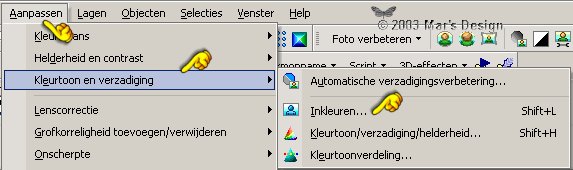
2. Adjust > Hue and
saturation > Colorize > 100 -
50.

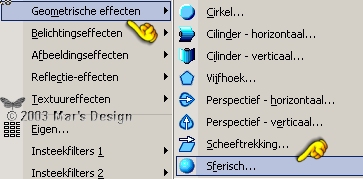
3. Effects > Geometric effect >
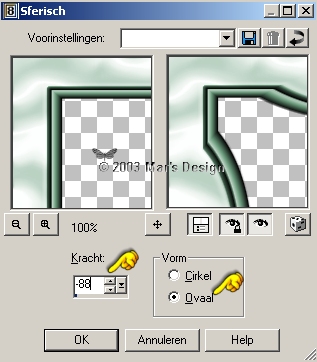
Spherize.
You can save this preset by clicking the blue
diskette.
4. Duplicate layer Frame.

5. Again > Effects >
Geometric effects > Spherize.
You can save this preset
too!

Apply.
6. Layers > New raster layer.

Foreground color #628F72 or another
one
from your image fill  this
layer. this
layer.
7. Layers > Mask load/save
> Mask load from disc.

Find OrnateSmall you saved from the ZIP.

Click the load button.
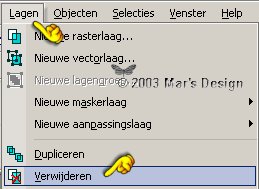
8. Layers > Delete.
Confirm merging.

9. Again > Effects >
Geometric effects > Spherize.
Use the last preset, with 100
strength.
10. Optional a drop shadow:
Effects
> 3D Effects > Drop shadow.
Shadow color > use a
darker color as your mask layer.
I used this green(#3B633E).


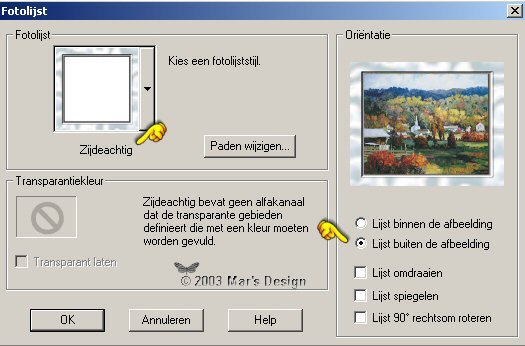
11. Image > Add borders
> Black.
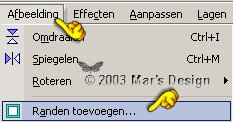
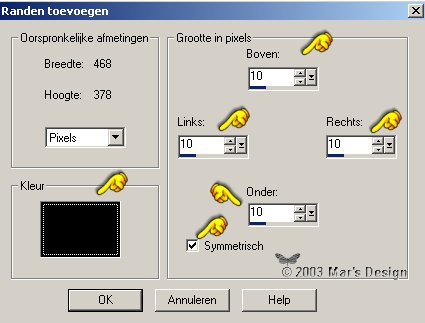
Apply.
For the first
border:
Use your magic wand.
12. Select the black border.
Fill your border with a color from your image.
13. Effects > 3D effects >
Inner bevel.


14. Second border:
Image >
add border, same as before (10 pixels).
Make sure your color is
different as in your first border.
15. Selections >All.
Selections >
Modify > Contract 10 pixels.
Selections > Invert.
Repeat inner bevel.
16. Third border:
Add border (10
pixels) use another autumn color.
Selections >
Select all.
Selection > Modify > Contract with 10.
Invert and repeat the inner bevel.
You're Autumn Frame is done.
I hope you did like this one, but most of all, that you did learn from it.
Image: © Corinne Hartley
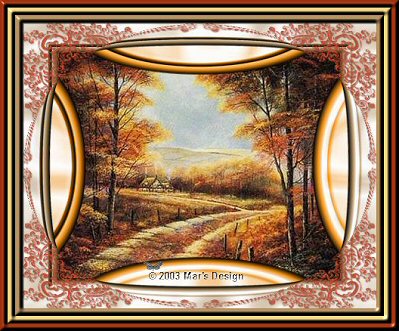
Image: © Ruane Manning
This tutorial is written and
designed by Mar and therefore her property.
This tutorial may not be
downloaded for any purpose other
than to follow the tutorial. If
you're a Moderator of a group,
please e-mail me
before adding this tutorial to any lessons,
etc.
When you do have my permission..... only a text link is
allowed.
My tutorials are never ever to
be sent over any mailing list or to leave my
site.
Translation into English
with help of my best friends, Trudie.
Thanks sweetie! Couldn't do
it without you.

Since
08-20-2003:
|