
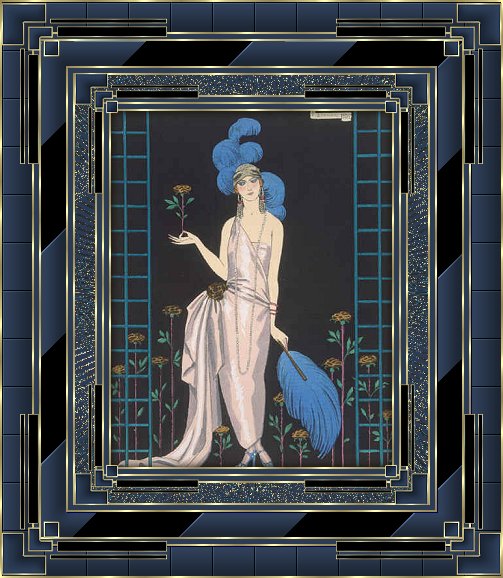
I wrote this
tutorial to compliment the Flapper
Tutorial.
I thought the images so
pretty.
Tutorial written June21,
2003.
Resemblance to any other tutorial is
coincidental.
Thank you to Paula aka
KyRed for working out the Spiky Halo
settings
in PSP8
I have updated Step 8 to include
them
Big thank you Paula
What You Will
Need
Paint Shop Pro
Unplugged
Shapes
FM Tile Tools
Tormentia
Supplies
- Here
1. Open your graphic, duplicate, and
close original
Set foreground pattern to the
gold
Choose a color from your graphic and set
as the foreground color
Set background to
white
2. Add 2px border - select with
magic wand
Flood fill with the gold
pattern
Selections - Invert
3.
Effects - 3D Effects - Cutout
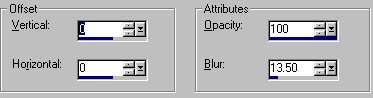
Select none
4. Add 5px
border - select with magic wand
Flood fill
with foreground color
Select none
5.
Add 2px border - select with magic wand
Flood
fill with gold pattern
Select none
6.
Add 5px border - select with magic wand
Flood
fill with foreground color
Select none
7. Add 2px border - select with magic
wand
Flood fill with gold pattern
Select
none
8. Add 25px border - select with
magic wand
Flood fill with foreground
color
Effects - Geometric Effects - Spiky
Halo
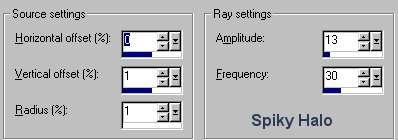
For PSP 8.10
Add 25
pixel border
Select with magic wand
Flood
fill with the gold fill
Effects / Distortion
Effects/ Spiky Halo
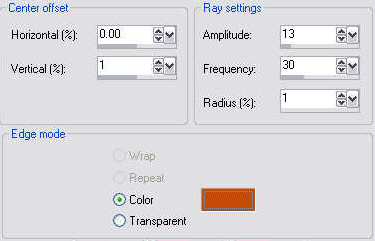
Use your own color
in the color box on the spiky halo
Select
none
9. Add 2px border - select with
magic wand
Flood fill with gold
pattern
Select none
10. Add 5 px
border - select with magic wand
Flood fill
with foreground color
Select none
11.
Add 2px border - select with magic wand
Flood
fill with gold pattern
Select none
12. Add 25px border - select with magic
wand
Effects - Plugins - Unplugged Shapes -
Warning

(To get a black constract to the yellow just put the
last - Black Control - to ZERO = 0)
Select
none
With the magic wand - Tolerance and
Feather 0 -
holding down the Shift key -
select all of the yellow lines
Flood fill
with the foreground color
Effects - Plugins -
FM Tile Tools - Blend Emboss
Apply the
default settings
Select none
Selections -
Select All Selections - Modify - Contract
25px
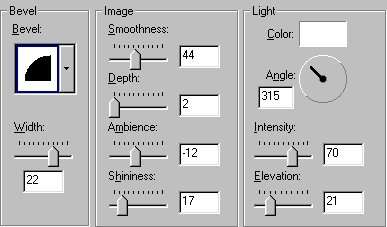
Effects - 3D Effects - Inner Bevel
Select none
13. Add
2px border - select with magic wand
Flood
fill with gold pattern
Select none
14. Add 5px border - select with magic
wand
Flood fill with foreground
color
Select none
15. Add 2px border
- select with magic wand
Flood fill with gold
pattern
Select none
16. Add 30px
border - select with magic wand
Flood fill
with foreground color
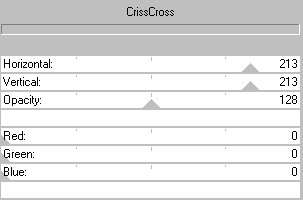
Effects - Plugins -
Tormentia - CrissCross
Effects - Plugins -
FM Tile Tools - Blend Emboss
Apply the
default settings
Effects - 3D Effects - Inner
Bevel
Apply the same settings as in Step
12
Select none
17. Add 2px border - select
with magic wand
Flood fill with gold
pattern
Select none
Add the
corner as supplied or ones of your own
I hope
you have enjoyed this tutorial


Tutorial Copyright Marlie ©2003
| | | | | | | | | | |
|