|
This tutorial's
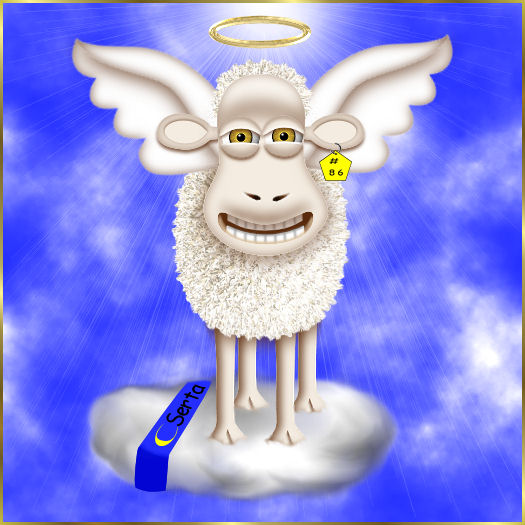
contents and images were intended as parody and hopefully will be
taken as such.
YOU WILL NEED |
|
 Paint Shop Pro Paint Shop Pro
Download a trial version here: 
Corel's KPT5 FiberOptix or Alien Skin's Eye Candy (version
3.1 or 4000)
KPT5 Preset Get
it here.
MuRa's Filter
Meister/Cloud (Freeware) Get it
here.
Flaming Pear's
Super Blade Pro (Optional)
Basic
knowledge of vectors and layers |
|
Remember to Save Often Often
|
| 1. |
Getting Started |
|
New Image 100 x 100
File/Save As:  eye.pspimage eye.pspimage |
| 2. |
The Eyes |
|
New Vector Layer Name it
"white" Name it
"white"
Foreground: Null
Background: #FFFFFF
Ellipse Tool 
Show
Nodes: Checked
Create on Vector:
Checked
Line Style: Solid
Line Width: 1
Antialias:
Checked
While holding down the Shift
Key...draw a rather large circle in the center of your canvas.
Go to Objects/Align/Center in Canvas.
Layers Panel/Right Click/ Convert to Raster.
Selection/Select All/Float.
Go to Effects/3D Effects/Inner Bevel and use the settings
below.

Selections/Select None.
New
Vector Layer Name it "iris"
Feel
free to choose your own eye color. Actually the blue eyed sheep are
pretty cute. These are only a guide line.
Foreground: #000000
Background:
#F5DB49
Ellipse Tool
Show Nodes: Checked
Create on Vector: Checked
Line
Style: Solid
Line Width: 4
Antialias: Checked
Again while
holding down the Shift Key draw another, but slightly smaller
circle.
Go to Objects/Align/Center in
Canvas.
Layers Panel/Right Click/ Convert
to Raster.
On
the Tools toolbar, choose the Magic Wand tool from the Selection tool
flyout. from the Selection tool
flyout.
Mode:Replace
Match
mode:RGB
Tolerance=0
Contiguous:Checked
Feather=0
Anti-alias:Checked
Click on the iris we just created to select
just the gold section.
Change to the
Airbrush tool. tool.
Brush default/round with
these settings.

Foreground: #592A0B
Background:
Null
Spray...concentrating the color mostly
around the edges, but with a light sprinkling in the
center.
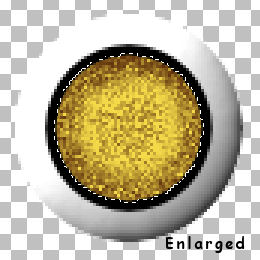
We
are still selected...right. Go to Adjust/Blur/Radial Blur and use
the following settings.
Blur Type =
Zoom
Blur Strength = 40
Elliptical = Checked
Center
settings all = 0
Selections/Select
None.
New Vector Layer Name it
"pupil"
Foreground: Null
Background: #000000
Ellipse Tool
Show
Nodes: Checked
Create on Vector:
Checked
Line Style: Solid
Line Width: 1
Antialias:
Checked
While holding down the Shift
Key draw one last circle, this time a small one, but again near the
center of the canvas.
Objects/Align/Center on
Canvas
Layers Panel/Right Click/ Convert
to Raster.

There we have our eyeball...be sure to save your work. I
chose to save mine as a picture tube as well.
|
|
| 3. |
Starting Over |
|
New Image 525 x 525
File/Save As: sheep_angel.pspimage |
|
|
| 4. |
The Body |
|
For those of you using KPT5.
Active
layer="raster1".
New Vector Layer
Name it "body".
Foreground: Null
Background: #DCC2A0
Ellipse Tool
Retain
Style: Unchecked
Antialias: Checked
Create on Vector: Checked
Line Style: Solid
Line Width:
1
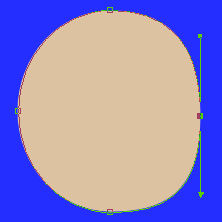
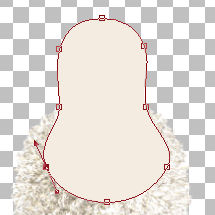
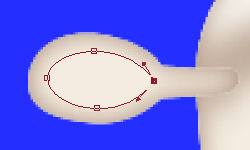
Starting at coordinates 170 x 160
draw out an ellipse ending at 362 x 362.
Right click on your ellipse/Convert to
path.
Lengthen the two side node arms
just a tad and move them ever so slightly inward.
Convert to Raster Layer
Selections/Select All/Float
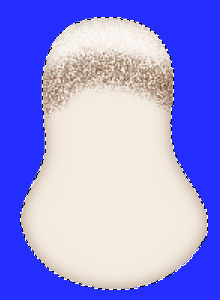
Using
KPT5/FiberOptix with the provided preset, let the plugin do its
magic.
Your results should be similar
to those below.

For those of you using Eye Candy 3.1. and
4000
Foreground:
Null
Background: #F4ECE1
Ellipse Tool
Retain
Style: Unchecked
Antialias: Checked
Create on Vector: Checked
Line Style: Solid
Line Width:
1
Starting at coordinates 170 x 160
draw out an ellipse ending at 362 x 362.
Right click on your ellipse/Convert to
path.
Lengthen the two side node arms
just a tad and move them ever so slightly inward as portrayed in the
KPT5 instructions above.
Convert to
Raster Layer
Selections/Select
All/Float
Adjust/Add Noise
Random: Checked
Monochrome: Checked
Noise= 23%
Adjust/Blur/Gaussian Blur/Radius 1
Selections/Select None
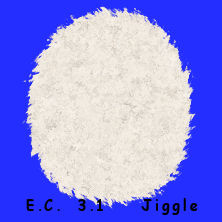
Effects/EyeCandy3.1/Jiggle
Movement Type = Brownian
Bubble Size= 12
Warp Amount= 12
Twist=41
Effects/EyeCandy4000/Jiggle
Movement Type = Brownian
Bubble Size= 8
Warp Amount= 8
Twist=20
Either Eye Candy result should be similar to
that below.
|
|
| 5. |
The Head |
|
Active layer="body".
New Vector Layer Name it
"head".
Foreground: Null
Background: #F4ECE1
Ellipse Tool
Retain
Style: Unchecked
Antialias: Checked
Create on Vector: Checked
Line Style: Solid
Line Width:
1
Again starting with
coordinates...this time 195 x 75, draw out another ellipse ending at
338 x 256.
Right click on your
ellipse/Convert to path.
Click on the Pen
Tool  to edit. to edit.
Add 4 nodes. One between
each of the existing 4 nodes. Shape the head similar to what you see
here.
Convert to raster.
Selections/Select All/Float
Effects/3D Effects/Cutout with these settings:
Vertical= 0
Horizontal= 0
Opacity= 50
Blur= 15
Shadow Color= #592A0B
Foreground: #FFFFFF
Background: #592A0B
Airbrush Tool
Brush=
default round.

New
Raster Layer Name it "details. Name it "details.
With
"head" layer still selected, right click and hold to spray a light
arc of brown across the forehead area.
Left
click and hold to spray the top of the head for a highlight.
Adjust/Blur/Gaussian Blur/Radius = 5
Selections/Select None
Make sure that "details' is your Active Layer and that the
"head" layer is immediately below.
Right
Click/Merge/Merge Down
|
|
| 6. |
The Ears |
|
Active layer="head".
New Vector Layer Name it "left
ear".
Foreground: Null
Background: #F4ECE1
Ellipse
Tool
Retain
Style: Unchecked
Antialias: Checked
Create on Vector: Checked
Line Style: Solid
Line Width:
1
I won't be
furnishing coordinates for the rest of the tutorial. You have the
basics in place, hopefully what is left to do will make each member
of our flock unique.
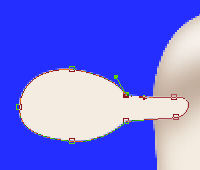
Draw an
oval for the ear about even with where you think the eyes should
be.
Right click on your ellipse/Convert to
path.
Click on the Pen Tool to edit
Add 3 nodes and shape it similar to
mine. Changing the node type to cusp where needed.
Convert to Raster Layer
Selections/Select All/Float
Effects/3D Effects/Cutout with these settings:
Vertical= 0
Horizontal= 0
Opacity= 50
Blur= 15
Shadow Color= #592A0B
Selection/Select None
New
Vector Layer Name it "inner ear".
Draw a small oval inside of the ear.
Right click on your ellipse/Convert to path.
Click on the Pen Tool to edit
Change the right hand node to cusp and make the inner corner
a little on the pointy side.
Convert to Raster Layer
Effects/3D
Effects/Drop Shadow with these settings:
Vertical= -1
Horizontal= 0
Opacity= 75
Blur= 5
Shadow Color= #592A0B
Make
sure that "inner ear" is your Active Layer with "left ear" directly
under it.
Right Click/Merge/Merge
Down
Move the "left ear" layer down till it
is beneath the "head" layer.
"Left ear
layer still active...Right Click/Duplicate
Images/Mirror
Right Click/Rename
the copy to "right ear"
Adjust the ears if
you think they stick out too far or not enough.
Here is what we have so far.

|
|
| 7. |
The Mouth |
|
Active layer="head".
New Vector Layer Name it
"mouth".
Foreground: Null
Background: #592A0B
Ellipse Tool
Retain
Style: Unchecked
Antialias: Checked
Create on Vector: Checked
Line Style: Solid
Line Width:
1
Draw out a thin oval nearly as
wide as the face.
Right click on your
ellipse/Convert to path.
Click on the Pen
Tool to edit.
Make the arms of the side nodes
longer and then push the nodes up just a little.

Convert to Raster.
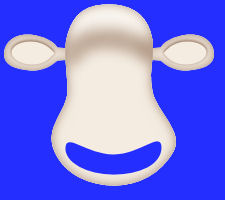
Make sure that "mouth" is the active layer. Go to
Selections/Select All/Float.
Click on the
"head" layer to make it active and strike the "delete" key.
Selections/Select None
Move the "mouth" layer to below the "head" layer.
This screenshot shows the head with some parts
made invisible. The colored background was added for clarity.
|
|
| 8. |
The Teeth |
|
Active layer="mouth".
New Vector Layer Name it "lower
teeth".
Foreground: Null
Background: #FFFFFF
Ellipse Tool
Retain
Style: Unchecked
Antialias: Checked
Create on Vector: Checked
Line Style: Solid
Line Width:
1
You'll need to zoom in for this
part.
Draw out a small white oval
somewhat smaller than the mouth.
Right
click on your ellipse/Convert to path.
Click on the Pen Tool to edit
Add a node at each side and shape the teeth to match the
curve of the mouth. Making certain that this layer is between the
"head" layer and the "mouth" layer as illustrated below.

Convert to raster.
Active
layer="teeth".
New Vector Layer
Name it "details".
Foreground:
#808080
Background: Null
Pen Tool
Antialias:
Checked
Create on Vector: Checked
Line Style: Solid
Line
Width: 2

Using the pen tool, draw a curved line following the curve
of the top edge of the teeth.
Remember to
do this we click and drag at both the starting and ending
points.
Selections/Select
None
Change the Pen to the settings
below. Same color. Be sure to uncheck the "Connect Segments
Box"

Draw a series of upright lines like
you see here.

Convert to Raster Layer
Adjust/Blur/Gaussian Blur/Radius= 1
Make "details" your Active Layer and be certain that "lower
teeth" is directly below it.
Right
Click/Merge/Merge Down
Active layer="mouth".
New Vector
Layer Name it "upper teeth".
Foreground: Null
Background:
#FFFFFF
Ellipse Tool
Retain Style: Unchecked
Antialias: Checked
Create on
Vector: Checked
Line Style: Solid
Line Width: 1
Draw
out another oval similar to what we did for the lower
teeth.
Right click on your
ellipse/Convert to path.
Click on the Pen
Tool to edit
Shape this oval to
match up with the "lower teeth".
Convert to Raster Layer
Active layer="upper teeth".
New Vector Layer Name it
"details2".
Foreground:
#808080
Background: Null
Pen Tool
Antialias:
Checked
Create on Vector: Checked
Line Style: Solid
Line
Width: 2
Skip the curved line, but
follow the guidelines above for making and placing the upright
lines.
Convert to Raster Layer
Adjust/Blur/Gaussian Blur/Radius= 1
Make "details2" your Active Layer and be
certain that "upper teeth" is directly below it.
Right Click/Merge/Merge Down
Continued on Page
2. |