
I really wanted to
learn to use the pen tool in PSP8.
I am still
not quite comfortable with it so I just
experimented
for a bit and this tag was
born.
I was doing a tutorial of Blueyes that
inspired me to play with the different
types
of lines.
I was going to use it for my
own personal use but someone has suggested
I
write it up as a tutorial.
I would
definately suggest being comfortable working in
PSP and using the "other
tools" - deformation
tool - preset shapes - pen tool.
I am
just giving you a guideline to work from, I
can't tell you how to exactly place
your
lines.
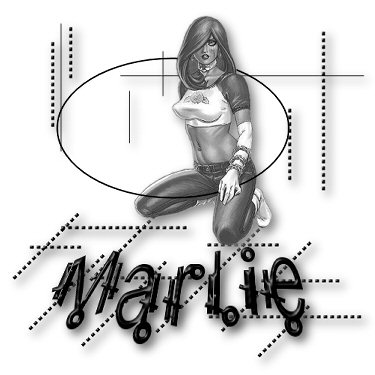
Have fun with it and remember this is
your own design.
Marlie
Supplies
Paint Shop
Pro
Tube - Here
Font
- Here
1. Open the tube and make a duplicate
copy of it - close the original
Image -
Greyscale
Image - Increase Colors - 16
Million Colors
Minimize the tube for the
time being
2. Open a New Image 500 x 500
- transparent
(we will resize later on)
3. Select your pen tool
Below is a
screenshot of how I set mine up

There are lots of line styles
- choose one that you want to use
I used a
combination of dots and the single
line
4. Working on the bottom half of the
canvas
**Tip
To draw a straight
line
Hold down the Shift key when you are
drawing for
perfectly straight lines**
With your pen tool, draw some horizontal
and diagonal lines
Use a combination of
different line styles or just one
Refer to my
tag for an example
I placed each of my
lines on it's own layer, although
time
consuming, you can then move them around and
place them
exactly where you are want
Once
you are happy with what you have
gotten
Layers - Merge - Merge
Visible
Rename this Layer - Lines 1
5. Activate the deformation
tool
Holding down the shift key - grab the
node* in the bottom center
Pull up a slight
amount
*The cursor will turn into a double
arrow*
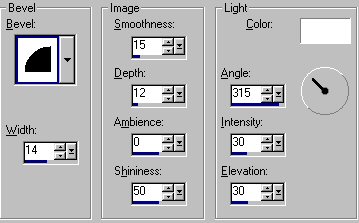
6. Effects - 3D Effects - Inner
Bevel
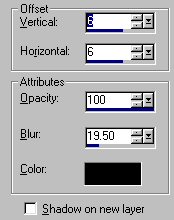
Effects - 3D Effects - Drop
Shadow
7. Working on the
upper half of the canvas
You now want to
draw some further lines
This time the lines
should be horizontal and vertical
Again see
my tag for an example
As with the bottom of
the canvas, I used a separate layer for
each
Once you have placed your lines where
you want, hide the Lines 1 layer
and merge
visible
Rename this layer Lines 2
8.
Ensure you are on the Lines 2 layer - add a
bevel and drop shadow
Use the same settings
as in Step 6
9. Make your tube the
active image
Copy and Paste as a New Layer on
your working image
Image - Resize -
85%
*ensure Resize All Layers is unchecked
and I use Bicubic resampling*
Position the
tube to your liking
Effects - 3D Effects -
Drop Shadow
Use the same settings as Step
6
Rename this layer Tube
10. Layers -
New Raster Layer
Select your Preset Shapes
Tool and set up as shown below

Set foreground to
black - #000000 and background to null
Draw
an elipse on the canvas - drawing with
vectors
gives you the opportunity to adjust
the shape if there are just
minor adjustments
you wish to do
Place it slightly over the
tube
See my tag above for a general idea of
placement
11. Activate your Eraser
Tool
You are going to erase parts of the
elipse so it appears
that the tube is sitting
inside the elipse
Again see my example
above....and the placement of your tube and
elipse
may vary from my tube
Rename this
layer Elipse
12. Layers - New Raster
Layer
Find the font you are going to use and
if it isn't installed on your computer,
just
minimize it in the task bar
- it will show up
in PSP
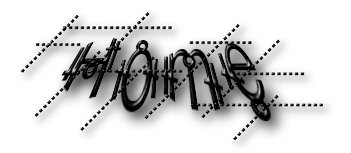
Activate your text tool and set up as
shown below

Type your text
Effects - 3D
Effects - Inner Bevel
Use the same settings
as previous
Activate your deformation
tool
Holding down the Shift key, grab the
nodes at the top corners and move them
in
towards the middle just a little bit - to angle
the text down
Once you are happy with how
your text is placed - apply a drop shadow to
it
Use the same settings as in Step 6
13. Layers - Merge - Merge All(Flatten)
Whew, you are finished and I hope I
haven't lost you somewhere along the
line
It was alot more difficult writing
it down as it was creating it
If you have any
questions please EMAIL me
and I will try my best to help you
out
Graphics and
Tutorial Copyright ©Marlie 2003
| | | | | | | |