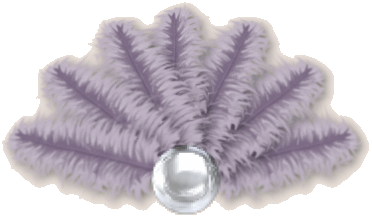

Feathered Fan
We will be making a Feathered Fan, similar to the one that you see here. You may use your own colors if you wish, and colorize the tubes that I have included in the zip, or make your own feathers just like I did. I found a wonderful tutorial on how to make feathers, and I just fluffed mine out a bit more than she did, but you can get the basics from her tutorial, and come back here, or use my tubes.
Materials Needed
I will not remind you between each step, but please save your image often, so that you will not lose all of your hard work. If you have your feathers, open them in PSP now. If you have made your own feathers, and colorized them to your taste, that is awesome! If you are using my tubes, I have one mauve colored plume, one colorized blue/gray and one that is white. Feather4 is not colored, and you can play around with your own with that one, and make it any color that you want. You will also want to open the pearl tube, and minimize it for later.
- Open a new image, 400 x 400, transparent background and 16 million colors.
- Copy and paste your feather as a new layer onto your new image.
- Image/Resize by 50%, all layers is unchecked. If you choose to
install the feather as a tube, then just change the scale to 50.
- Using your mover, move the feather near the top and center of your
graphic. Rename this layer Feather1
- Layers/Duplicate.
- Image/Rotate left by 25%.
- Move feather so that the bottom of the quill touches the other
one.
- Repeat steps 5 - 7.
- Repeat steps 5 - 7.
- Go back to the Feather1 layer, and make sure that it is highlighted on the
layer palette.
- Layers/Duplicate.
- Image/Rotate right by 25%.
- Layers/Move Down, and then move the quill so that the end touches the
other ones.
- Repeat steps 11 - 13.
- Repeat steps 11 - 13.
- Now go to Effects/3D Effects/Drop Shadow, and use these settings: Vertical
and Horizontal = 3, Opacity = 50, Blur = 12, Color = #000000. I
used black on the Mauve color, but if you use different colors, you might want
to adjust that to your taste.
- Continue to apply the same drop shadow to each one of the layers.
- Copy and paste the pearl as a new layer, and make sure the pearl is on top
of all of the other layers. Move the pearl into position at the
base of the feathers. If desired, you can put a drop shadow on the
pearl, too.
- If you want to tube this image for future use, Layers/Merge Visible. Then copy and paste as a new image. This will get rid of any excess space around your graphic, and then you are ready to tube it. If you are doing this for a group project, resize according to the group specifications, and save as a jpg or gif.
Thank you for doing my tutorial, and I hope that you enjoyed it!

Ask me about...
Colon Cleanse, weight loss, health, nutrition & energy.
all rights reserved